Table of Contents
This practical guide explains how to access bios on your windows 11 pc with clear steps and useful context. It also covers common requirements, potential problems, and the details that can help you get better results.
(Note: Most modern computers these days use UEFI instead of BIOS. This can be considered an improved version, offering more advanced features than traditional BIOS. However, many people still have it. It is customary to call UEFI BIOS, so let's treat these two concepts equally.)
Access BIOS on Windows 11 with the Keypress
The simplest way to access BIOS on your Windows 11 PC is to use a specific keypress on the keyboard while powering on the computer. The advantage of this method is that you can use it even when the operating system is not loading.
With this method, the prerequisite is that you know which BIOS access key your device uses. The most common BIOS access keys for computers today are F1, F2, F10, F12, DEL or ESC. However, you can also distinguish by mainboard type or model to make it easier to know the BIOS access key. Also, when you start your computer, on the first screen that opens (usually showing the manufacturer's logo) you'll see a message telling you which key you pressed to enter the BIOS.
Access BIOS on Windows 11 from Settings Menu
If you can't find the dedicated BIOS access key, you can also use Windows 11's Settings app to enter the BIOS.
First, launch the Settings app on your PC.
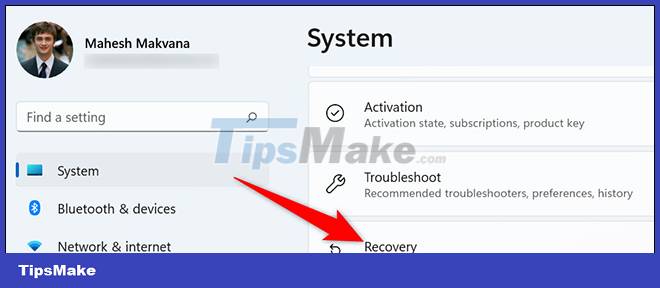
In the Settings interface that opens, from the list on the left, select 'System'.

On the 'System' page, you click 'Recovery'.
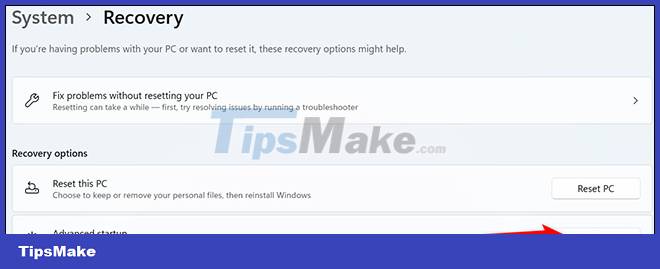
In the 'Recovery' menu, next to 'Advanced Startup', click 'Restart Now'.
You'll see a "We'll Restart Your Device So Save Your Work" prompt. In this prompt, click 'Restart Now' to restart the PC.
(Note: Make sure you've saved any unfinished tasks before restarting your PC).
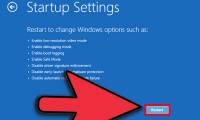
You should now see the 'Select an option' screen. From here, navigate to Troubleshoot > Advanced Options > UEFI Firmware Settings and click 'Restart'.

You will be taken to your PC's BIOS mode.
Access BIOS on Windows 11 with Windows Terminal
To run the PC boot command in the BIOS, you can use the PowerShell utility or Command Prompt.
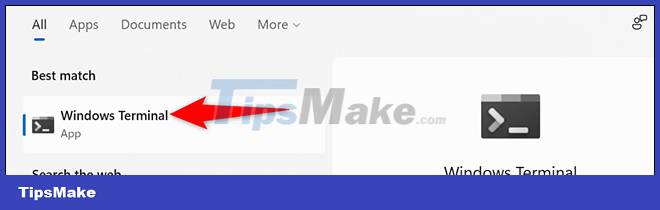
First, open the 'Start' menu and search for the keyword 'Windows Terminal'. Click the app in the returned search results.
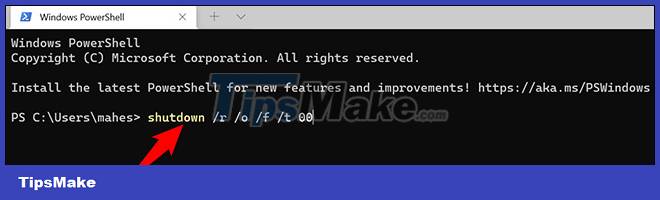
In Windows Terminal, type the following command and press Enter. This command works in both PowerShell and Command Prompt, so you can use both.
shutdown /r /o /f /t 00
On the 'Choose an Option' screen that opens, navigate to Troubleshoot > Advanced Options > UEFI Firmware Settings, and click 'Restart'. Your PC will then enter the BIOS.
Hope you are succesful.
Conclusion
Understanding BIOS makes it easier to compare options, avoid common mistakes, and apply the information in this guide more effectively. Review the relevant requirements before making changes or choosing a solution.
FAQ
How do you access bios on your windows 11 pc?
Follow the steps in this guide in order, confirm the required settings or tools, and verify the result before making additional changes.
Is it safe to access bios on your windows 11 pc?
It is generally safe when you follow the recommended instructions, use trusted tools, and avoid changing settings you do not understand.
What should you do if the process does not work?
Recheck the requirements, restart the device or application when appropriate, and review each step for missed settings or compatibility issues.
Related Articles
 Display BIOS Information on Windows 10 Using Command Prompt4 minutes read
 Instructions for Accessing BIOS on Windows 87 minutes read
 What Is BIOS in a Computer?9 minutes read
 How to Enter Bios3 minutes read
 How to Enter Bios for All Motherboard and Laptop Lines7 minutes read
 How to Enter BIOS (UEFI) on Windows 104 minutes read
Reader Comments 0
Sign in with email or Google to join the discussion.