How to create and restore System Image Backup with Macrium Reflect
This tutorial will show you the basic concepts of Macrium Reflect, how to create image backups and how to recover them.
- How to create and restore System Image Backup with Macrium Reflect
- Part 1: Install Macrium Reflect
- Part 2: Create Rescue Media (Rescue medium)
- Part 3: Create the entire backup image
- Part 4: Create Differential and / or Incremental backup
- Part 5: Restore system backups
- Part 6: Service, update and upgrade a Macrium Image
- Differential Backup / Image
- Incremental Backup / Image (Not available in the free version!)
This tutorial will show you the basic concepts of Macrium Reflect, how to create image backups and how to recover them. The article will not go into advanced features. However, the Macrium Reflect user interface as well as its functions and features such as planning and backup will be mentioned in the article.
The free version of Macrium Reflect is enough for most average users. But if you're interested in the ability to create advanced backups, that's a good reason to consider whether to buy a full Home edition. In Europe, the current price is € 62.95 for a PC or € 125.90 for four machines (buy 2 get 2 free).
Comparison table of features between Free version and Home version:

If you have any questions about one of the features mentioned above, leave your comments in the comment section below!
Part 1: Install Macrium Reflect
1) Download Macrium Reflect for free or 30-day Home Edition trial from Macrium Reflect Free.
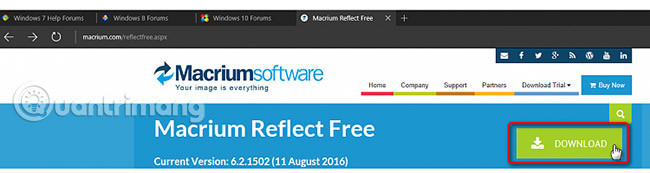
2) Run the installer, select Free or Home , click Download .

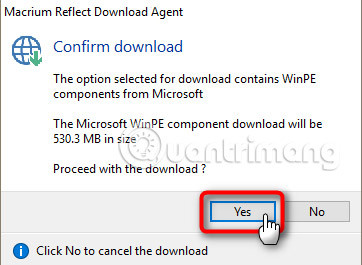
3) Windows PE is a kind of mini operating system. Its components need to be downloaded.
4) When the components of Windows PE have been downloaded, the Macrium installer will start working. Install as usual and accept all reminders.
Part 2: Create Rescue Media (Rescue medium)
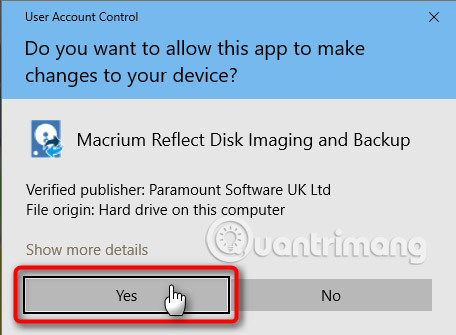
1) Run Macrium Reflect. The UAC window will appear if you do not turn off UAC. Click Yes to turn off UAC.
2) When running for the first time, Reflect will suggest you create WinPE rescue media, ISO image or CD / DVD or USB drive.
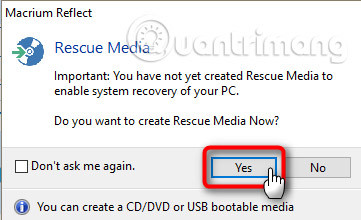
Creating a rescue media is highly recommended. Backups of your images will be useless if in an emergency, you cannot start your computer to restore an image backup.
3) The correct version of WinPE will be selected automatically. Click Next .

4) Reflect will list your network drivers and storage drivers (highlighted in yellow) and put them in rescue media. Click Next .
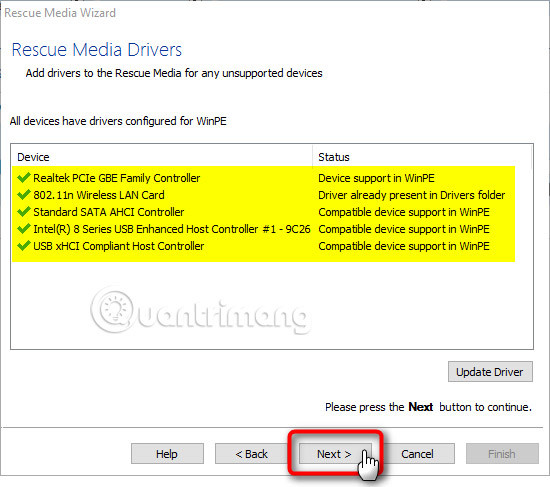
5) Click Next .

6) Select your preferred media (CD / DVD, USB) and click Finish .

7) Rescue media will be created. Click OK when done.
* Tips (NOT REQUIRED)
If you want, you can also add Macrium Rescue to the Windows boot menu. It is a very practical option to use when you want to restore an image or reset Windows startup logs, in case Windows cannot boot normally.
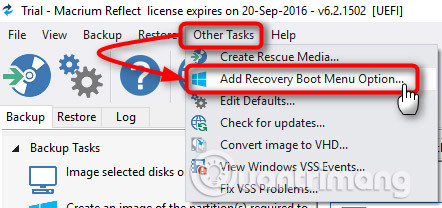
To add Macrium Rescue to the boot menu, select the Add recovery Boot Menu option from the Other Tasks menu.
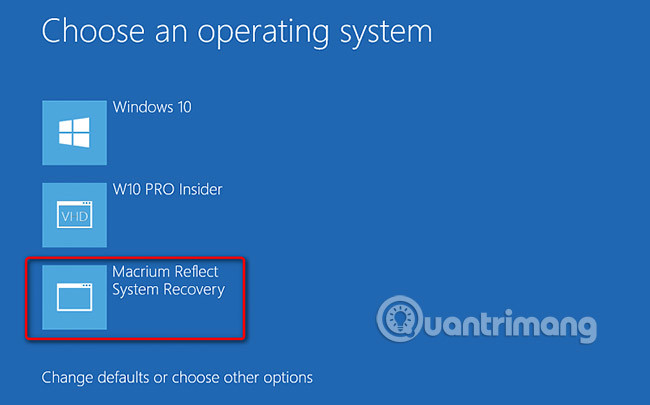
Select Windows 10 PE, click OK , accept all the following reminders:

This step will add Macrium Rescue to your Windows boot menu.
Part 3: Create the entire backup image
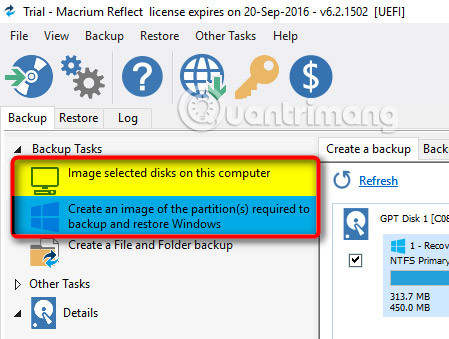
1) By default, Reflect will display the Backup (Home edition) or Disk Image (Free edition) tab. You can see all the connected drives on the right pane, with checkboxes for each drive (# 1 in the screenshot) and for each partition (# 2) in case you don't want to restore restore all partitions of the selected drive:
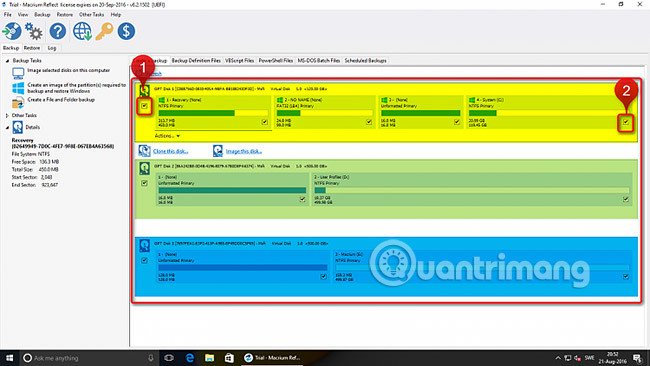
Note:
The points marked in the screenshot above show the main drive where Windows is installed (yellow), the secondary disk, which will store user data (green) and an additional drive External add-on for backup photos of Macrium Reflect (blue)
The drive for backing up your Macrium images cannot contain a system image, so be sure to uncheck it.
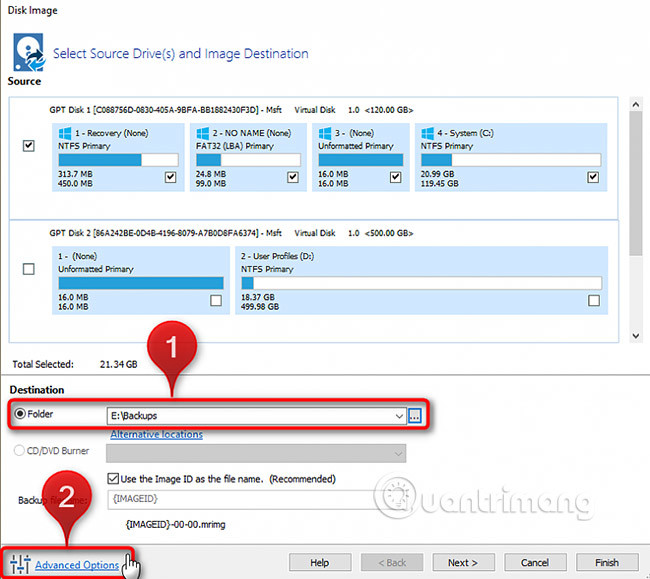
2) Select all drives and partitions or only the necessary drives and partitions (including specialized systems and C: partition partitions on old BIOS / MBR systems or all EFI system partitions) and partition C: drive on UEFI / GPT system) to restore in Windows.
3) Select where to save your image, in this case, the author selects Backups folder on the external backup drive (drive E :) (highlighted in blue in the screenshot in Part 3 / step 1 above).
When finished, click Advanced Options .
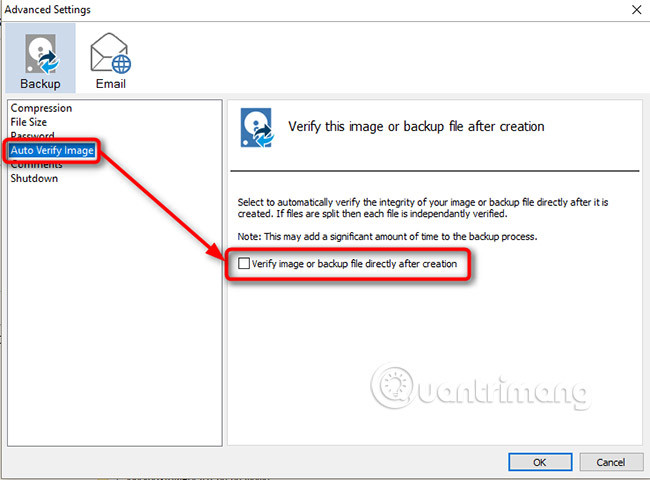
4) If you want to be sure of your image, you need to verify them. You can manually verify after each backup or installation to automatically verify them:
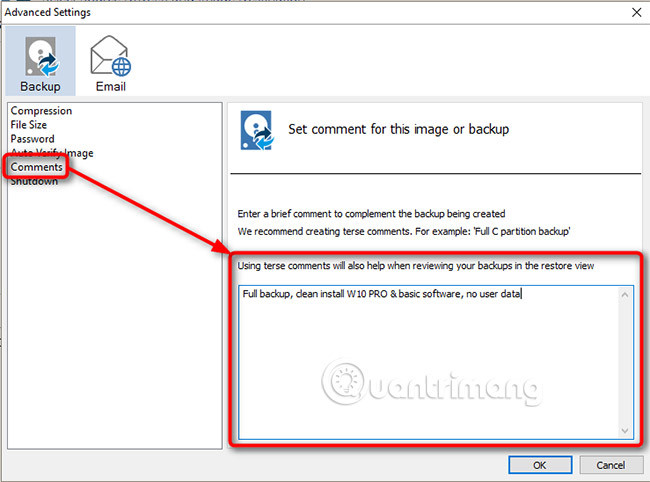
5) To track your images, add a description caption. Click OK when done, click Next to continue:
6) Now, for the basic image, it is necessary to select the level of filtering with when storing the selected image, with XGB free space, delete the oldest image and click Finish.

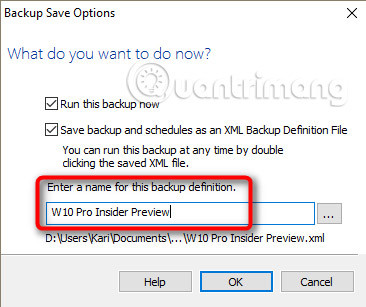
7) Enter a name in the Backup definition section. Click OK .
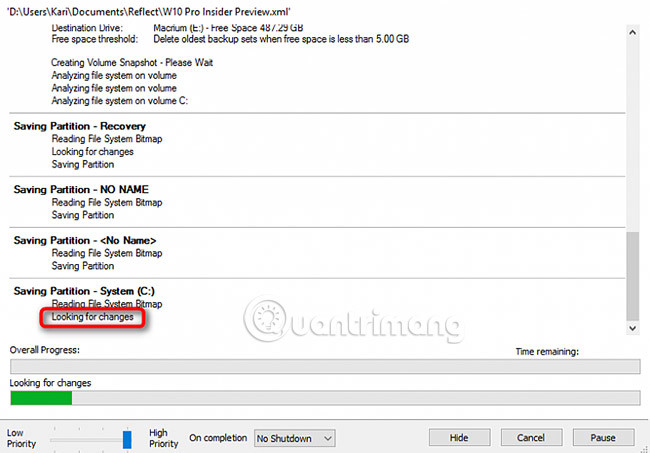
8) Reflect starts capturing selected drives and partitions. First, it will create a snapshot of your system (# 1 in the screenshot below). Images will be created based on this snapshot. When the snapshot has been taken, Reflect will start the process of merging these images and you can continue to work normally with Windows. Anything you change (save, copy, delete) after a snapshot has been created will not be included in the system image.
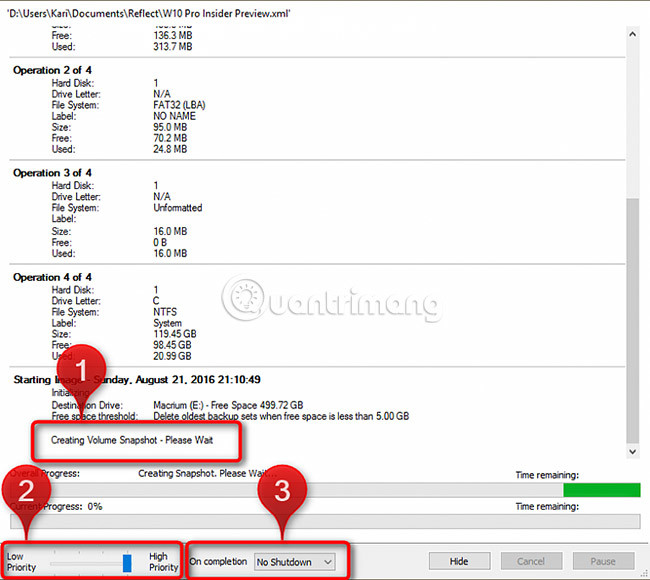
You can also change the priority for the shooting process (# 2). Low priority provides more system resources for Windows, while high priority uses as much resources as possible to take photos.
If you want, you can ask Reflect to shutdown, pause, or hibernate when the job has been completed (# 3). This option is very practical. You can set Reflect to create a bedtime image, then select Shutdown when done.
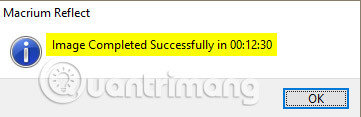
9) Images will be created quite fast, actual speed depends on your computer hardware.
10) Click the Restore tab to view the image properties and to verify it manually if you like.
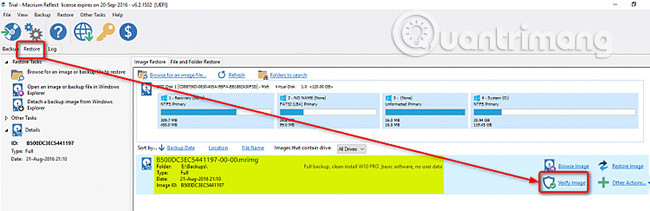
Note that verifying an image takes longer than creating it.
Part 4: Create Differential and / or Incremental backup
Differential Backup / Image
Differential Backup will check what has changed since the last full backup and only save those changes. When differential backup restoration, both differential backup images and full backup images must be available on the same folder on the backup storage.
Because only changes since the last full backup was saved, the differential backup image can be quite small compared to full backup, depending on the big changes the user has made. Then a differential backup version was created, the more changes made, the larger the backup image.
Incremental Backup / Image (Not available in the free version!)
An incremental backup checks what has been changed since the last backup regardless of whether it is full, differential or incremental backup and only saves those changes. When restoring an incremental backup, all different, incremental and full backup images must be available on the same folder, on the backup drive.
Incremental image may be very small. For example, if you perform incremental backup daily and today you browse the web, receive some emails but not download or install anything, incremental backup today is only a few kilobytes or megabytes.
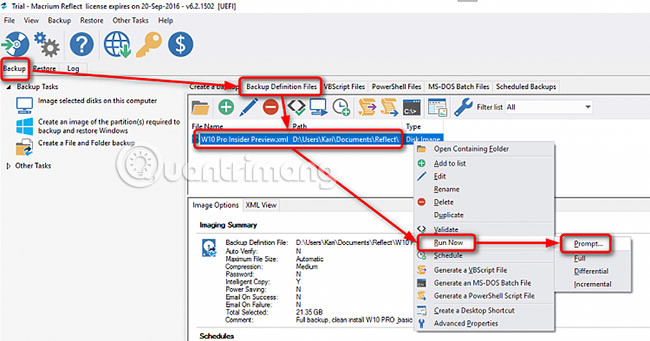
1) Click the Backup Definition file, right-click your definition, select Run now> Prompt .
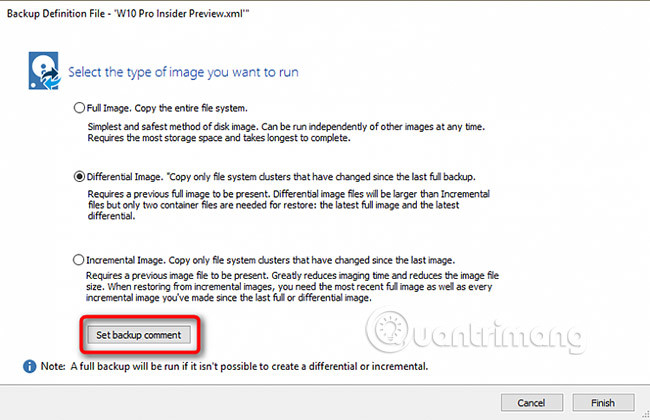
2) Choose your preferred image type. This example will run a differential image, after installing some software, click Set backup comment to enter a description comment for this image.
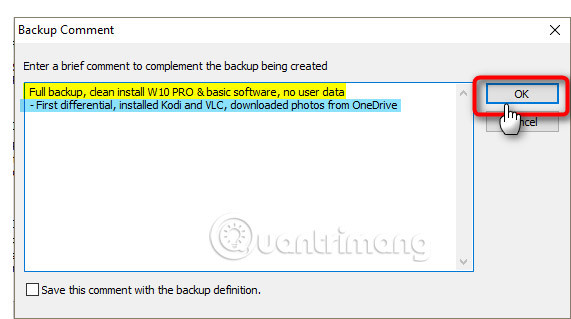
3) Comment from your last full backup will be displayed (highlighted in yellow), add a comment for differential or incremental image (blue). Click OK .
4) Click Finish to start the backup.
5) Once again the photo will be created. Because this is a differential (or incremental) backup and only the changes are saved, Reflect will check the changes and take photos of them.
6) Since there are not so many changes, the image is created quite quickly.
7) Click the Restore tab on the upper left, you can now see differential (or incremental) new image listed at the top of the full image in the right pane.
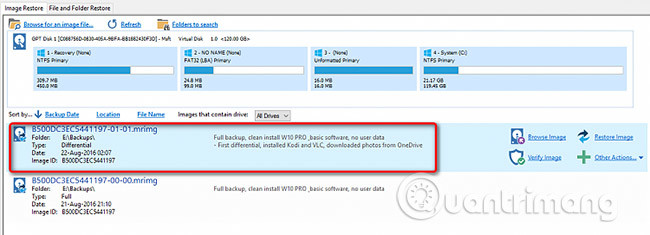
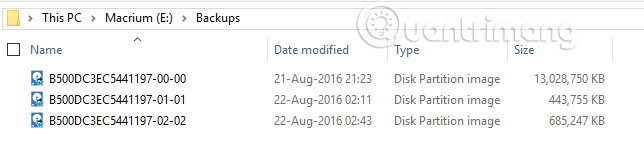
8) This, full backup first and then differential and / or incremental backup (or image), is called a backup set. The default file name for the backup file is XX-YY-ZZ where XX is the same 16-character ID for all files in the same set, YY is the ID number (incremental) for the file in the set (00 = full backup, 01, 02, etc. . are full, differential and incremental image), and ZZ is the total number of files in the set (starting from 00, so 04 is fifth) and usually looks like YY, except when one or Many backup files are separated, for example when you save backups to DVD or files larger than 4GB to FAT32 drive.
The file extension is always .mrimg .
Example 1, there is no split file:
- Full backup: DF2BBBA4AE813494-00-00
- Differential or incremental backup next: DF2BBBA4AE813494-01-01
- Differential or incremental backup next: DF2BBBA4AE813494-02-02
- Differential or incremental backup followed: DF2BBBA4AE813494-03-03
Example 2, there is a separate file:
- Full backup - Part 1: DF2BBBA4AE813494-00-00
- Full backup - Part 2: DF2BBBA4AE813494-00-01
- Full backup - Part 3: DF2BBBA4AE813494-00-02
- Differential or incremental backup first - Part 1: DF2BBBA4AE813494-01-03
- First Differential or incremental backup - Part 2: DF2BBBA4AE813494-01-04
- Differential or incremental backup next, only part: DF2BBBA4AE813494-02-05
9) After downloading some photos from OneDrive for PC, create an incremental backup version before reviewing these backup image files in File Explorer.
Same as above, in steps 1 and 2 when running a new backup, this time is incremental backup. Downloaded photos don't need much storage. Incremental backup only saves changes since the last backup, in which case the current image image is created above, so shooting takes place very quickly.
10) Check the folder where the images are stored with the same ID, only different in incremental numbers. You can also see that while full backup has capacity, it is much smaller than 13GB, differential and incremental image.
11) Remember to save all image backup files in the same set and in the same folder. You cannot restore differential or incremental image if some files are missing.
Part 5: Restore system backups
1) You can restore a full backup or any differential or incremental image.
- Restoring a full backup will only restore the full backup, not including any differential or incremental image created later.
- Restoring a differential backup will restore the last full and changed backup saved in the differential backup selected (only these two files are needed most, regardless of how many differential and incremental backups are between full backup and differential backup. selected).
- The incremental backup restore will restore a backup set (full, differential, incremental backup) until the selected incremental backup.
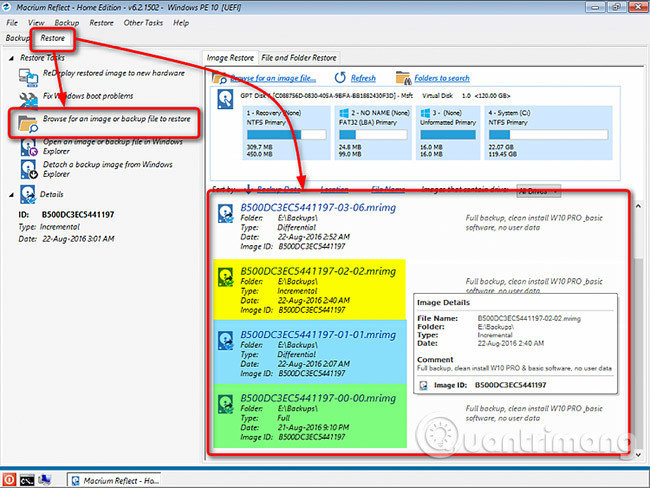
2) Although restoring an image backup can completely start from the Windows desktop, but you should restore only when the PC is booted into Macrium Rescue console (PE), or select Macrium Rescue from the Windows boot menu or boot device. Macrium Rescue USB device you created in part 2. Some people may feel uncomfortable when replacing system files on a running system, so always use restore from WinPE, boot into Macrium Rescue environment instead of Windows.
3) Macrium's WinPE environment looks slightly different than when Reflect is run from the Windows desktop. Select the Restore tab and browse to the image you want to restore or select the image from the right pane. In this example, the image XX-02-02 (highlighted in yellow) is restored as a incremental backup version. It will also restore full backup XX-00-00 (green) and the changes saved in the backup differential version XX-01-01 (blue).
4) Start recovery.

5) Click Next and Finish in the prompts that appear.
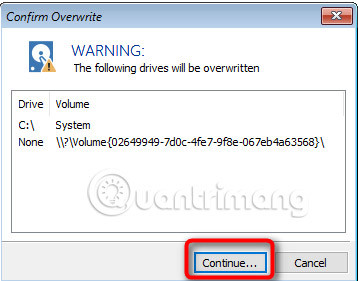
6) You will be warned that the drive will be overwritten. Click Continue .
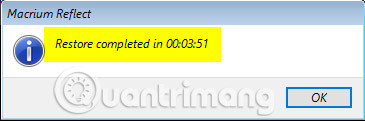
7) Recovery process is relatively fast.
8) Click the restart button in the bottom left corner to restart your PC. It will boot to restore Windows 10, exactly as if the recovery image was created.

Part 6: Service, update and upgrade a Macrium Image
Macrium viBoot is a new application from Macrium Software that allows you to mount Macrium system images (full, differential or incremental) as a virtual machine to extract files from there, add files to it, update installed Windows and even upgrade it.
Good luck!
See more:
- Instructions for backing up and restoring data in Windows 7
- Backup and restore Windows Registry is simple
- Complete how to use all backup and restore tools on Windows 10
- How to transfer Windows to another drive using Macrium Reflect
- How to use Backup and Restore on Windows 7?
- Complete how to use all backup and restore tools on Windows 10
- Create Backup System Image in Windows 7
- How to use Iperius Backup Free to back up Windows data
- Configure the System Restore feature in Windows 10
- How to create a System Image backup on Windows 11
- How to backup and restore Windows in just 10 minutes with Acronis True Image
- Install CentOS on Windows 10 WSL
- What is the USO Core Worker Process or usocoreworker.exe? Are they viruses?
- How to exclude files and folders with Robocopy in Windows 10
- Fixed a bug with C drive with yellow exclamation on Windows 10
- How to disable SMB3 in Windows 10
- 3 ways to remove a Windows 10 computer from a domain that no longer exists
- How to create a yellow circle around the mouse cursor on Windows
- How to open the camera on laptop Windows 7/8/10
- How to change the Start button on Windows 10
- How to install Owncloud server on Windows 10 (WSL)


-
 How to fix a stuck Windows Restore error.
-
These backup mistakes could cost you years of photos
-
5 tips to reduce WhatsApp backup file size
-
How to Backup and Restore Microsoft Authenticator on iPhone
-
How to turn off WhatsApp message backup on phone
-
Microsoft launches new utility to simplify data backup and transfer on Windows 11
 How to fix a stuck Windows Restore error.
 These backup mistakes could cost you years of photos
 5 tips to reduce WhatsApp backup file size
 How to Backup and Restore Microsoft Authenticator on iPhone
 How to turn off WhatsApp message backup on phone
 Microsoft launches new utility to simplify data backup and transfer on Windows 11