Create Backup System Image in Windows 7
No matter how robust your system is, you cannot reduce its risk of collapse. So there is the question: when will your system crash and then do you have the backups needed to rebuild your system?
In Windows 7, there is a feature that allows you to clone your system into an image file so that you can restore the system from that image when disaster strikes. In this article, I will show you how to replicate your system drive in Windows and restore the system from that image.
Duplicate the system
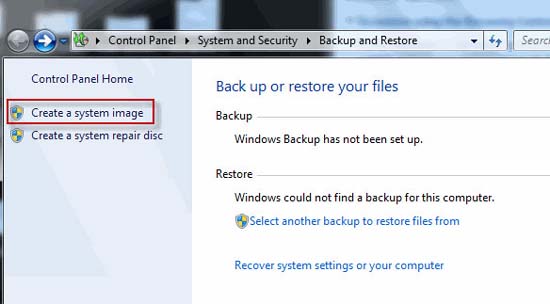
1. In the Start menu search box, type 'backup and restore' and press 'Enter' . You will then see a Backup and Restore window in the control panel. Click 'Create a system image' on the left side of the window.
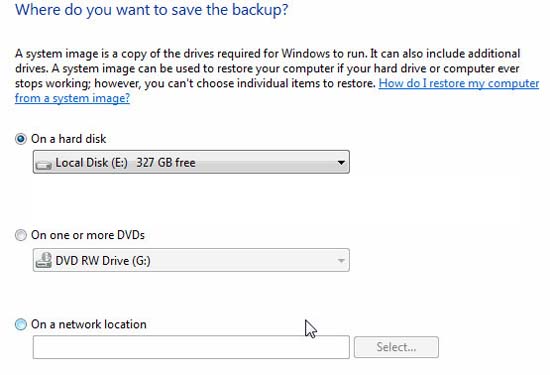
2. When the 'Create a System image' window appears, select the option ' On a hard disk ' and navigate to the drive where you want to save the backup. You can also choose DVD options, but be warned that it will take a lot of DVDs to complete the backup. Using an external hard drive now is the best option.
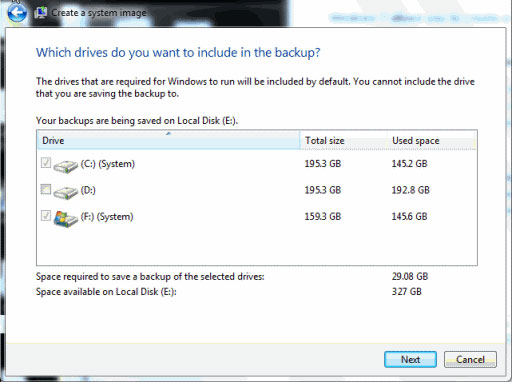
3. After confirming the backup location, you can click the 'Next' button to move to the next step. This is where you choose the drive to backup. The system drive (C :) is selected by default. For other drives, simply check the checkbox next to them to perform backups.
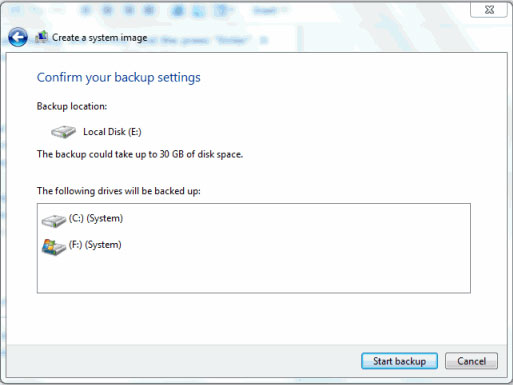
4. In this step, you must confirm whether you have selected the correct location for backup and the correct drive you want to backup. Click the 'Start backup' button when you have checked everything Ok.
5. The backup process will take some time to perform. You can get away from the computer and do some relaxation.
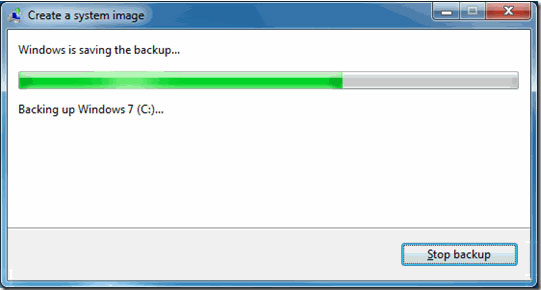
After the backup process is complete, you can remove the external hard drive and keep the backup image file in a safe place.
System restore from backup image
To restore the computer from a backup image, you can boot it from the startup screen (if your operating system cannot boot) or restore from the control panel (when you want to revert back to the old settings). ).
Restore from Control Panel
1. Type 'backup and restore' into the Start menu search box to open the Backup and Restore window .
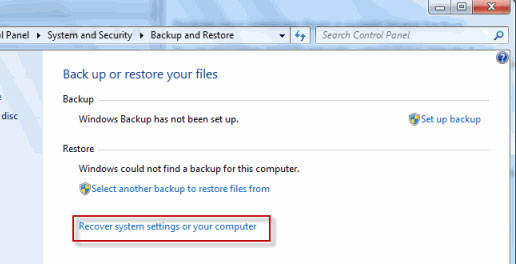
2. Click ' Recover system settings or your computer '.
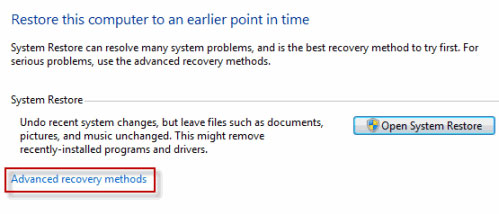
3. Click 'Advanced recovery methods' .
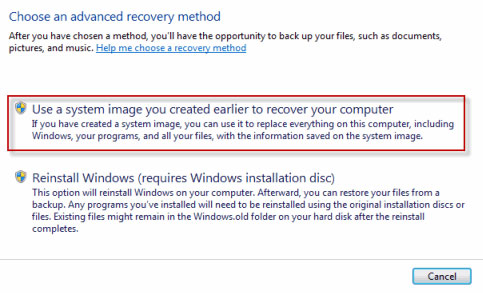
4. Select the option 'Use a image system you created earlier to recover your computer' .
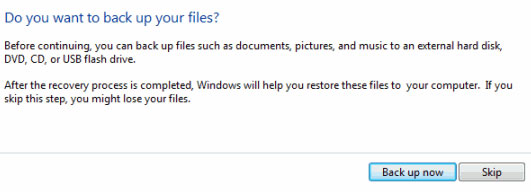
5. Now you will see an option to back up files like documents, pictures, and music that are in the current system drive. You can skip this process by clicking the 'Skip' button .
6. Click the 'Restart' button. When the computer starts, select the location of the backup image file and perform the restore.
Restore from the startup screen
1. Restart the computer, hold down the F8 key on startup to enter the advanced boot options menu.
2. Select your preferred keyboard layout. Click Next to proceed .
3. Set the username and password, and then click OK.
4. Select 'System Image Recovery' from the System Recovery options menu and follow the instructions.
That's all the steps you need to take to create a backup image of your system as well as how to restore your system from this image.