How to Create a Realistic Lightsaber in GIMP
Ever watched one of the Star Wars movies, or even a fan film, and been dazzled by the special effects? Well, in this tutorial, you can learn how to recreate the lightsaber effect using Gimp, a free photo editing/animation software. Strap...
Table of Contents
Part 1 of 3:
Creating the Lightsaber
-
 Open up Gimp. Once that is done, find the photo you want to add the lightsaber to, and click-and-drag it into Gimp.
 -
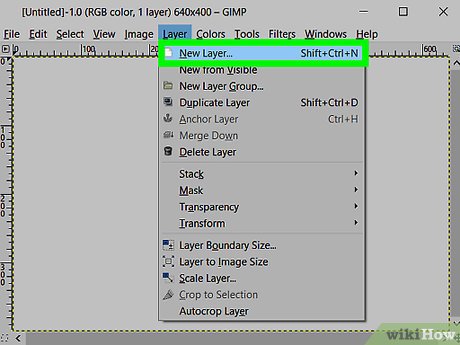 Go to Layer r> New Layer. Name it whatever you want, and make sure it is set to "Transparency". If you have two lightsabers in your shot, you'll want two layers.
 -
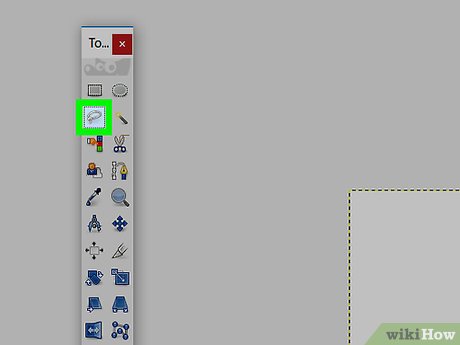 Go to layer into your toolbar and select the "Isolation Tool". This should look a bit like a coil of gray rope. Then, make a mask around you lightsaber blade. You can also draw a curve at the tip of the blade. Try to be exact as possible. Repeat for any other lightsabers that may or may not be in the shot.
 -
 Grab the "Brush Tool" from your toolbar. Bring the size up to something larger than your lightsaber blade mask, and set the color to white. Then, fill the mask.
 -
 Right click on each core layer and select "Duplicate Layer". Rename each duplicate, and put them below your core layers. Then, select your "Bucket Fill Tool" from the toolbar and fill the white part with whatever color you want your lightsaber to be.
 -
 With your colored layer selected, go to Filters > Blur & Sharpen > Gaussian Blur. For a standard quality picture (480x640p.) select a blur radius of 20. This will create a glow, but it will be kind of faint. Duplicate the glow layers using the method mentioned in step five until you have a good looking glow.
 -
 Tidy up a little. Your "Layers" window will be kind of crammed by now, so right click on the top layer and hit "Merge Down". Repeat this for all layers, until the background and all lightsaber layers are merged into one.
 -
 Good work! You should now have a good looking lightsaber. But what if you want to add a clash for when two lightsabers touch?
Part 2 of 3:
Adding Clashes
-
 Go Filters > Lighting Effects > Supernova. Set the supernova center to where the lightsabers meet.
 -
 Adjust the settings. Set the "Radius" to whatever you want, and set the "Rays" to 25, set the "Color" to a nice yellowish-orange, and set "Color Randomness" to zero.
Part 3 of 3:
Adding To Your Video
-
 Add your image to a video if desired. There is only one way to do this. It's called rotoscoping.
 -
 Import every frame of your video and add the sabers and clashes. Do this enough times, and you have a good-looking lightsaber sequence. Happy rotoscoping!
Was this article helpful?
Your feedback helps us improve.
Related Articles
 How to create X-ray effects in GIMP7 minutes read
 How to design professional leaflets with GIMP29 minutes read
 Create ghosts in Photoshop or GIMP6 minutes read
 How to create semi-transparent images in GIMP2 minutes read
 How to automate GIMP by script9 minutes read
 New features of GIMP version 2.1010 minutes read
Reader Comments 0
Sign in with email or Google to join the discussion.