Edit photos using layers
Do you know how to use layers (also known as layers) when editing digital photos? If you have never used this tool then you are wasting a tool to say the most powerful in photo editing. The layers seem to cause you a lot of obstacles at first, but the fact that they are not so hard to use ...
In this article, I will show you some of the basics of using layers.
Learn about layers
Classes are really like what their terms describe. Imagine taking two photos and putting this on the other. You will then not be able to see the one below. However, with layers, you have the ability to make the image above a certain part, so the other image will show through the image above. It is a concept of layers in the most concise way. In most image editing programs, you can add more layers if you like, and change the 'opacity' (transparency) of each layer - the lower the opacity, the lower the layers can be. more clearly.

A layer can be created by almost anything. You can layer two different images or copy an image like that. A layer can be a graphical component, such as a special color that is controlled via the Palettr Layer.
Add a Layer
So how do we do it? There are many ways to add two photos to a project using layers, but start with the simplest way. We will describe the process using the components of Adobe Photoshop, but in many other programs it is almost the same.

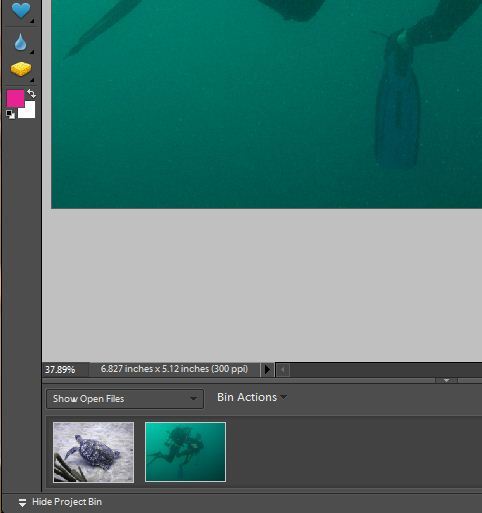
To start, open two images in Photoshop Elements. You will see them appear in Project Bin at the bottom of the screen, but only one image is in the workspace at this time.
Copy the image in the workspace: Press Ctrl-A to select the entire image, then press Ctrl-C to copy it to the clipboard.
Next, double click on another image in Project Bin. This image will appear in the workspace. In the menu, select Layer, New, Layer and click OK in the New Layer dialog box. You should now see an empty, transparent layer above the image in the Layers Palette.
Press Ctrl-V to paste the image that was copied into the class. Workspace will be replaced with a new image, but other images are still here, below it. You may not see it now, because the top layer still completely obscures it (not transparent).
Edit a Layer
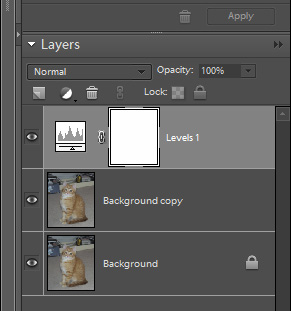
To prove that what we say is true, look in the Layers Palette. You will see two images in two different layers. You can turn off the upper layer by clicking on the 'Eye' icon located on the left side of the upper layer. Put that 'turn on' class back, click on the 'Eye' icon.

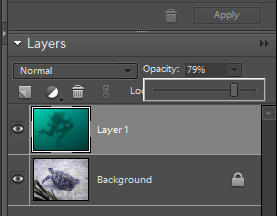
Would you like to change the transparency of the upper layer so that the image below is shown through it? Select the upper layer - click on it in the Layer Palette - then adjust the opacity (Opacity).
It is also possible to change the location of classes. If you want the bottom layer to change up, pull it up. There is a trick here: The underlying layer will initially be locked as the 'background' background by default (the keychains icon is the same). To remove it, you need to upgrade this class. To do that, double click on the bottom layer and click OK in the New Layer dialog box. Now you can drag the underlying layer onto the layer above to convert the position for them.
Use color according to your choice
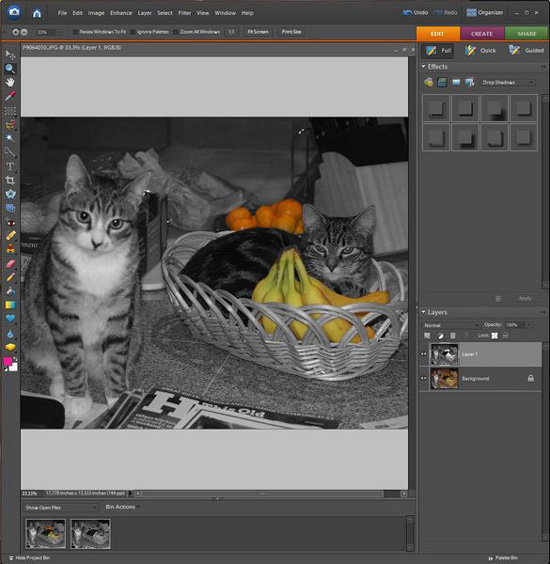
Now that you understand some of the basics of adjusting layers, let's create a picture with a selection color - in other words, almost the whole picture is black and white, only partially. has selected color.
Start by opening the image in Photoshop Elements. Then select ( Ctrl-A ) and copy it ( Ctrl-C ). In the menu, select File, New, Image from Clipboard . Project Bin will display two identical images; We will adjust black and white. Select Image, Mode, Grayscale . Select that picture and copy it.
Double-click the color version of the image in Project Bin to convert it, then select Layer, New, and Layer . Click OK. Press Ctrl-V to paste the black and white version of the image into the top layer.

Click the Eraser Tool in the toolbar on the right side of the screen and start deleting. You can adjust the size of the Erase Tool with the Tool Options toolbar at the top of the screen. The places you paint with Eraser will see that the color of the upper layer is lost and the color layer below is revealed. This is an easy way to add more colors of your choice to paint a one-color picture.
Dave Johnson


 How to create clipping mask in GIMP
  How to create spherical images in GIMP
  How to sign a document with GIMP
  How to create movie posters in GIMP
  How to Color Inside the Lines in FireAlpaca
  How to swap and combine faces in GIMP