How to create semi-transparent images in GIMP
GIMP can create semi-transparent images very effectively, especially when users want to create business logos. GIMP is not difficult to use and this semi-transparent image creation process takes only a few minutes to perform.
If you want to manipulate images or simply want to design a logo for your website or business blog, you can use the GNU Image Manipulation Program, abbreviated as GIMP, as a free alternative. for advanced image editing software. GIMP can create semi-transparent images very effectively, especially when users want to create business logos. GIMP is not difficult to use and this semi-transparent image creation process takes only a few minutes to perform.
1. Launch GIMP and open the image you want to make semi-transparent.

2. Press Ctrl + L to display the Layer tool box to the right of the GIMP window. You can also click "Windows" at the top and select "Layers" from the menu. The layer containing the image is selected by default.

3. Click and drag the "Opacity" slider at the top of the Layer tool box to the left to reduce opacity and increase transparency.

4. Set the Opacity slider to "50" to create a semi-transparent image.

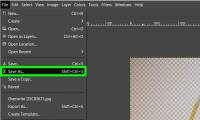
5. Save images in GIF, TARGA, PNG or TIFF format to maintain transparency.
Users can also enter the number "50" in the box next to the Opacity slider and press "Enter" to make the image semi-transparent.
Good luck!
See more:
- How to convert images into sketches in GIMP
- How to turn an image into transparent with GIMP
- Create ghosts in Photoshop or GIMP
Was this article helpful?
Your feedback helps us improve.
Related Articles
 How to turn an image into transparent with GIMP6 minutes read
 6 photo editing tips with GIMP12 minutes read
 How to create spherical images in GIMP7 minutes read
 How to Make Semi Transparent Flowers in Paint Shop Pro2 minutes read
 How to Make a Transparent Image Using Gimp7 minutes read
 7 best websites to find images with transparent backgrounds7 minutes read
Reader Comments 0
Sign in with email or Google to join the discussion.