How to Feather Edges on GIMP
Making an edge fade away into the foreground is a common image editing technique. GIMP is one of a few powerful programs that let a user fade the edge of an image to his exact needs. *please note the images are shown on OSX, but the menu...
Table of Contents
Part 1 of 5:
Opening an Image
-
 Click 'File', then 'Open' to open the file navigator.
 -
 Select your file by clicking on it (it will be highlighted blue when selected). Click 'Open'.
Part 2 of 5:
Adding an Alpha Channel
-
 Click 'Layer'.
 -
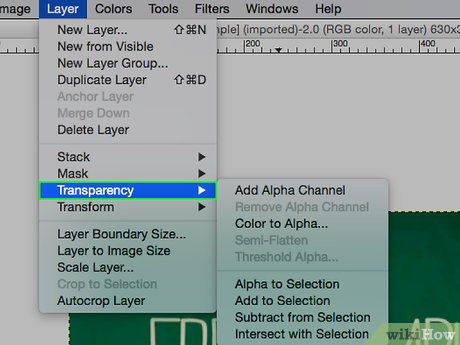 Hover over 'Transparency'.
 -
 Click 'Add Alpha Channel'. Adding an alpha channel adds the ability to become transparent to your image.
Part 3 of 5:
Adding a Layer Mask
-
 In the layers toolbox, hover over your image and right click.
 -
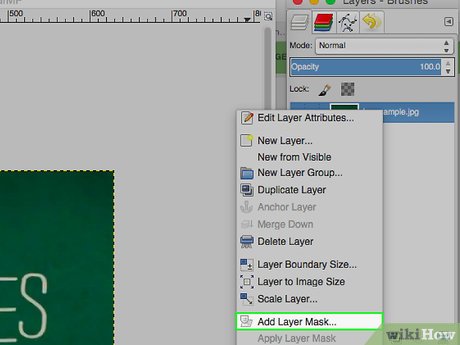 Click 'Add Layer Mask'.
 -
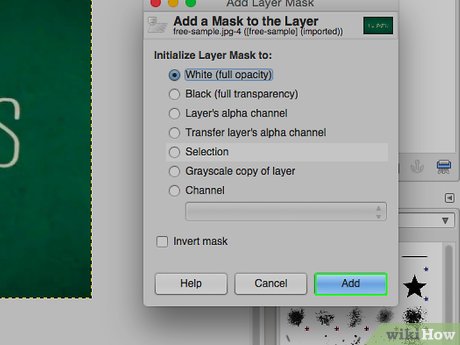 Click 'Add.' White (full opacity) should be selected.
Part 4 of 5:
Feathering the Edge
-
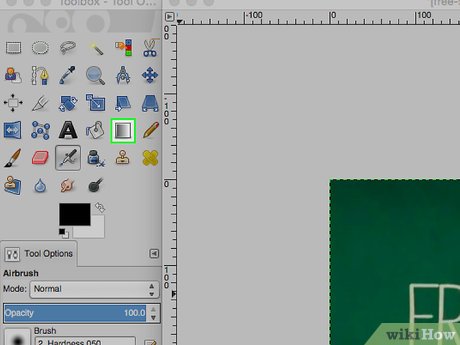 Select 'Blend Tool' in your toolbox.
 -
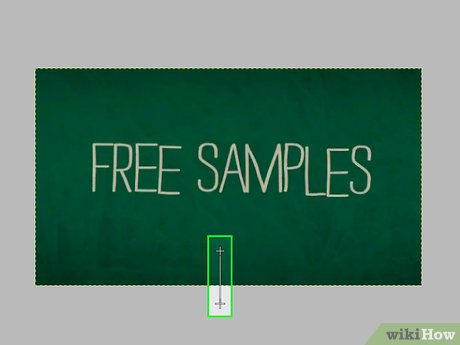 Click and drag from where you want your fade to end, to where you want your fade to begin.
- Don't like how you fade looks? Simply hit Ctrl+z (on OSX) or Ctrl+z (on Windows) to undo your last step and try again!
- The fade you establish will run along the length of the page, perpendicular to the line you drag.
- Hold ⌘ Cmd (on OSX) or Ctrl (on Windows) while dragging to make your line automatically stick to set angles, making a perfectly vertical or horizontal line easier.
Part 5 of 5:
Exporting the Image
-
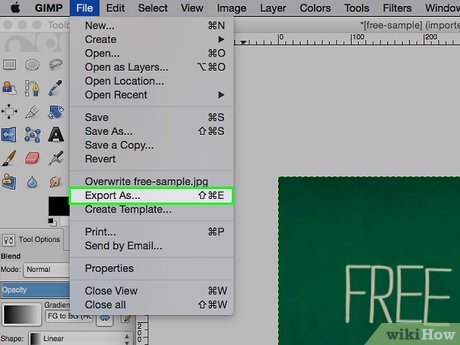 Click 'File', then 'Export as'.
 -
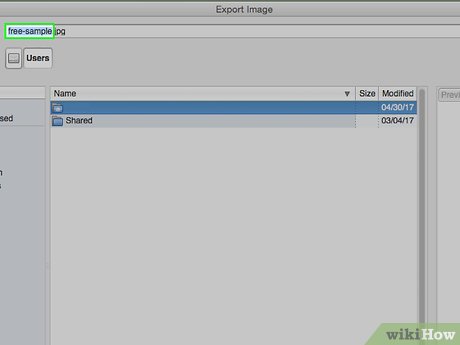 Name your new faded image, and add the .png extension in place of any other extension.
 -
 Click 'Export', or simply hit the ↵ Enter key.
Was this article helpful?
Your feedback helps us improve.
Related Articles
 Glowing pink owl wings may be sending secret messages5 minutes read
 New features of GIMP version 2.1010 minutes read
 How to arrange brushes in GIMP with tags5 minutes read
 4 plugins that help GIMP become a professional tool.5 minutes read
 8 best GIMP plugins and how to install them11 minutes read
 How to create X-ray effects in GIMP7 minutes read
Reader Comments 0
Sign in with email or Google to join the discussion.