Table of Contents
This updated guide examines Tasks: How to Create a Gantt Chart and organizes the essential facts, background, and practical takeaways in clear American English.
Sample Gantt Charts
 Sample Gantt Chart
 Sample Gantt Chart for Play
Method 1
Creating Your Own Gantt Chart
- Understand the work breakdown structure. A Gantt chart is a chart that displays a timeline for a project along with all the different phases, tasks, and jobs that are part of the project. A separate bar is used to illustrate when each phase, task, or job of a project starts and ends.
- Gather information about all tasks and processes within the project. You will need to know each of the different phases (summary elements) of a project and all the tasks (terminal elements) that need to be accomplished in each phase.
- Learn about terminal and summary elements. Terminal elements are smaller tasks that make up a larger task. The larger task that the terminal elements make up is called the summary element. For example, if you are filming a movie, one of the summary elements may include each scene that needs to be shot. The terminal elements may include planning, set design, filming, editing, and animation for each scene.[1]
- Evaluate dependency and relationships between different phases and tasks. Some tasks and/or phases of a project may be able to be accomplished independently of other tasks and phrases. Others phases and tasks may depend on other processes being completed first. For example, in movie production, casting must be finished before filming can begin.
- Create a timeline on a graph. Draw a horizontal timeline for the Gantt chart at the top of the graph. The timeline represents the entire project with the start date on the left and end date on the right. You will then need to break up the timeline into increments that represent days or weeks of the timeline.
- List each task of the project on the left side of the graph. Each task should have it's own line in the graph. To make the Gantt chart look more organized, be sure to list each task in the order they need to be completed in. You also need to know how long it will take for each task to be completed.
- Arrange bars for each phase and/or tasks within the timeline. Use a highlighter or colored bars to highlight when each task starts and finishes within the timeline. When you are finished, you should have a list of staggering bars for each task below the timeline. Some bars may have overlapping dates, bars that represent tasks that are dependant on other tasks will need to start after the dependent task is completed.
- Try using different color bars for each summary task.
- Implement the Gantt chart in software. After you have created a rough draft of your Gantt chart, use software to print a clear and professional looking final copy. Microsoft Project is software specifically made for project management that has the ability to create and print Gantt charts. You can also create Gantt charts in Microsoft Excel, PowerPoint, Word, Photoshop, or Adobe Illustrator and many other programs.
FAQ
What is Tasks: How to Create a Gantt Chart about?
It provides a structured overview of tasks, explains the main context, and highlights practical takeaways for readers.
Why does this topic matter?
Understanding the main concepts helps readers evaluate the issue, avoid common mistakes, and make better-informed decisions.
How should readers use this information?
Use the guidance as a practical starting point, confirm details that may have changed, and follow current product, safety, or security recommendations.
Related Articles
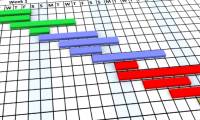 How to Create a Gantt Chart for Project Management in Excel7 minutes read
 Gantt Chart in Excel, How to Create, How to Draw Gantt Chart in Excel7 minutes read
 How to Draw a Gantt Chart in PowerPoint5 minutes read
 Instructions for Inserting, Drawing and Creating Charts in Word 20074 minutes read
 How to Create a Bar Chart in Excel4 minutes read
 8 Types of Excel Charts and When You Should Use Them9 minutes read
Reader Comments 0
Sign in with email or Google to join the discussion.