Table of Contents
This updated guide explains how to Create a Computer File through clear steps, practical examples, and important checks that help prevent common errors.
Method 1 of 3:
On Windows
-
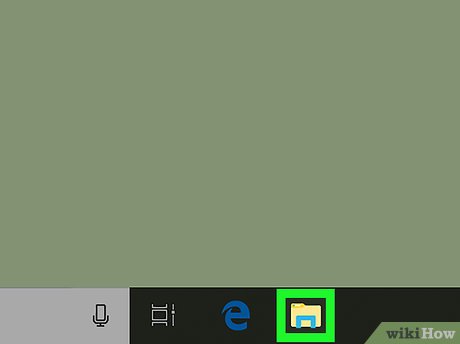 Open File Explorer. Click the File Explorer app icon, which resembles a yellow-and-blue folder, in the taskbar at the bottom of the screen.
- You can also press ⊞ Win+E to open the File Explorer.
-
 Go to the folder in which you may need to create the file. On the left side of the File Explorer window, click the folder in which you may need to make your computer file.
 -
 Click the Home tab. It's in the top-left side of the File Explorer window. A toolbar will drop down from the top of the File Explorer window.
- You can also just right-click a blank space in the window to prompt a drop-down menu.
-
 Click New item. This is in the "New" section of the toolbar. A drop-down menu will appear.
- If you're using the right-click menu, select New in the drop-down menu to prompt a pop-out menu.
-
 Select a file type. In the drop-down menu, click the type of file you may need to create. Doing so will prompt the file to appear in your selected folder with its name highlighted.
- If the file type you may need to create isn't listed in the menu, see the final method for details on creating a file from within a program.
-
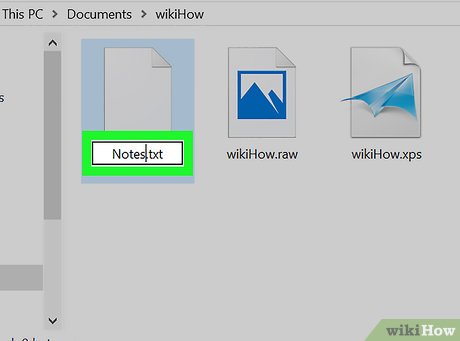 Enter a name for the file. While the file's name is highlighted, type in whatever you may need to name the file.
 -
 Press ↵ Enter. Doing so saves your file's name and creates the file in your selected location.
- You can double-click the file to open it.
Method 2 of 3:
On Mac
-
Understand the types of files you can create. Unlike Windows computers, Macs don't allow you to create new files without opening the program with which you may need to create a file (this means that if you may need to create a Microsoft Word document, for example, you must open Microsoft Word). However, you can still create folders.
- If you may need to create a file or document, see the final method.
-
 OpenFinder. Click the Finder app icon, which resembles a blue face, in the Dock.
-
 Go to the folder in which you may need to create the folder. In the Finder window, go to the folder where you may need to create a new folder.
- For example, to create a new folder in the "Downloads" folder, you would click Downloads on the left side of the Finder window.
-
 Click File. It's on the left side of the menu bar that's at the top of your Mac's screen. A drop-down menu will appear.
 -
 Click New Folder. This option is in the drop-down menu. Doing so adds a new folder to the current location.
 -
 Enter a name. While the folder's name is highlighted (as it will be immediately after you create it), type in the name that you may need to use for the folder.
 -
 Press ⏎ Return. Doing so will save your folder name and create the folder in your current folder location.
Method 3 of 3:
Using Program Menus
-
 Open the program you may need to use. Click or double-click the app icon for the program that you may need to use to create a file, or do one of the following to search for the program:
- Windows — Click Start
, type in the name of the program you may need to open, and click the program at the top of the search results.

- Mac — Click Spotlight
, type in the name of the program you may need to open, and double-click the program at the top of the search results.

- Windows — Click Start
-
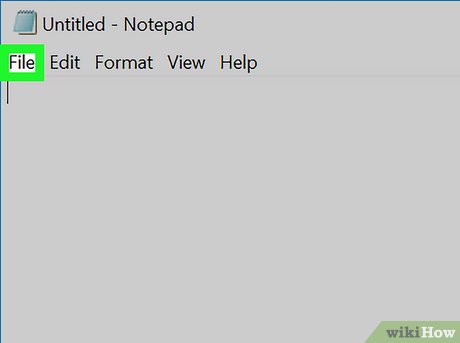 Click File. It's typically in the upper-left side of the program window (Windows) or the screen (Mac). A drop-down menu will appear.
- Some programs, such as Paint 3D on Windows computers, will have a New or New Project on the opening page of the program. If so, skip this step.
-
 Click the New option. This option is usually found in the File drop-down menu, but you may find it on the launch page for the program as well.
- Some programs, such as Adobe CC, may require you to enter details about the project or select a template before proceeding.
-
 Create your file as needed. If you may need to do anything to your file (e. g., add text) before saving it, do so before proceeding.
 -
 Open the "Save As" menu. The easiest way to do this on any computer is by pressing either Ctrl+S (Windows) or ⌘ Command+S (Mac).
- You can also click File and then click Save As .
- If pressing Ctrl+S or ⌘ Command+S doesn't do anything, it's probably because you already created your file during the New process. This is common for Adobe CC programs.
-
 Enter a name for your file. In the "File name" (Windows) or "Name" (Mac) text box in the Save As window, type in the name you may need to use to identify your file.
 -
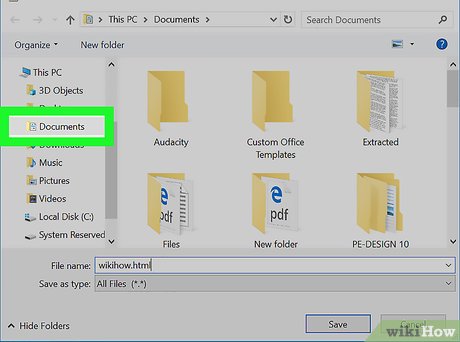 Select a save location. Click one of the folders on the left side of the window to select it as the location in which you'll save your file.
- For example, to save a file on the desktop, you would click the Desktop folder.
- On a Mac, you may instead need to click the "Where" drop-down box and then click the folder in which you may need to save the file in the resulting drop-down menu.
-
 Click Save. It's in the bottom-right corner of the window. Doing so creates and saves your file in your selected location under your specified name.
FAQ
What is the easiest way to Create a Computer File?
Start with the requirements in this guide, then follow each step in order. Check the result after every major change so problems are easier to identify.
Can beginners follow these instructions?
Yes. The process is organized into practical steps, and you can repeat any step before moving forward.
What should I check if the method does not work?
Confirm your software or device version, permissions, settings, file format, and internet connection when the task depends on online services.
Related Articles
 Create EXE File: How to Create an EXE Installation File17 minutes read
 The Easiest Way to Create EXE File7 minutes read
 Instructions for Creating and Using BAT File on Windows9 minutes read
 How to Make an Exe File7 minutes read
 Click: How to Create an Iso File12 minutes read
 Instructions on How to Transfer ESD File to ISO for Win XP4 minutes read
Reader Comments 0
Sign in with email or Google to join the discussion.