How to Lock a Folder on Windows
This wikiHow teaches you how to hide files in a secret locked folder in Windows 10. Press . This opens the File Explorer.
Table of Contents
Part 1 of 4:
Creating a Lock File
-
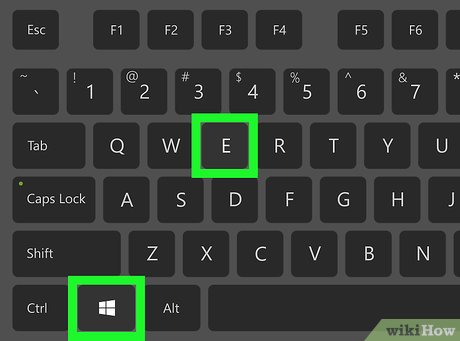 Press ⊞ Win+E. This opens the File Explorer.
 -
 Double-click the folder you want to lock. This opens the contents of the folder.
 -
 Right-click an empty part of the folder. A menu will appear.
 -
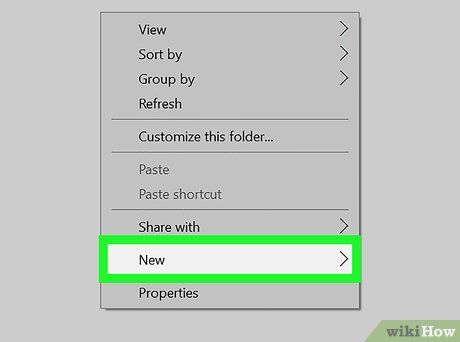 Click New. A list of file types will appear.
 -
 Click Text Document.
 -
 Type lock and press ↵ Enter. You now have a text file called 'lock' in the current folder.
 -
 Double-click the 'lock' file. This opens the blank file in your default text editor (e.g. Notepad). You'll need to paste some code into this file.
Part 2 of 4:
Adding the Lock Code
-
 Open a web browser. You can use any web browser on your computer, such as Edge, Chrome, or Firefox.
 -
 Navigate to https://www.laptopmag.com/articles/password-protect-folder-windows-10. This is the site from which you can copy the code.[1]
 -
 Scroll down to the code that begins with 'cls @ECHO OFF.' The code begins right after the 6th step in the article.
 -
 Copy all of the code. To do this, click the mouse before 'cls' and then drag it all the way to the end of the code, then press Ctrl+C.
 -
 Return to the 'lock' file that's open in your text editor. The file should be blank.
 -
 Click the mouse cursor in the file and press Ctrl+V. The copied code will appear in the file.
 -
 Locate and highlight Your-Password-Here. If you're having a hard time finding it, press Ctrl+F to open the Search tool, type your-password-here into the box, then press ↵ Enter. The text should automatically highlight.
 -
 Type a lock password. Since Your-Password-Here is highlighted, it will disappear once you start typing your lock password. The password you type is the one you'll need to enter to access the folder.
 -
 Click the File menu. It's at the top of the window.
 -
 Click Save As….
 -
 Select All Files from the 'Save As type' drop-down menu. It's the first drop-down menu at the bottom of the window.
 -
 Change the file name to FolderLocker.bat. To do this, erase what's already in the 'File name' field and type FolderLocker.bat.
 -
 Click Save. Now you're ready to password-protect your files.
Part 3 of 4:
Locking the Folder
-
 Double-click FolderLocker in the File Explorer window. This creates a new folder called Locker in the current folder.[2]
 -
 Drag the files you want to lock to the Locker folder. Dragging files to this locker will also remove them from their current folder.
 -
 Double-click FolderLocker. This opens a black window that asks, 'Are you sure u want to lock the folder (Y/N).'
 -
 Press Y.
 -
 Press ↵ Enter. The window will disappear, as will the folder called Locker. Don't worry, it's still there—you'll just have to run the FolderLocker script to make it visible.
Part 4 of 4:
Accessing Files in the Locked Folder
-
 Double-click the folder where you created the Locker. You can do this from the File Explorer at any time.
- This is the folder that contains the file called FolderLocker.
-
 Double-click FolderLocker. A black window will appear, asking you to enter the password.
 -
 Type the Locker password and press ↵ Enter. This brings back the Locker folder, which is now accessible.
Was this article helpful?
Your feedback helps us improve.
Related Articles
 Top 5 Folder software, extremely secure folder lock5 minutes read
 How to set password for Folder, protect data effectively3 minutes read
 5 Best Free Folder Lock Software 20245 minutes read
 Unlocking Folders on Windows 10+11 is super fast and super easy8 minutes read
 Fixed a bug with the Cap Lock key on Windows 10 suspended2 minutes read
Reader Comments 0
Sign in with email or Google to join the discussion.