How to Back Up Data
This wikiHow teaches you how to back up the data on your computer or smartphone. Backing up your computer or phone creates a copy of its data so that you can restore it later if your computer, phone, or tablet is damaged or erased. Connect...
Table of Contents
Method 1 of 4:
On Windows
-
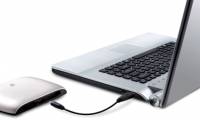
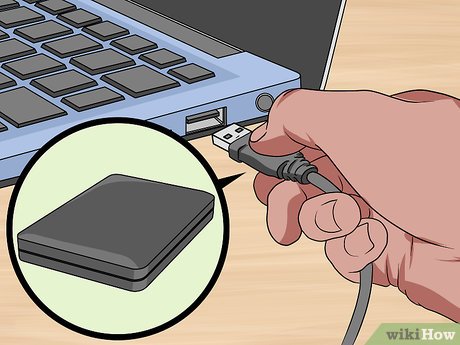 Connect an external hard drive to your Windows computer. You can do this by using one of your computer's USB ports. In order to back up your Windows computer, you will need an external hard drive on which to store the backup.
- Your external hard drive must be formatted for use with a PC for this to work.
- You can also use a high-capacity flash drive for this step.
-
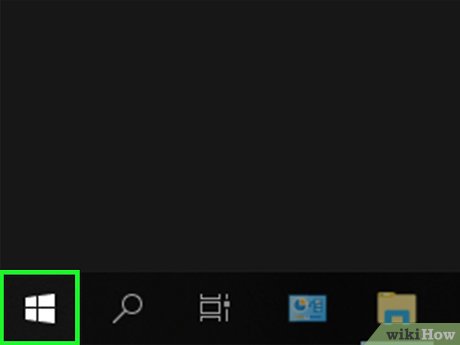 Open Start. Click the Windows logo in the bottom-left corner of the screen.
-
 Open Settings. Click the gear-shaped icon in the lower-left side of the Start window.
-
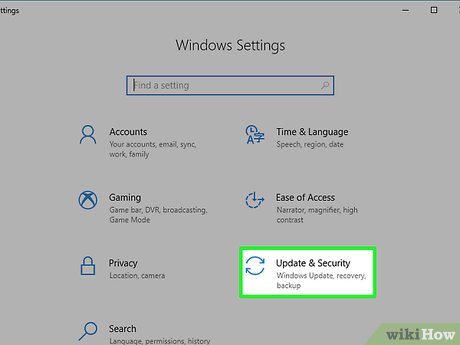 ClickUpdate & Security. You'll find this option in the Settings window.
-
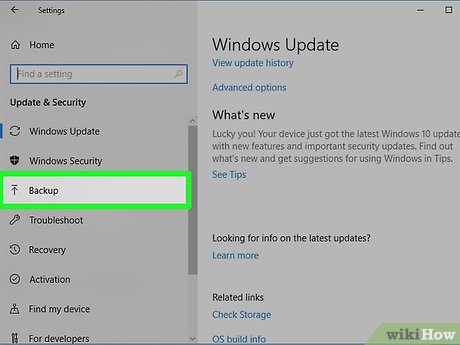 Click the Backup tab. It's in the upper-left side of the Update & Security page.
 -
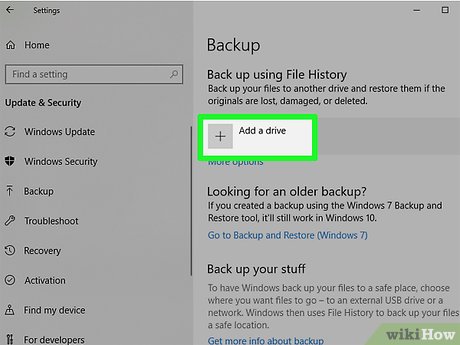 Click Add a drive. This is at the top of the page. A drop-down menu will appear.
 -
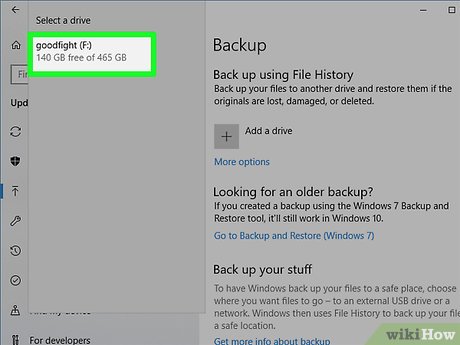 Select your external drive. Click your external drive's name in the drop-down menu. This will set it as your computer's backup drive.
 -
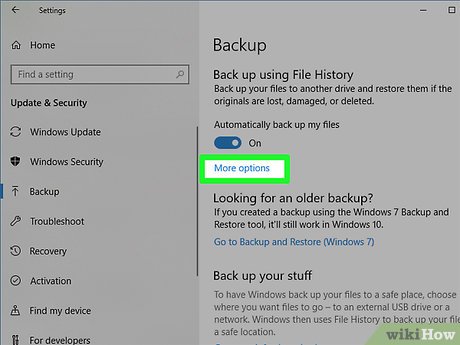 Click More options. It's a link below the "On" switch near the top of the page.
 -
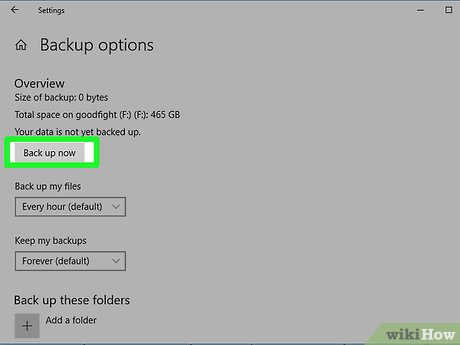 Click Back up now. This option is in the upper-left side of the page. Doing so will prompt Windows to assemble the backup and begin loading it onto your external drive.
- You may have to click Back up now a couple of times before your drive will begin backing up.
-
 Wait for your backup to complete. You'll see a "Backup completed" notification in the bottom-right corner of your screen once the backup finishes, at which point you can eject and remove the external hard drive.EXPERT TIPSpike Baron is the Owner of Spike's Computer Repair based in Los Angeles, California. With over 25 years of working experience in the tech industry, Spike specializes in PC and Mac computer repair, used computer sales, virus removal, data recovery, and hardware and software upgrades. He has his CompTIA A+ certification for computer service technicians and is a Microsoft Certified Solutions Expert.
Spike Baron
Network Engineer & Desktop Support Spike Baron
Network Engineer & Desktop SupportWindows 10 has a backup file history that works automatically. You can connect a backup drive that you leave attached all the time and Windows 10 will automatically backup your personal files as they change.
Method 2 of 4:
On Mac
-
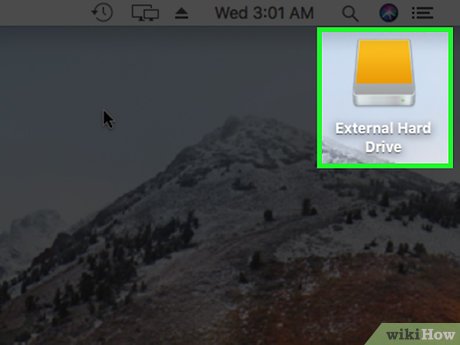 Connect an external hard drive to your Mac. You can do this by using one of your computer's USB-C ports. In order to back up your Mac, you will need an external hard drive on which to store the backup.
- Your external hard drive must be formatted for use with a Mac for this to work.
- You can also use a high-capacity flash drive for this step.
- If your selected external drive uses a USB 3.0 connection, you'll need a USB 3.0 to USB-C adapter in order to connect the drive to your computer.
-
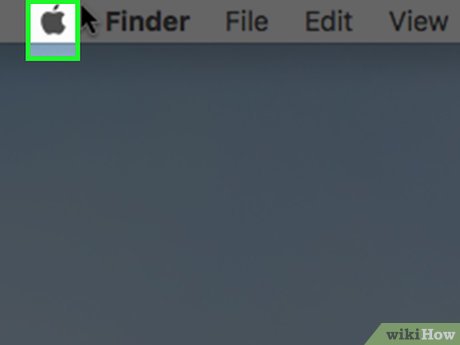 Open the Apple menu. Click the Apple logo in the top-left corner of the screen. This will prompt a drop-down menu.
-
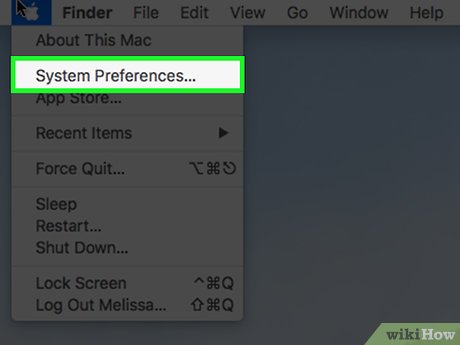 Click System Preferences…. It's near the top of the drop-down menu.
 -
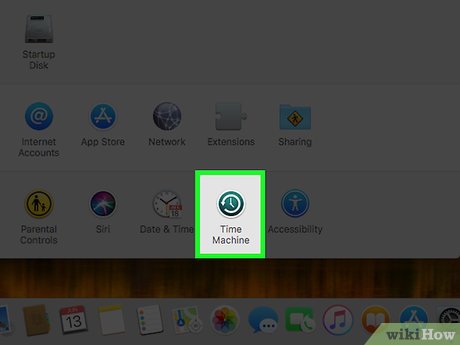 Click Time Machine. This app icon resembles a green clock dial. The Time Machine window will open.
 -
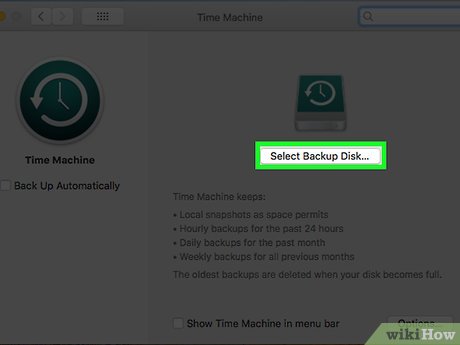 Click Select Backup Disk…. It's near the top of the page. A window will open.
 -
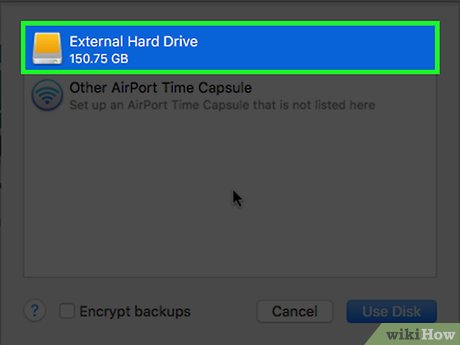 Select your external drive. Click your external drive's name in the window.
 -
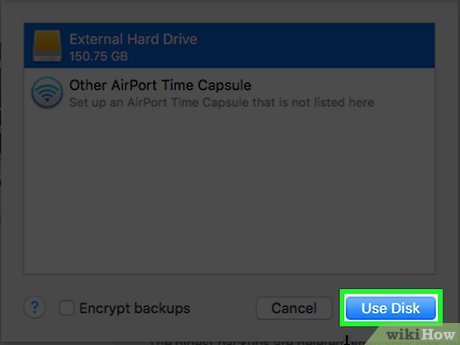 Click Use Disk. It's at the bottom of the window. Doing so will set the external drive as your Mac's Time Machine backup drive.
 -
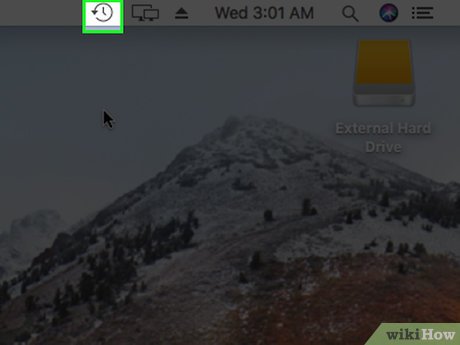 Click the Time Machine menu icon. It's the clock dial-shaped icon in the upper-right corner of the screen. A drop-down menu will appear.
 -
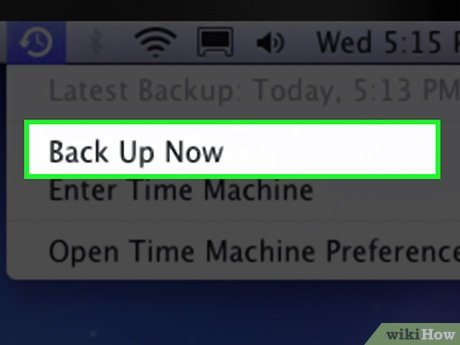 Click Back Up Now. You'll see this near the top of the drop-down menu. Doing so prompts Time Machine to begin backing up your Mac to the external drive.
 -
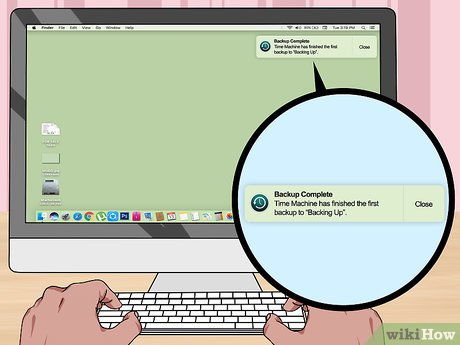 Wait for your backup to complete. You'll see a "Time Machine has finished..." message once the backup finishes, at which point you can eject and remove the external hard drive.
Method 3 of 4:
On iPhone
-
 Connect your iPhone to your computer. Use the iPhone's USB charger cable to do so.
 -
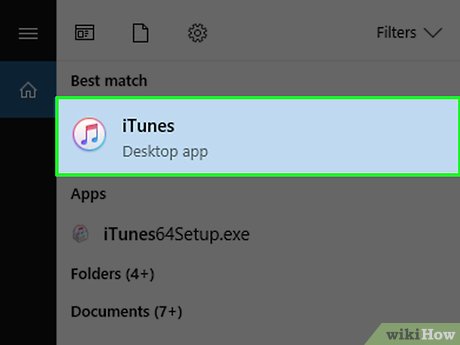 Open iTunes. It's a white app with a multicolored musical note on it.
- If prompted to update iTunes, click Download iTunes and then wait for the update to install. You may have to restart your computer after doing this before continuing.
-
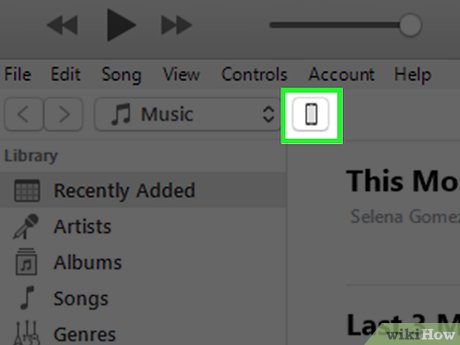 Click your iPhone's icon. This icon resembles an iPhone (or an iPad if you're backing up an iPad instead) in the upper-left side of the iTunes window. Doing so opens the iPhone's page.
 -
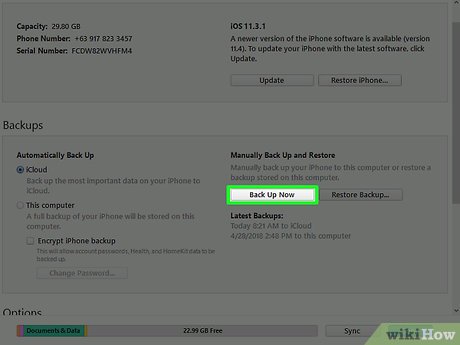 Click Back Up Now. It's in the "Backups" section of your iPhone's page.
 -
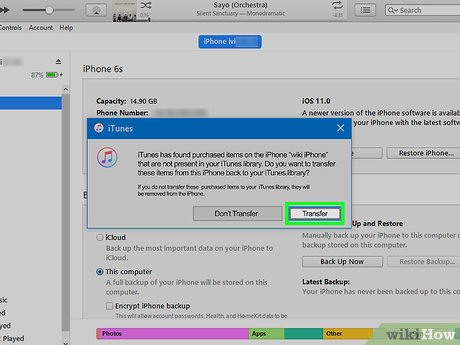 Click Transfer Purchases if prompted. If you've purchased items from the iTunes Store app on your iPhone, you'll be asked whether or not you want to store those purchases on your computer. Click Transfer Purchases to do so.
 -
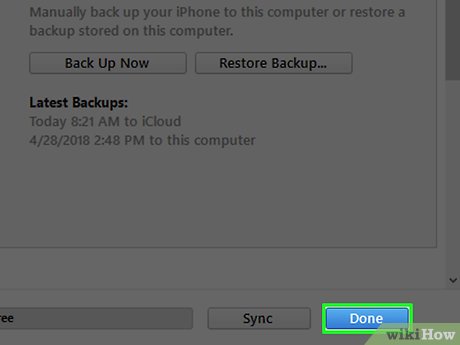 Click Done. It's a blue button in the bottom-right corner of the window.
- If prompted, click Apply before continuing.
-
 Wait for your iPhone to finish backing up. This will usually take less than 10 minutes. Once your iPhone is done backing up, you'll hear a noise, and the progress bar at the top of the window will disappear. At this point, you can disconnect your iPhone from your computer.
 -
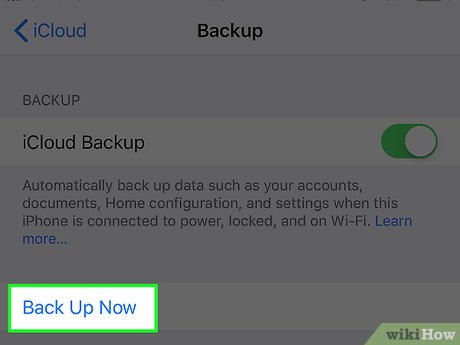 Back up your data using iCloud. To do this, you'll most likely need more than 5 gigabytes of iCloud space, and you'll need to be connected to Wi-Fi (it helps to be connected to a power source, too). To back up to iCloud:
- Open Settings

- Tap your name at the top of the page.
- Tap iCloud
- Scroll down and tap iCloud Backup
- Tap the white "iCloud Backup" switch

- Tap OK when prompted.
- Tap Back Up Now
- Open
Method 4 of 4:
On Android
-
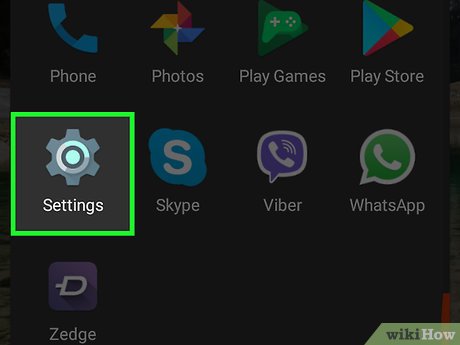 Open your Android'sSettings. Tap the Settings app, which resembles a gear-shaped icon or a set of sliders.
- You can also use two fingers to swipe down from the top of the screen and then tap the gear-shaped icon in the upper-right or upper-left corner.
-
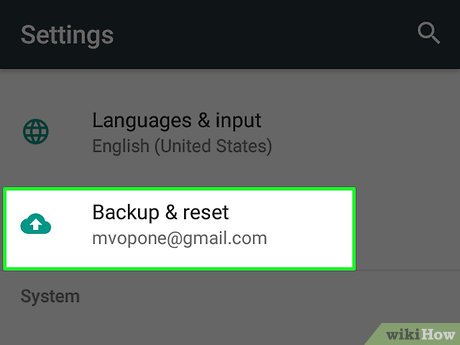 Scroll down and tap Backup and reset. It's near the middle of the Setting page.
 -
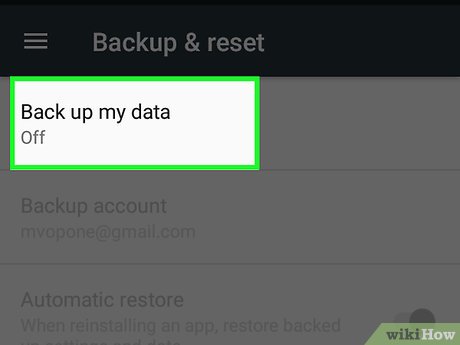 Tap Back up my data. You'll see this under the "Google account" heading.
 -
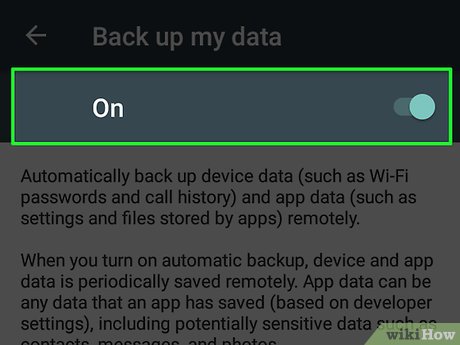 Check the On option. Doing so will enable automatic backups for your Android.
- On some Android phones or tablets, you may have to tap the white "Off" switch to turn the switch to "On"


- On some Android phones or tablets, you may have to tap the white "Off" switch
-
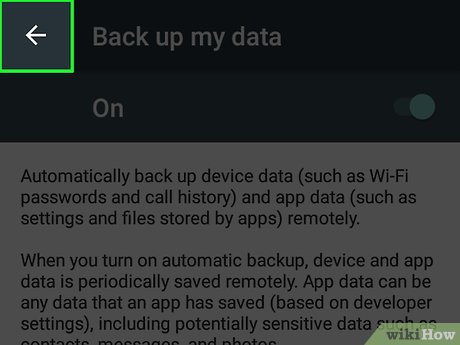 Tap the "Back" arrow. It's in the top-left corner of the screen.
 -
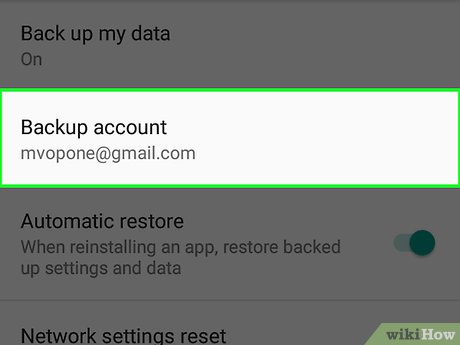
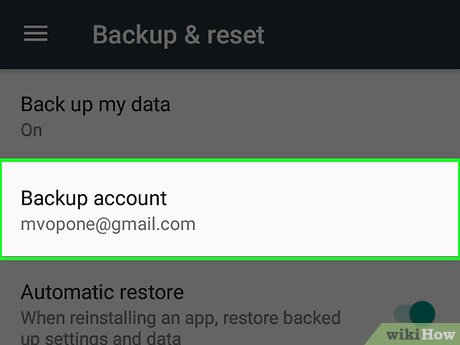 Make sure that your Google account is the backup account. Tap Backup account and look for your Google email address. If you don't see it here, tap Add account and enter the email address and password for your preferred Google account.
 -
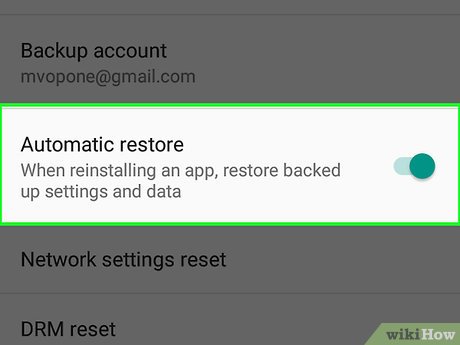
 Enable Automatic Restore. Tap the white "Automatic restore" switch. It will change color
 which signifies that Automatic Restore is on. This feature automatically updates any Android that you sign into with your backed-up settings, apps, and files.
-
 Tap the "Back" button. This will take you back to the Settings page.
 -
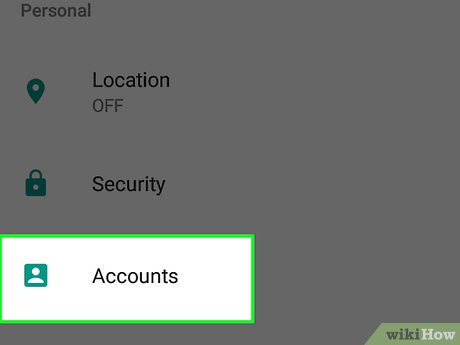 Scroll up and tap Accounts. You'll find this near the top of the page. The last thing you'll need to do is make sure that your Google account's information is being backed up.
 -
 Tap Google. It should be the top option on this page.
 -
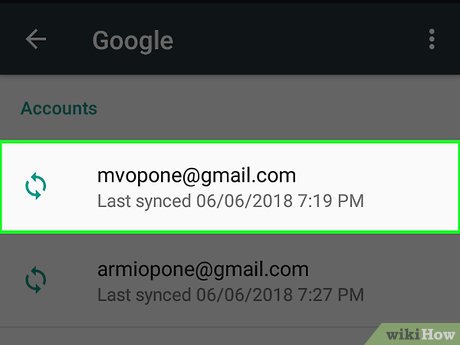 Select your Google account. Tap the account that you want to back up.
 -
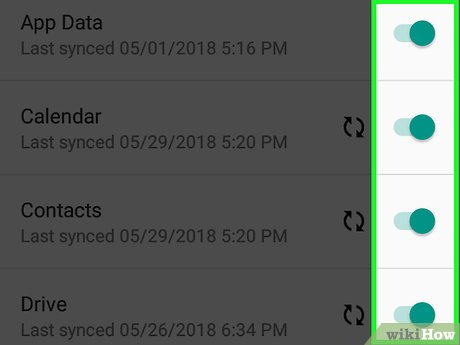 Make sure that everything is set to back up. Scroll down through all of the backup items. If you see a white switchto the right of any item on this page, tap it to enable the backup for that item.
- Colored switches next to items mean that those items are backing up.
- You don't have to back up all data here, but make sure that all of the things that you care about have backup enabled.
Was this article helpful?
Your feedback helps us improve.
Related Articles
 How to Back Up Data9 minutes read
 How to back up and restore data saved on PS49 minutes read
 How to back up iPhone data to iCloud2 minutes read
 How to back up iPhone and computer data2 minutes read
 How to Back Up a Mac4 minutes read
 Free tools for backing up data securely for your computer4 minutes read
Reader Comments 0
Sign in with email or Google to join the discussion.