Guide to clean up Windows 10 computer junk to increase capacity and speed up the computer
When using the computer for a long time, we will experience the phenomenon of slow computer and larger hard drive capacity when installing many times. To overcome this situation, you need to clean your computer and let's find out how to clean your computer on Windows 10 in the article below!
1. Use the Disk Clean up tool on Windows 10
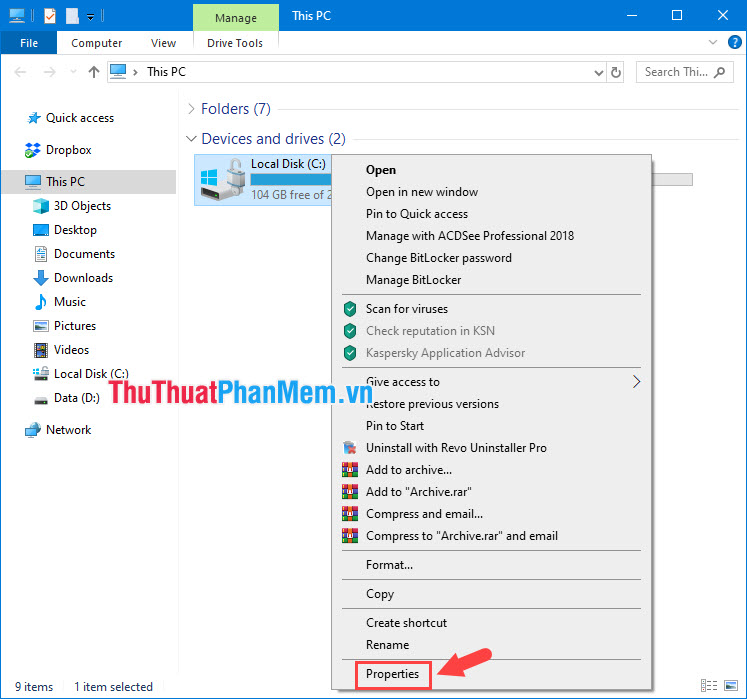
Step 1: Click on the hard drive installed Windows => select Properties .
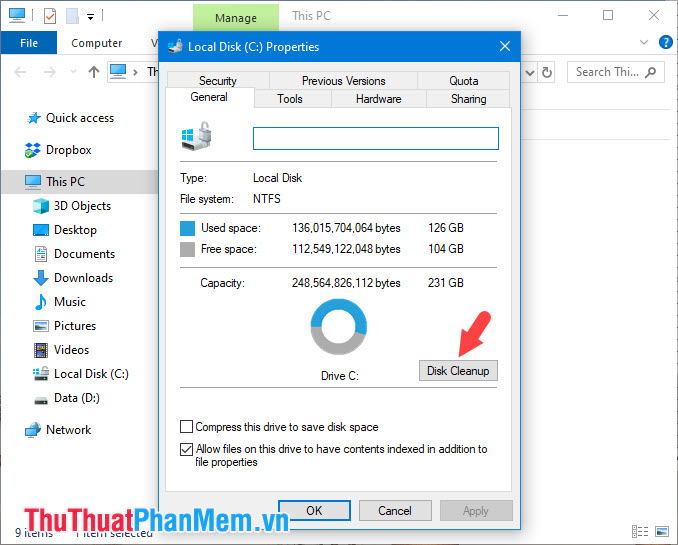
Step 2: Select Disk Cleanup .
Step 3: Click the item Clean up system files so that the Windows cleaner displays additional system junk files such as the Windows upadate file, error reporting . You tick all but exclude Download if You have not backed up the downloaded file to the computer. Then click OK to continue.

Step 4: Click Delete Files to confirm that you are done.

2. Delete the System Restore file
The System Restore feature is useful in case the computer fails and you do not want to reinstall Windows, using System Restore will help you to restore the computer to its original settings without reinstalling Windows. If you do not need to use System Restore, we can turn them off by the following:
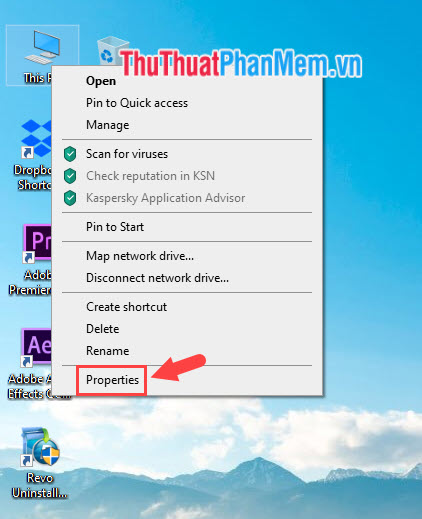
Step 1: Right-click on This PC and select Properties .
Step 2: Choose System protection .
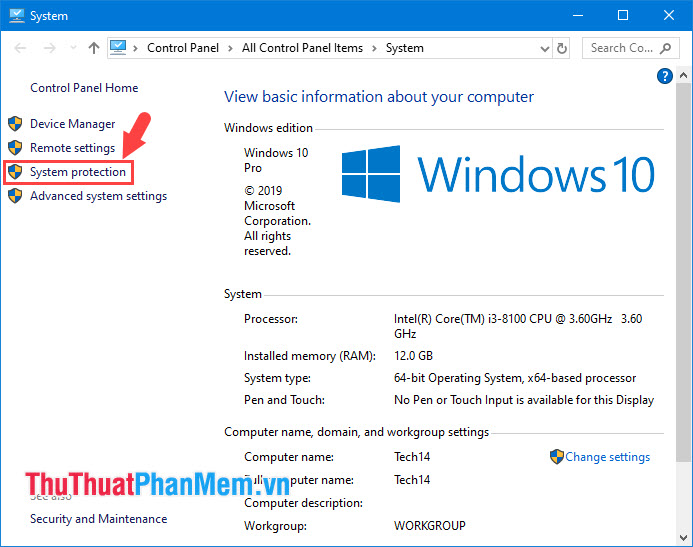
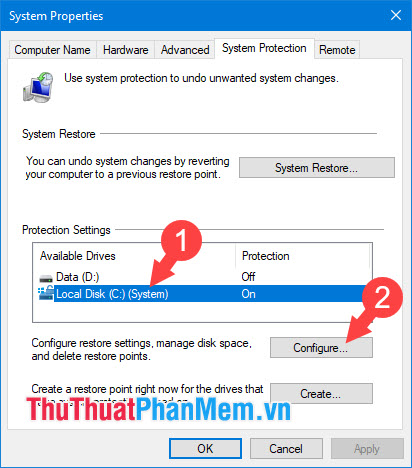
Step 3: Select the drive to turn off System Restore (1) and then click Configure (2) .
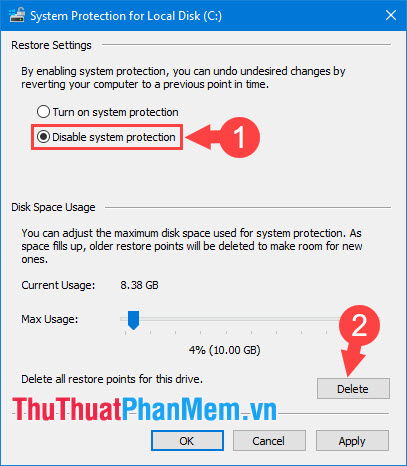
Step 4: Check the Disable system protection (1) and click Delete (2) .
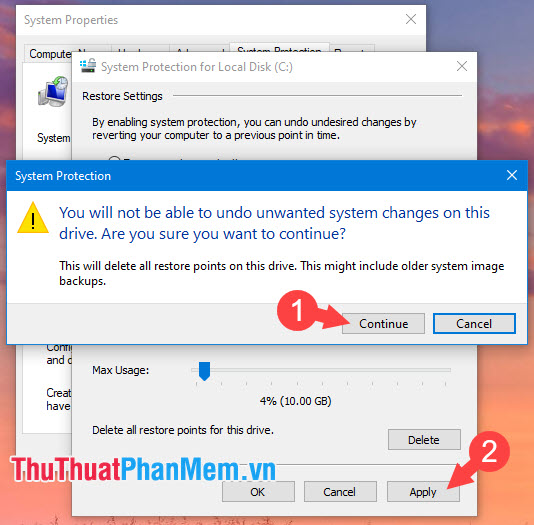
Step 5: A new message board appears, click Continue to continue deleting the junk files, then click Apply to save the settings.
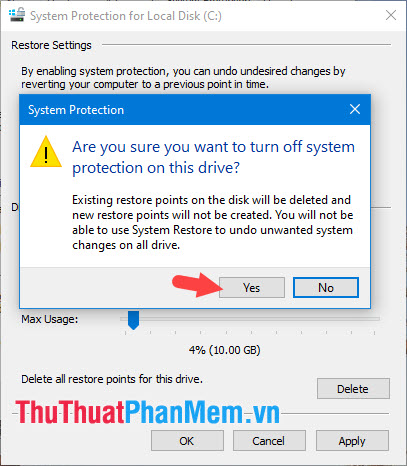
Step 6: Click Yes to agree to turn off System Restore .
3. Turn off hibernation (Hibernate)
Hibernate helps you to start the computer quickly when you do not want to use the computer for a long time. However, this feature will consume gigabytes of memory on your computer. To disable this feature, press the Windows + R key combination and enter the command powercfg -h off then Enter to turn off Hibernate.

4. Using CCleaner software
CCleaner is a reputable garbage removal software and is trusted and used by many people everyday because of its efficiency and compactness, without consuming computer resources.
Step 1: You download CCleaner here https://www.ccleaner.com/ccleaner
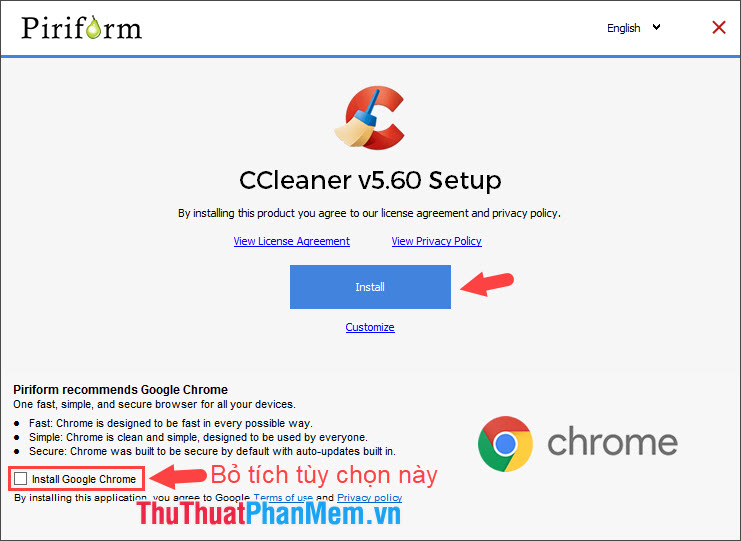
And open the installation file. When installing you should uncheck the Install Google Chrome option if you do not want CCleaner to install additional external software. Then you click Install to install.
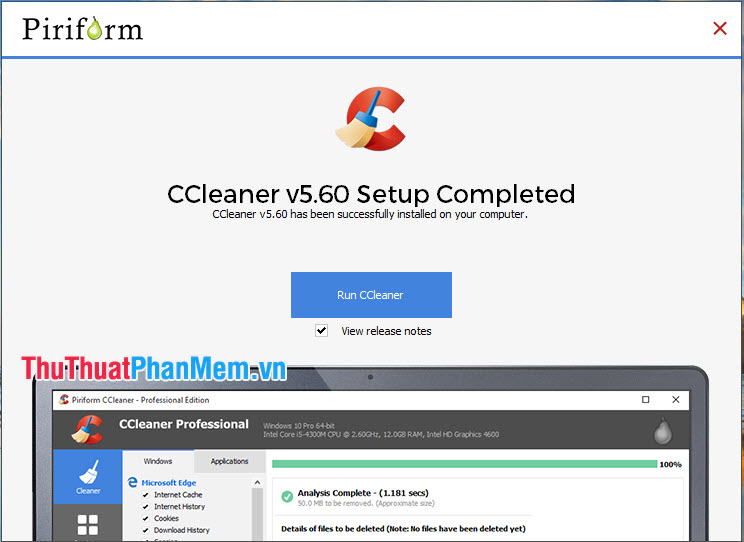
Step 2: Installation is complete, click Run CCleaner to launch the software.
Step 3: At the main interface of the software, click Analyze to analyze the junk files in the system.

Step 4: After the analysis process is successful, click Clean All to have the software automatically clean the garbage for your PC.

You should clean the garbage regularly with a frequency of 1 week / time for your computer to operate efficiently and smoothly. Good luck!
You should read it
- ★ How to delete junk files on the computer, clean the computer most effectively
- ★ Clean junk computer Windows 10, Windows 7 most effectively
- ★ How to automatically clean junk on Windows 10 computers
- ★ How to use Cleanmgr + clean the drive, clear the browser cache
- ★ How to speed up your computer, improve Windows performance