Table of Contents
This guide provides a practical overview of Instructions on How to Use Windows Sandbox on Windows 10, including its main features, benefits, limitations, and important considerations.

What is Windows Sandbox?
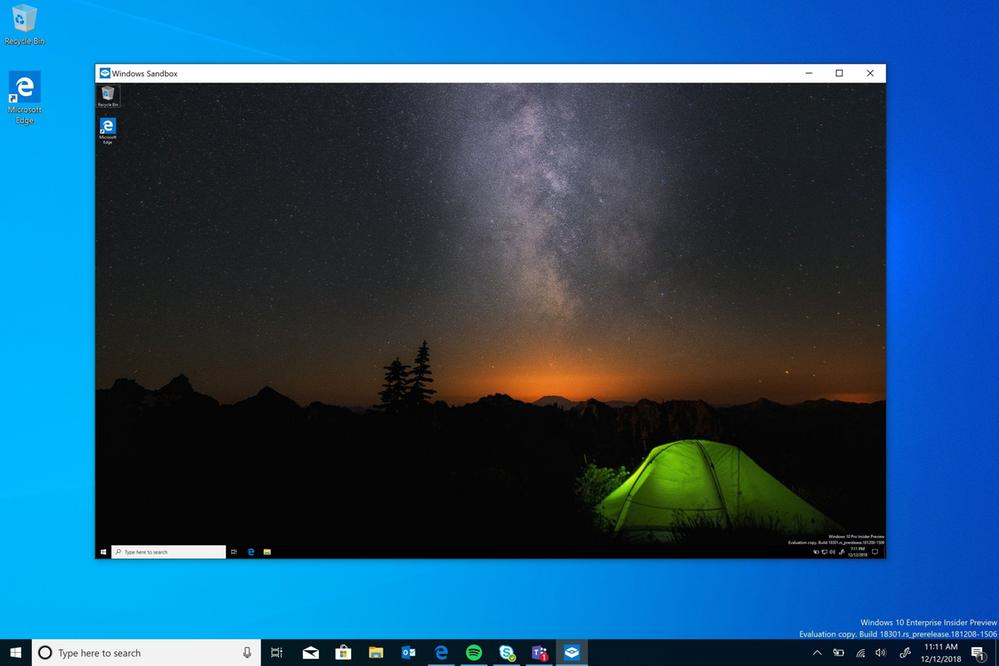
From Windows 10 build 18305 onwards, Microsoft has incorporated the Windows Sandbox feature into the Supported operating systems. It has the function of creating a virtual environment, a new desktop environment, compact and completely independent of the machine's Supported operating systems so that you can install and set personal adjustments without affecting the original Supported operating systems. In other words, Windows Sandbox is a virtual machine. However, Windows Sandbox only appears on Win10 Profesional - Enterprise - Education editions but not on Home editions.
Conditions for running Windows Sandbox
- Windows 10 Pro or Enterprise Insider version 18305 or higher
- AMD64 architecture
- Virtualization is enabled in the BIOS
- At least 4GB of RAM (8GB recommended)
- At least 1 GB of free disk space (SSD recommended)
- At least 2 CPU cores (4 cores recommended with hyperthreading)
Basic features of Windows Sandbox
- Windows Sandbox has all the basic features of Windows 10 Pro and Enterprise. You do not need to use additional VHD.
- Windows Sandbox works independently of the Supported operating systems. You will have an extra virtual Windows 10 in your existing Windows 10.
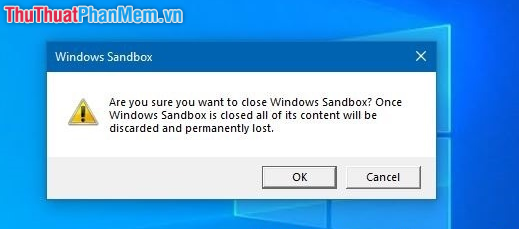
- When closing the application, all software installed in the Sanbbox will be removed.
- Windows Sandbox virtualizes based on hardware for kernel isolation, based on Microsoft's virtualization to run separate kernels, isolating Windows Sandbox from real machines. Therefore the software does not take up a lot of machine resources.
- Windows Sandbox uses an integrated kernel scheduler, intelligent memory manager and virtual GPU.
How to enable Windows Sandbox feature
Step 1 : First, to use the Windows Sandbox feature, your computer needs to enable the Virtualization feature in the BIOS. To check if your computer has enabled virtualization you have done.
(1) Press Ctrl + Shift + Esc to enter Task Manager .
(2) Switch to the Performance tab.
(3) Notice if the Virtualization line is Enabled ( disabled) and Disable (disabled).
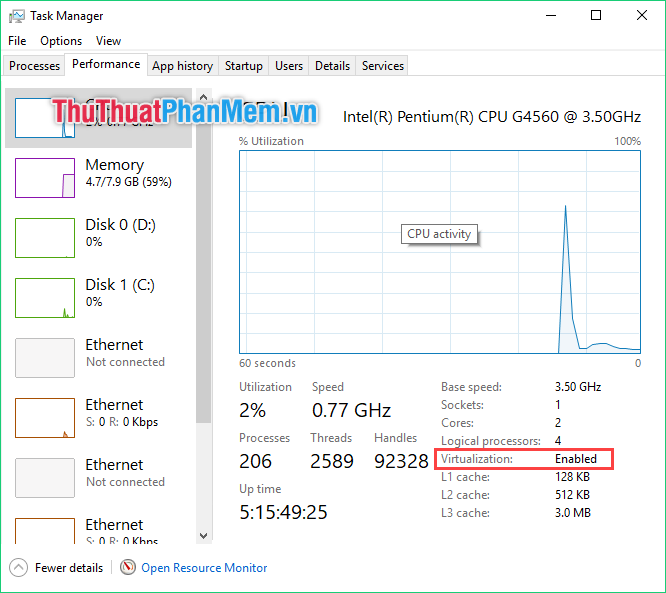
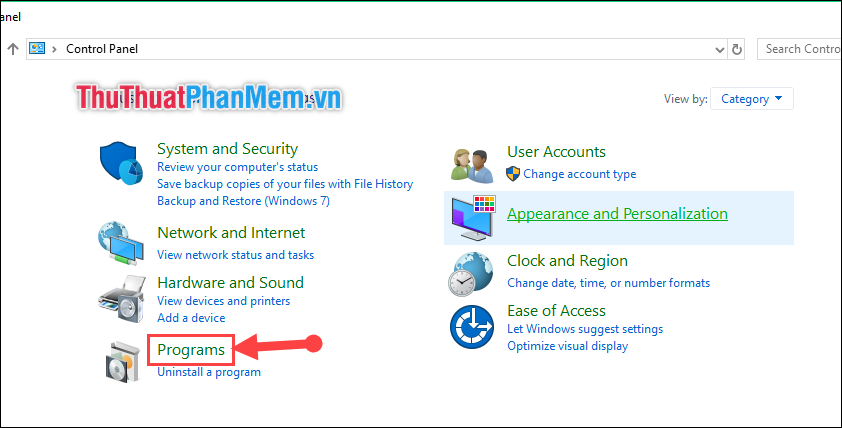
Step 2 : Next, open Control Panel and click Programs .
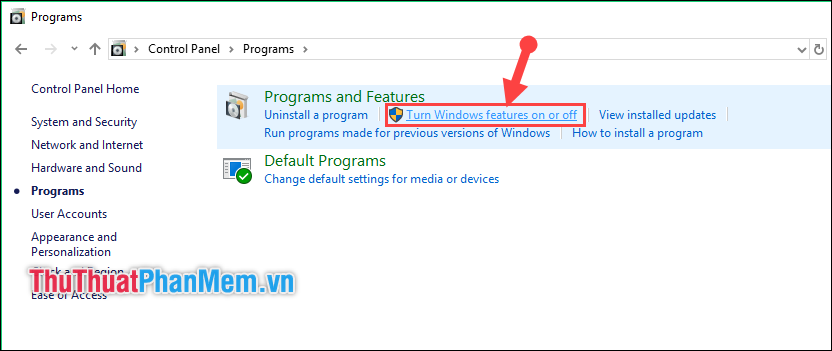
Step 3 : Then select Turn Windows features on or off .
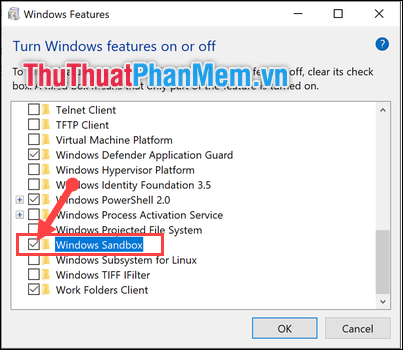
Step 4 : Then tick the Windows Sandbox . And restart Windows.
Step 5 : After restarting, go to Start Menu, type Sanbox and then click on the Sandbox icon to launch the program.
Step 6 : After use, close the Sandbox. However, as mentioned above, closing the Sandbox will remove the program and all the data you have used from the Sandbox. Any programs or files you downloaded during the session will be permanently deleted.
Thank you for watching the article!
FAQ
What should I know about Instructions on How to Use Windows Sandbox on Windows 10?
Focus on the key features, requirements, limitations, and practical use cases explained in this guide.
How do I get the best results with Instructions on How to Use Windows Sandbox on Windows 10?
Follow the recommended steps, use current software or information, confirm compatibility, and review settings before major changes.
Are there any risks or limitations?
Potential limitations depend on compatibility, data quality, cost, privacy, support, and how the product or method is used.
Related Articles
 Windows Sandbox: What It Is and How to Use It to Run the Application5 minutes read
 Steps to Activate Windows Sandbox on Windows 115 minutes read
 How to Configure Windows Sandbox on Windows 108 minutes read
 How to Turn on / Off Windows Sandbox on Windows 104 minutes read
 What Is a Sandbox and How Does It Sandbox a Program?17 minutes read
 What Is a Sandbox? the Best Sandbox Software6 minutes read
Reader Comments 0
Sign in with email or Google to join the discussion.