Download and install Arduino on the computer
Arduino software (IDE) allows you to write programs and upload them to the board. The following article will show you how to download and install Arduino on your computer..
Arduino software (IDE) allows you to write programs and upload them to the board. In the Arduino website (arduino.cc), you will find two options:
1. If you have a reliable Internet connection, you should use the online IDE (Arduino Web Editor). It will allow you to save your sketches in the cloud, so they are available from any device and backed up. You will always have the latest version of the IDE without installing updates or libraries created by the community.
2. If you prefer to work offline, you should use the latest version of IDE on the desktop.
To get detailed instructions for each operating system, go to the next section of the article.
Install Arduino (IDE) software on Windows PC
This section explains how to install Arduino (IDE) software on Windows machines.
Download Arduino software (IDE)
Download the latest Arduino version from the download page. You can choose between the installer (.exe) and Zip packages. You should use the installer, to directly install everything you need when using the Arduino (IDE) software, including drivers. With Zip package, you need to install the driver manually. Zip files are also useful if you want to create a portable installation.
When the download process finishes, proceed with the installation and please allow the driver installation process, when you receive a warning from the operating system.

Please select the components to install.
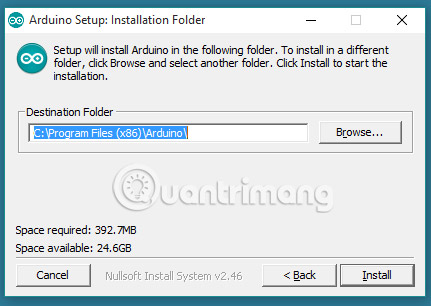
Then, select the installation directory (you should keep the default folder).
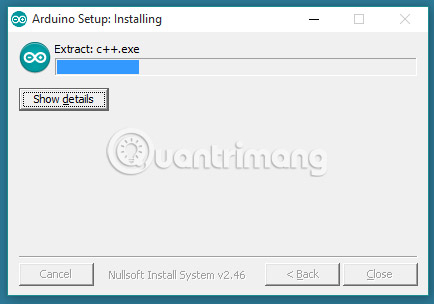
The process will extract and install all the necessary files to properly implement the Arduino (IDE) software.
Install Arduino (IDE) software on OS X
This section explains how to install Arduino software (IDE) on OS X machines.
Download Arduino software (IDE)
Download the latest version from the download page. Downloaded file will be in Zip format; If you use Safari, it will automatically be expanded. If you use a different browser, you may need to extract it manually.
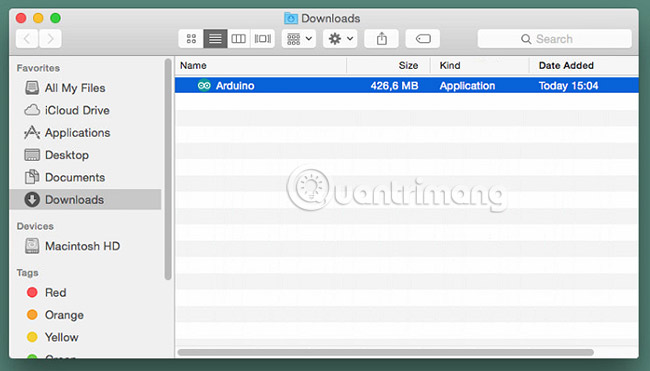
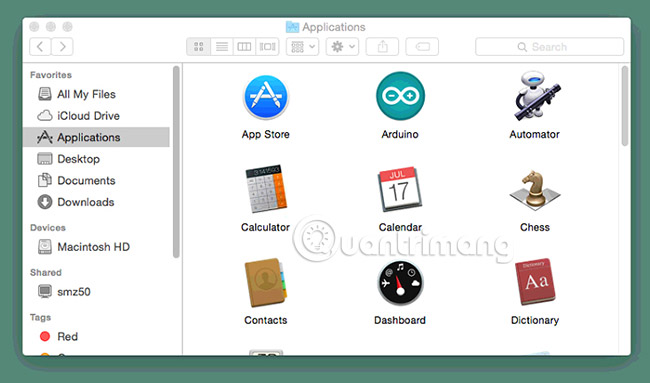
Copy the Arduino application to the Applications folder (or in another location on your computer).
Install Arduino (IDE) software on Linux
This section explains how to install Arduino (IDE) software on Linux machines.
Start fast
The Arduino (IDE) software currently does not require any specific procedures for different distributions of Linux. The only thing to note is that the operating system version is 32-bit or 64-bit.
Download Arduino software (IDE)
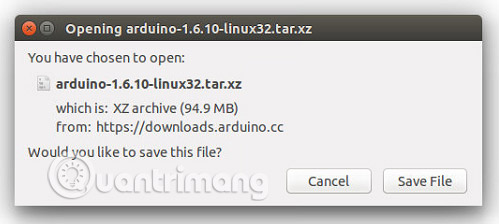
Download the latest version from the download page. You can choose between 32, 64 and ARM versions. It is important that you choose the right version for your Linux distribution. Clicking on the selected version will take you to the donation page and then you can open or save the file. Please save it on your computer.
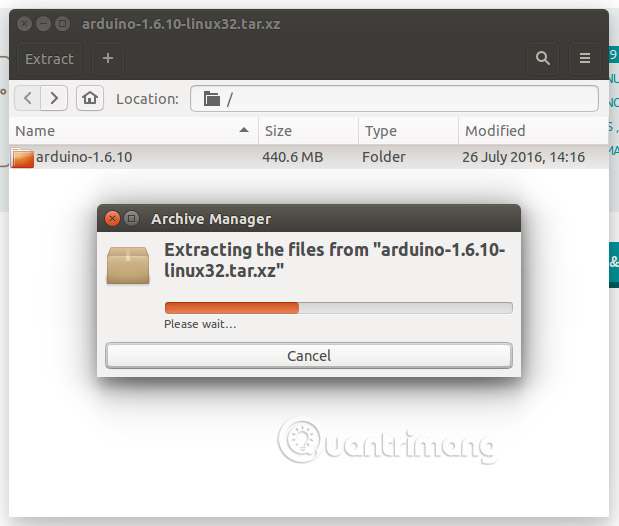
Unpack the package
The files are compressed and you must extract it in an appropriate directory, remembering that it will be executed from that directory.
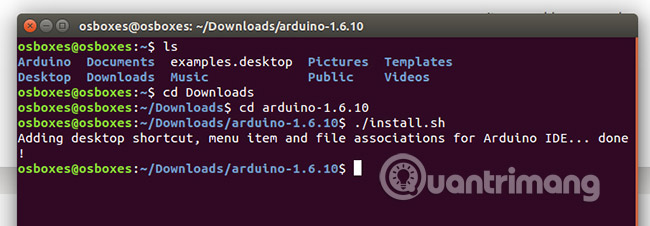
Run the installation script
Open the arduino-1.6.x directory , created only by the extraction process and detect the install.sh file . Right click on it and select Run in Terminal from the context menu. The installation process will quickly end and you will find a new icon on your desktop.
If you do not find the option to run the script from the context menu, you must open the terminal window and switch to the arduino-1.6.x directory . Type the command ./install.sh and wait for the process to finish. You will find a new icon on your desktop.
After you have selected the board and serial port, you may experience an error when opening the serial port. Errors can occur when you upload a sketch. If you get this error, you need to set permissions for the serial port.
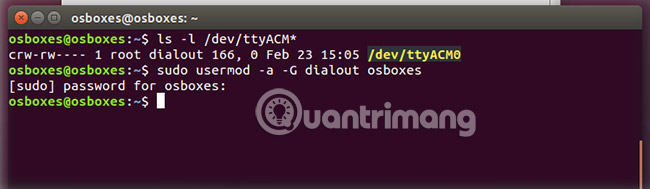
Open the terminal and type:
ls -l / dev / ttyACM *
You will get the following result:
crw-rw ---- 1 root dialout 188, 0 5 apr 23.01 ttyACM0
" 0 " at the end of the ACM may be another number or multiple entries may be returned. The data needed here is "dialout" (the group owner of the file).
Now you only need to add users to the group:
sudo usermod -a -G dialout
In it is your Linux user name. You will need to log out and log back in for this change to take effect.
This is the procedure to access the serial port from Arduino software (IDE) if you get an error.
After this procedure, you will be able to perform other normal operations and upload the sketch on your board or use Serial Monitor.
How to create and use portable version of Arduino software (IDE)
This section explains how to install the Arduino (IDE) portable software on Windows and Linux machines. A portable installation contains all the files and folders needed to get the Arduino (IDE) software to work on the computer, without affecting its files outside the directory, designated for portable installation. dynamic.
Why choose the portable version?
For example, at school, almost all students do not have administrative rights, so they do not have the right to write in some directories. This leads to some problems in using the Arduino (IDE) software, because your options and sketchbook are saved in one of those folders. Using a portable version of the IDE, you can fix this problem.
Another example might be: You want to organize a workshop and you need some additional libraries or a specific core. If the portable version stores sketchbook, library and local hardware folder, all conference participants will have the same starting point, only copy the same folder on all machines. This is also useful if for some reason you don't have an internet connection and want to prepare everything for your project without downloading or being delayed.
Furthermore, a portable installation can be carried out on a single drive, allowing you to bring your own sketches, core and personal library, for use on any computer without affecting Your other files.
How to make Arduino portable on Windows and Linux?
This process is done in a few simple steps. You can use a USB or a local folder on your computer. Once done, with the necessary additional libraries and cores, that folder can be copied on other machines.
Download the compressed version of your Arduino IDE according to your operating system.
After downloading is complete, extract the content stored on the selected unit (local or USB).
Open the extracted folder and in its root directory, create a new folder named portable along with other folders.
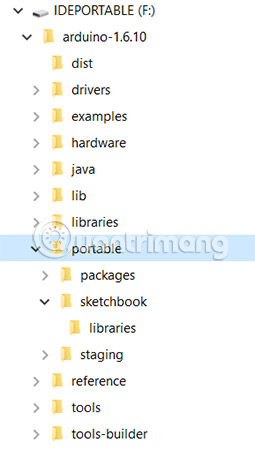
The tree structure will be the same. The portable folder will contain the Arduino software (IDE), when libraries, sketches, and cores need it.
To use this setting, launch Arduino.
From now on all additional sketches, libraries and core will be installed in the portable folder. You can copy the entire home directory and take it wherever you want. It will retain all your options, library, core and sketches.
Note for MacOS / OS X
The installation of the portable version is not officially supported on Apple's Mac OS for many reasons. One of them is related to package signature: Add any content - like additional core, library and sketch - to the package will break this. As a result of Gatekeeper's reaction, it may even prevent the application from starting. This relates to the operating system and is not related to the IDE.
Update the portable installation
If you want to update the portable installation to a newer version, download the new version in a compressed format, then extract the content in a temporary folder. You can now move the "portable" folder you have from the old installation to the new folder, or copy all the new version files to the old folder, and overwrite all the files. Either way, you should end up with the update of the Arduino (IDE) portable software with the core, the library and the sketches preserved. Remember to rename the root directory with the appropriate release version, if needed. You should always start the "Arduino" executable file from within your portable installation directory to use the outline, core and library contained therein. If you are using another installation of Arduino software (IDE) on your computer, that version will not be affected. The libraries and cores that are installed on the machine will not be viewed or used by the portable installation process.
Good luck!
See more:
- 10 great Arduino projects for beginners
- What is Arduino and its applications in life