How to Program Arduino with Raspberry Pi
Running a program on an Arduino is easy, but have you tried doing it with the Pi? The Raspberry Pi is powerful enough to be a standalone computer and also good enough to program microcontrollers.
Table of Contents
Today's example uses a Raspberry Pi 3 Model B+ to make the Arduino Uno blink the LED! The article will divide this tutorial into two parts: How to install the Arduino IDE and how to use the IDE on the Raspberry Pi. While it is possible to program the Arduino through Platformio, it is much simpler to do it this way for newbies.
Why use Raspberry Pi to program Arduino?
Usually, you'll want to do that because:
- You cannot use your PC normally.
- You join it for a learning experience.
But there are many other reasons. In fact, there's a good balance between having a standalone PC and using your Raspberry Pi!
Advantages
- Raspberry Pi uses less power than laptops.
- You can use the backup battery when there is no power.
- Save time when you already use it as an IoT terminal.
Defect
- Excessive heat generation can become a problem for Raspberry Pi if you don't have ventilation.
As such, the Raspberry Pi is good enough if you are working on a quick IoT project in a weekend. Just plug in your sensors, peripherals and Arduino, then enter the code to see if it works with the rest of the system.
But if you're still in the "have to figure out how to make this circuit work" stage, then use a suitable desktop. This will help reduce problems.
Things you will need
- Raspberry Pi with Raspberry Pi OS and USB port
- An Arduino
- One USB Type-A to USB Type-B connector
- Computer peripherals (monitor, keyboard and mouse)
- 250Ω resistor (optional)
- Small LED bulb (any color, optional)
- Breadboard and jumper wire (optional)
Install Arduino IDE
1. Open Chromium (or any browser) and go to https://www.arduino.cc/en/software.
2. Select 'Linux ARM 32 bits' .

3. That will take you to a page that allows you to download and/or donate. You can click 'JUST DOWNLOAD' if you don't want to donate.

4. This will open a new window. You can change the file name at the top and the download location on the left. Save button in the bottom right corner.

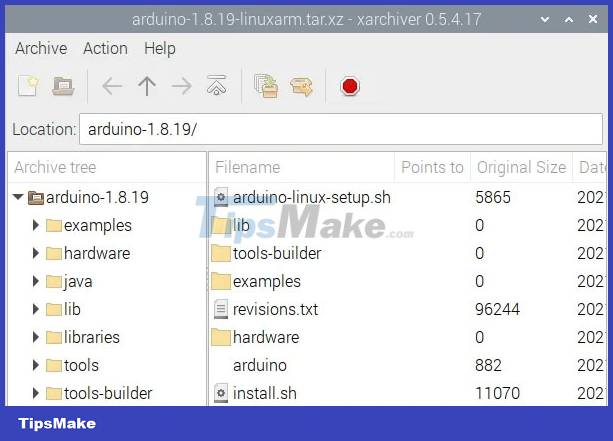
5. You'll find it in the Downloads folder (or whatever folder you choose) when it's finished downloading. Double-click it to run the Archiver application. It may take a few minutes before it opens.

6. Archiver will open your file, but it will take some time to finish reading. There is a circle on the bottom left flashing red and green. Wait for it to complete before doing anything else.
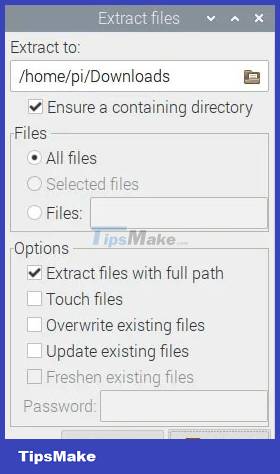
7. Click 'Extract files'. It was the brown box icon, opened with an orange arrow pointing to the right.

8. This will open a new window allowing you to choose some settings. You can change the value of the top text box to point to the 'Downloads' folder. Otherwise it will point to the 'tmp' directory by default. Click 'Extract' at the bottom right to complete the download.
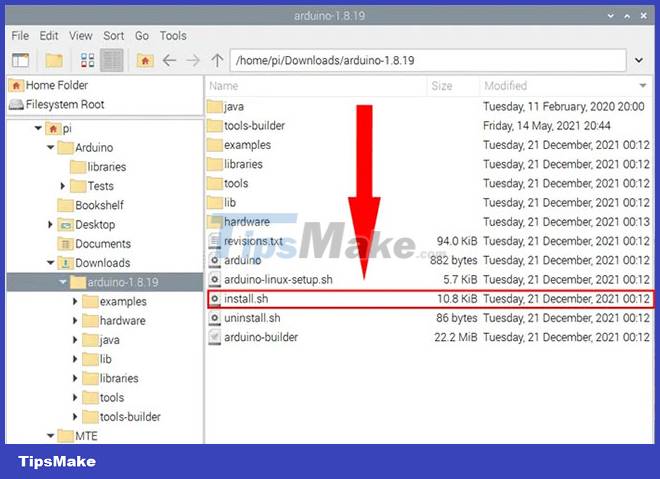
9. Close the Archiver, then go to the new folder and double click the 'install.sh' file.
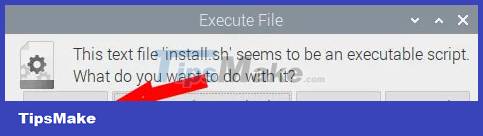
10. Click 'Execute' in the new window.
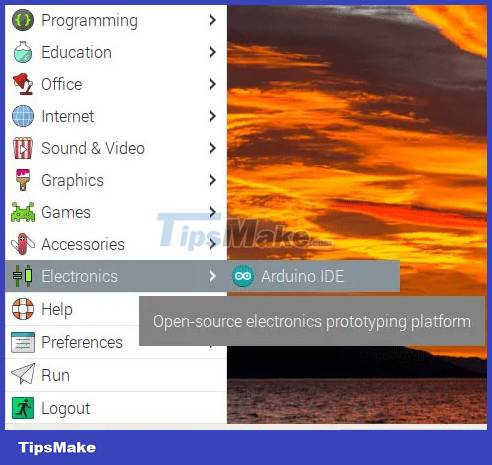
11. Arduino IDE will be available at 'Pi logo > Electronics > Arduino IDE'.
Programming with the Arduino IDE
1. Run the Arduino IDE from the Pi logo. You will find a green window where you can write your code.
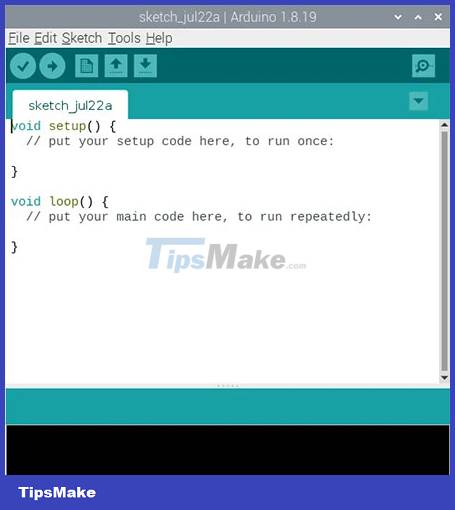
2. Copy and paste the following code:
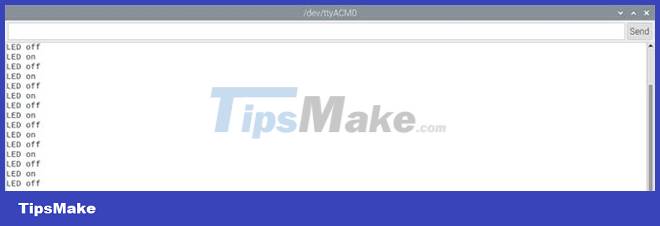
void setup() { // put your setup code here, to run once: Serial.begin(9600); pinMode(LED_BUILTIN, OUTPUT); } void loop() { // put your main code here, to run repeatedly: digitalWrite(LED_BUILTIN, HIGH); delay(500); Serial.println("LED on"); digitalWrite(LED_BUILTIN, LOW); delay(500); Serial.println("LED off"); }The code makes the LED turn on and outputs 'LED on' on the Serial Monitor for 0.5 seconds, then does the opposite, turns the LED off and outputs 'LED off' for the same amount of time.
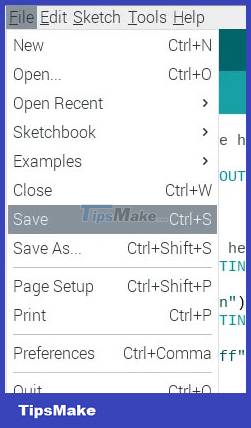
3. To save, click File > Save or press Ctrl + S on your keyboard.
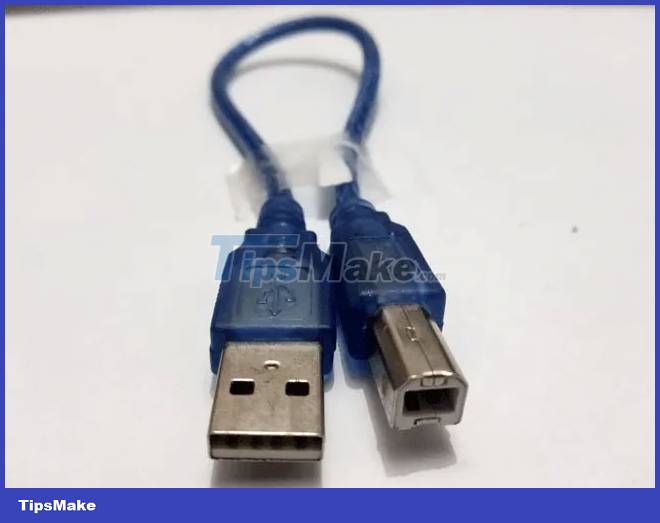
4. Connect the cable. The Arduino Uno uses a USB Type-A to USB Type-B connector. The square edge plugs into the Arduino, while the rectangular edge plugs into the Raspberry Pi.
5. To upload to the Arduino, click Sketch > Upload or press Ctrl + U on your keyboard.

6. When uploading, the TX and RX LEDs will flash briefly, then run your program, which causes the L LED to turn on or off every 0.5 seconds.
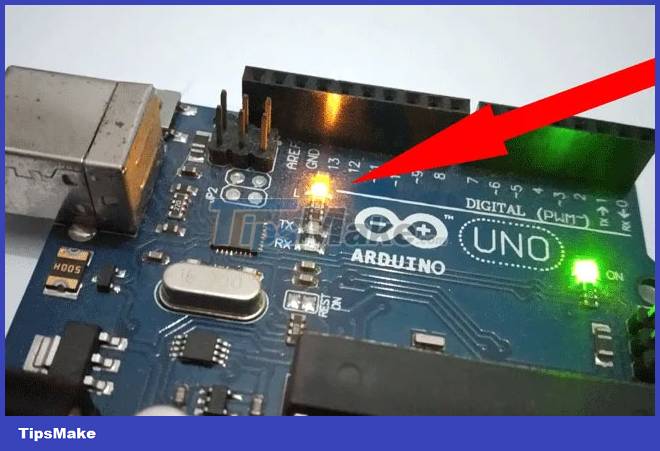
7. To make things a little easier to see, you could try connecting an LED bulb and a 250Ω resistor between D13 and GND. It's easier to do this on a breadboard, and be sure to disconnect the Arduino from the Raspberry Pi before doing anything with the pins.
8. If you do it right, the LED will light up and dim at regular 0.5 second intervals.

9. To access Serial Monitor, click Tools > Serial Monitor or press Ctrl + Shift + M on your keyboard.
Once done, you should be able to start doing things with the Raspberry Pi and Arduino.
Was this article helpful?
Your feedback helps us improve.
Related Articles
 Compare Raspberry Pi and Arduino5 minutes read
 What is Arduino and its applications in life3 minutes read
 How to program Arduino with an Android phone5 minutes read
 How to add an ADC to Raspberry Pi: What you need to know9 minutes read
 How to install and run Arduino IDE on Raspberry Pi4 minutes read
 Synthesis of useful commands to code the Arduino9 minutes read
Reader Comments 0
Sign in with email or Google to join the discussion.