How to Set Up an Arduino Uno
So, you've just bought, or are considering buying, an Arduino Uno kit. Your mind is probably full of questions about how you can get started right away maximizing your experience. Nothing is stopping you from coding the next big thing on....
Part 1 of 4:
Setting Up on Mac OSX
-
 Download and mount the latest Arduino package.
 -
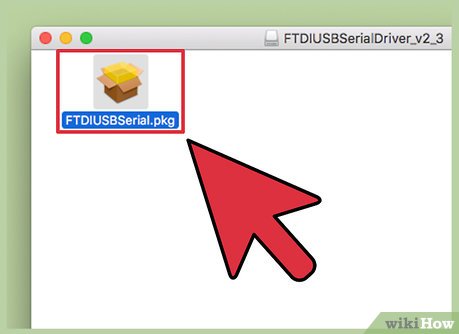 Run the FTDIUSB Serial driver included.
 -
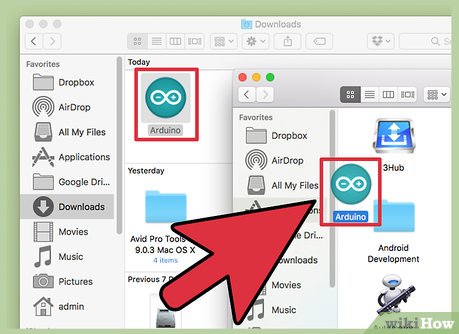 Once that is complete, drag the application to your applications folder. You will have to restart your device to activate the new drivers.
 -
 Connect the Arduino. The first time you connect the Arduino, OSX will tell you that it has detected a new interface. Simply click on 'Network Preferences' and then click 'Apply.'
Part 2 of 4:
Setting Up on Windows 7
-
 Begin by downloading the latest version of the Arduino package and unzipping it. It may be around an 80MB download, fully expanded to 230MB, so depending on your internet connection you may want to grab a coffee.
 -
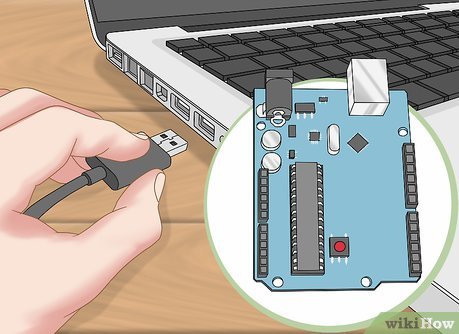
 Plug the Arduino into your PC with the included USB cable. Close any pop-up windows and decline any search for drivers through Windows' tool.
 -
 Click on 'Start,' and then type devmgmt.msc. Press ↵ Enter and the Device Manager panel should open.
 -
 Find the 'Other devices' section. You should see an Arduino Uno on the list, with one of those yellow "problem" indications. Double-click on that, select 'Update Drivers' and then select 'Browse my computer for driver software.'
 -
 Select 'Let me choose a Driver,' click on 'All Devices', 'Have Disk,' and then go to the 'Downloads' folder. In the drivers folder, you should see an Arduino Uno file. Select that. The driver installation process will deem it a "communications port" and report a "mistake unsigned driver" when installing. Ignore that, proceeding with the installation anyway.
Part 3 of 4:
Configuring the Board and Port
-
 Launch the Arduino application from either the 'Download' folder or the 'Applications' folder.
 -
 Set up the port and board. On either system, you may have a tools menu. Click that and ensure a matching board is chosen. The Uno is the default and may already be highlighted in your installation. Ensure the serial port is chosen correctly, too
- On a Mac, the port names are a bit more confusing, but it will be one of the listed USB ports. Perhaps it will be listed as cu-USB.
Part 4 of 4:
Run Your First Application
-
 Click 'Open,' and from the dialog select the example application: Basics -> Blink.
 -
 Test the setup. To ensure that the board is working and is connected correctly, go ahead and click 'Upload.'
- After a short moment compiling the application, some orange lights that are labeled TX / RX on the Arduino will begin flashing. This means that data is being transmitted or received. When the process is done, the code will be run immediately.
-
 Start experimenting. That is as far as this tutorial will take you. You've now set up your Arduino and figured out how to upload apps to it, confirming that it works properly.