Instructions on how to create automatic table of contents in word 2007
Automatic table of contents creation in Word 2007 can save time and effort not only for the person who created the document, but also for the readers of the document to have the most overview of the text.
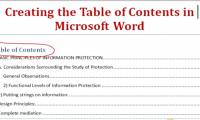
Table of Contents
Are you making an internship report, dissertation, graduation thesis or simply a long piece of text? Creating a table of contents will help you look at the main content of the paragraph. To save time for you when working with Word, as well as the desire to provide people with additional useful lessons on office computing, TipsMake will reveal more for you one more simple way to create. Automatic table of contents in Word.
Automatic table of contents can save time and effort not only for the person who created the text, but also for the readers of the text to get a better overview of the text. For a hundred-page report, essay, when we need to edit the content or the headline, the layout of the article, you will not have to edit the table of contents anymore. Because the automatic indexing function of Word helps you do this. When you want to open any item in the document, it only takes one simple operation with an automatic table of contents: hold down Ctrl + left click, you will reach the page you want.
In the previous article, we showed you how to make an automatic table of contents by adding a level, or selecting the Heading tab. However, a lot of you have trouble when the change of font format, font size and color is changed unlike your ideas, right? Therefore, today I will guide you to make a quick and automatic table of contents and save time for your future documents as well.
Before creating the table of contents, please add page numbers for the entire document.
I. Step 1: Create typefaces corresponding to each heading
First, to create a table of contents automatically, you must create typefaces corresponding to each heading, title as you like.
1. Open the Word file you want to create the table of contents automatically, and then follow these steps:
2. On the toolbar, in the Home tab, in Styles, click the arrow in the bottom right corner of the Styles section (as shown below).

3. The Styles dialog box appears, click the Create a New Style Icon (as shown in the picture), the Create New Style from Fomarting panel pops up. At this table, you can set the font styles, fonts for the headings at your own discretion.

* In this table, you need to note the following options:
+ Name: Give a name to your typeface. Make it easy to remember (Example: I name the headings T1, T2, T3, T4. T is the first letter of my name. 1,2,3,4 are the headings divided from big to small) )
+ Style for following paragraph: The font you just named depends on the paragraph. (Example: You are creating type T2 (Level 2), you want in the table of contents the small headings will automatically indent 1 less than the larger table of contents, in this box, fill in T1, which means that T2 is in T1 If you want the items to be on the left margin of the text, enter the name of the font you are creating.)
+ Fomatting: Here you can set the font format, font size, font color . as you like.
+ Add to Quick Style list: you should tick here to make your typeface appear in the Styles section of the Home tab
+ Automatically update: When you edit the format of 1 item in the font you've just created, Word will automatically edit the format of all items in that font style.
+ Only in this document: If you check here, the font that you choose will only display in this document.
+ New documents based on this template: (Should choose) the font you just created will be fixed in the Styles section. This is handy when you want to create a table of contents for another document.
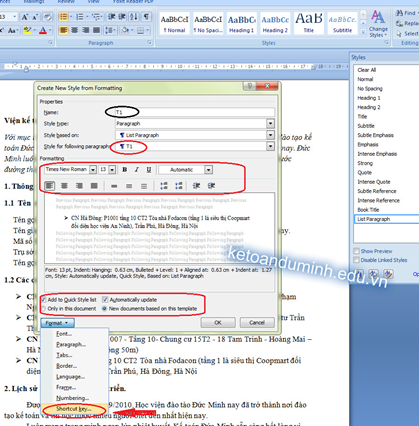
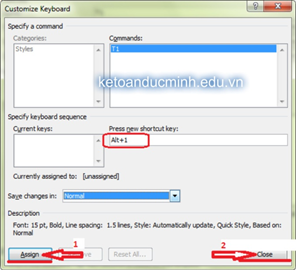
In the Fomat box, you can also edit Font, Paragraph format as usual. Also, I will just add 1 tip so you can save more time. Click on the Shortcut key to create a shortcut for the type. Remember, the shortcut you choose cannot match the default shortcut of the computer. I usually choose Alt + lever number (Example: type T1 and Alt + 1) Then click on Assign to complete the shortcut, then OK.
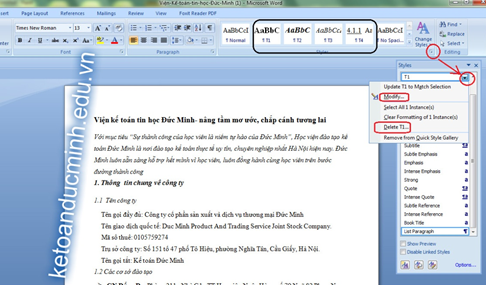
Once completed, you look at the toolbar at the Home tab will see the font that you have just created.
After creating, if you need to edit the style, just right-click on the font on the toolbar, select Modify, or in the Styles dialog box select the style to edit, right-click and select Modify.
With the remaining levels and typefaces, you can do the same as above. You calculate how many levels you need to create in the lesson.
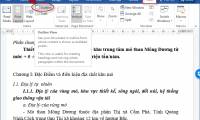
II. Step 2: Assign styles to the corresponding headings.
This stage is quite simple because I previously created shortcuts for styles. You just need to put the mouse in the position of each title and then press the shortcut key.
III. Step 3: Create an automatic table of contents
Click on the position you want to put the table of contents (should create a blank page at the position of table of contents)
- At References tab, select Table of Contents à Insert Table of Contents. The dialog box appears, you choose the following: At the Show level, you enter the number of Styles you have created above. Then click on Options.

- In this dialog box, you delete the numbers 1,2,3 . in the Heading section, scroll down to find the font style you've just found and then enter the numbers 1,2,3 . and OK

So you've created the table of contents automatically.
IV. Step 4: Update the table of contents editing
- Edit: You can edit font format, table of contents as usual as you like. And the result after editing is as follows:
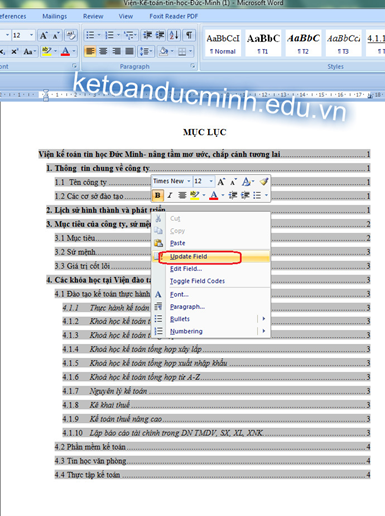
- Update: In the table of contents just created, right-click, select Update Field to update the table of contents. Now every time you change the content in the article, you just need to update the table of contents is done.
+ Update page numbers only: (Only update the page number) If you just edit the content of the text without changing the headings, then tick this box.
+ Update entire table: If you add or remove directories, then check this box to update the entire table of contents.

Was this article helpful?
Your feedback helps us improve.
Related Articles
 How to create an automatic table of contents in Word 2019/2016/2010/200710 minutes read
 Create automatic table of contents in Word 20038 minutes read
 Create automatic table of contents in Word for Word 2007, Word 2010 to Word 20195 minutes read
 Instructions on how to create automatic table of contents in Word quickly 20205 minutes read
 How to create automatic table of contents in Word 20164 minutes read
 Instructions for creating a table of contents in word 2007 and above and word 2003 fastest11 minutes read
Reader Comments 0
Sign in with email or Google to join the discussion.