Added the option to Defragment to the menu when right-clicking on a drive on Windows
On modern versions of Windows, defragmentation is done regularly. But however if you perform manual defragmentation will be more effective.
If you are using Windows versions from Windows Vista to Windows 10, you do not need to defragment the drive manually anymore. This is especially true if you are using a Solid State Drive (SSD - Windows will automatically defragment the drive (if needed) once a week by default at 1:00 am Wednesday. (And it's smart enough to defragment all SSDs).
However, this process requires you to open the computer at the right time or at least have to turn on the computer when in Sleep mode (sleep mode) so that defragmentation takes place. If at that time you turn off your computer because you are not using it, then you will have to manually manipulate the disk defragmentation.
Instead of digging through the tools to do that, why don't you add a defragment command (Defragment command) to the context menu, when right-clicking a drive in File Explorer?

Added the option to Defragment to the menu when right-clicking on a drive on Windows
1. Edit the Registry manually
To add the Defragment command to the right-click menu, you must manipulate it by editing the Windows Registry.
Note:
Registry Editor is a powerful tool that affects your system. Therefore, you should back up the Registry Editor to prevent a bad situation when editing the Registry Editor .
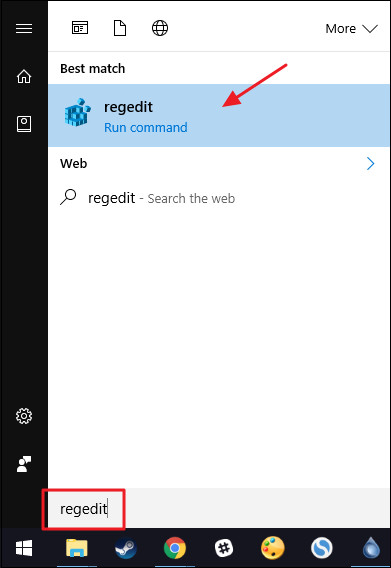
First open the Registry Editor by entering regedit in the Search box on the Start Menu and then press Enter . If the UAC window appears, click Yes to allow changing your computer.
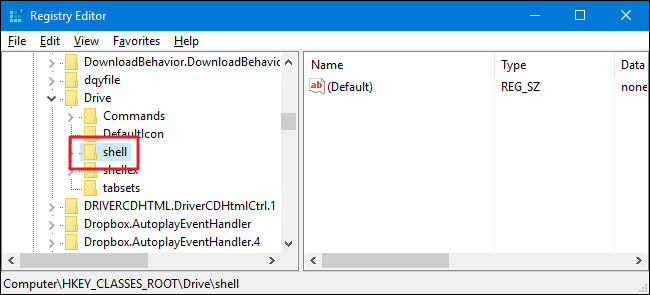
On the Registry Editor window, in the left pane you navigate to the key:
HKEY_CLASSES_ROOTDriveshell
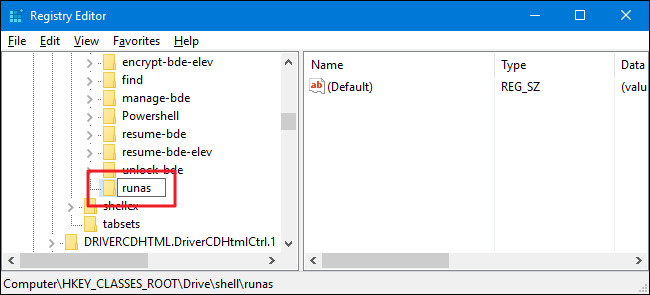
The next step is to create a new key in the Shell key. To do this, right-click the Shell key , then select New => Key . Name this new key " runas ".
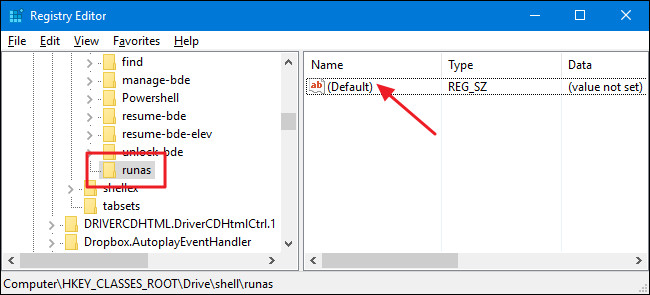
Next, change the value in the new runas key. With the runas key selected, double-click the key to open the Properties window.
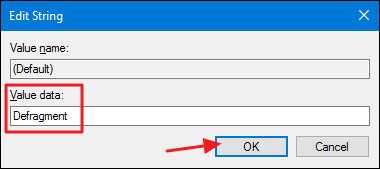
On the Properties window, set the value in the Value data box to Defragment and then click OK . This is to display the Defragment command on the context menu.
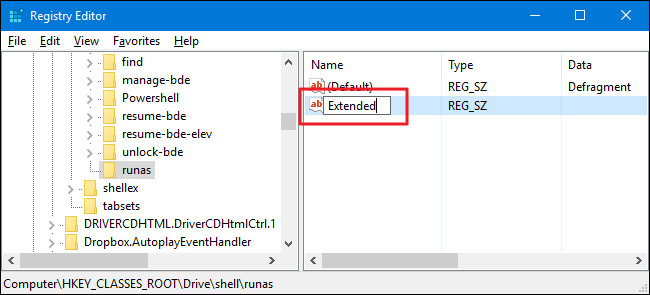
You can also set the Defragment command to display only if you press the Shift key while right-clicking on a drive on the system, similar to the way the Open Command Prompt command is hidden unless you press Shift + click. must go to a certain directory.
To do this, right-click the runas key then select New => String Value . Name this new value Extended . And you don't need to make any changes.
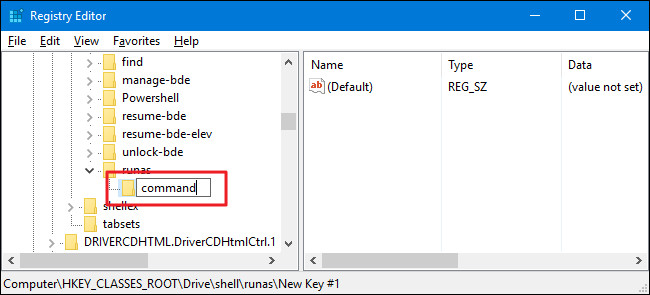
The next step is to create a new key in the runas key. Right-click the runas key and select New => Key . Name this new key as command .
Change the default value in the Command key by double-clicking the key to open the Properties window.
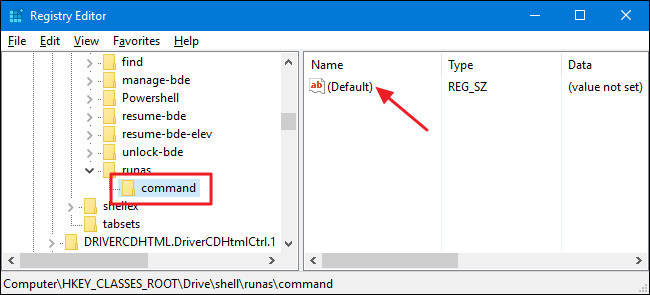
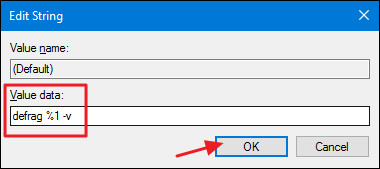
Enter the following command into the Value data box and then click OK :
defrag% 1 –v
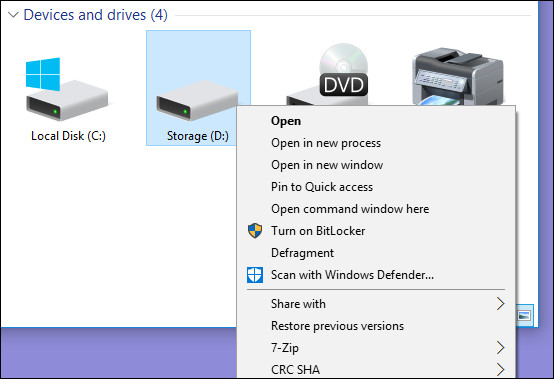
Finally close the Registry Editor window and check by right-clicking (or pressing Shift + right-click if you set this option) on any drive on the system and the Defragment command will display on the menu. scene.
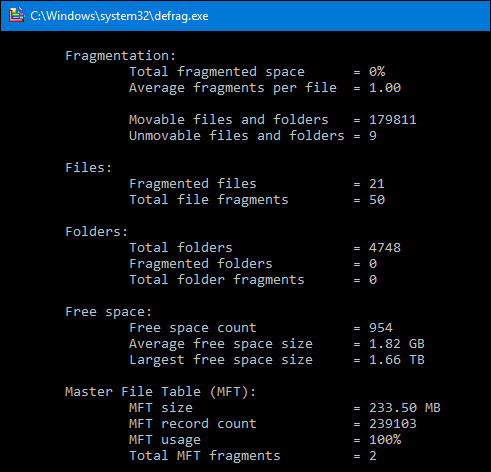
When you run the command, you will see the Command Prompt window appear with the results shown below.
If you want to change the default settings first, simply access the Registry and delete the runas key you created.
2. Use the built-in Registry
If you don't want to edit the Registry manually, you can use the built-in Registry to add the option to Defragment to the menu when right-clicking on a Windows drive.
Download Defrag Context Menu Hacks on your device and install.
Download Defrag Context Menu Hacks on your device and install here.
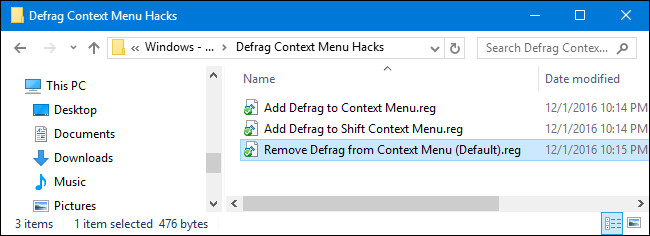
Next proceed to extract Defrag file Context Menu Hacks that you download. Now you will see 3 files that Add Defrag to Context Menu to add Defragment command to normal context menu, file ' Add Defrag to Shift Context Menu ' to add defragment command to context menu when you use Shift + click right mouse, and ' Remove Defrag from Context Menu ' file to delete the Defragment command you added.
Refer to some of the following articles:
- Troubleshooting System Restore does not work on Windows 10/8/7
- When and how to defragment hard drives on Windows 10?
- How to speed up the process of copying and moving data on USB drives
Good luck!