Add Recovery Console to the boot menu on Windows XP
When there is a problem with Windows on the computer, you often use the Windows CD and Recovery Console built-in disk to solve the problem ....
TipsMake.com - When there is a problem with Windows on your computer, you often use the Windows CD and the Recovery Console built-in to solve the problem. So what happens when you don't always carry a disk or accidentally lose a disc? Simply install the Recovery Console on your device and make it work as an option during Windows XP startup.
Install Recovery Console
First, you need to insert the Windows XP CD into the disk drive. It is important that the Windows XP version on this CD is similar to the Windows you are using.
Go to Start -> Run and enter the following command, in which E: corresponds to the CD drive:
E: i386winnt32.exe / cmdcons

You will see a dialog box asking to confirm whether you really want to install the Recovery Console, click Yes

The installation process will take a few minutes

And finally, the dialog box informs the installation process was successful

Access to Recovery Console
After you have successfully installed Recovery Console on your computer, restart your computer and you will notice the difference on the boot screen:
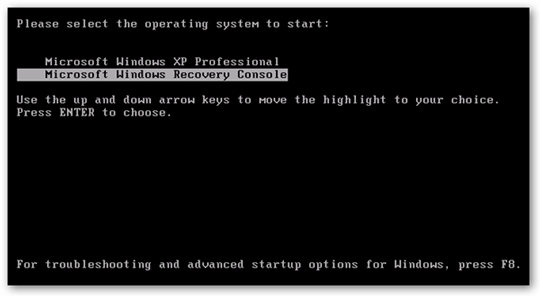
When the recovery process is loaded, it will ask you to choose which installation you want to log into. You can enter the corresponding number, in this case 1 and then the message will be entered into the administrator account password

Change the wait time of the boot menu
After installing this feature, you will usually receive a notification waiting for 30 seconds at the start menu. If you want to change this time period, when you are in Windows, right-click My Computer and select Properties or press the hot key Win + Break.
At the Advanced tab, click the Settings button in the Startup and Recovery section :

Change the timeout value as you wish:
