Instructions to bring Safe Mode to the standard Boot Menu on Windows 8 and 10
In case your Windows computer has a problem, you may have to boot the system in Safe Mode to fix the problem. However, not all users know how to boot in Safe Mode. So putting Safe Mode in the Start Menu makes it easier and faster to access and troubleshoot.
Table of Contents
In case your Windows computer has a problem, you may have to boot the system in Safe Mode to fix the problem.
1. What is Boot Entry?
Boot entry is just a file that contains parameters that determine how to boot the operating system. When you install Windows, the boot entry will create a standard boot menu and load every time you open your Windows computer.
When you add startup items, Windows will display the Menu with the boot options for you to choose to boot the system.
In case your Windows computer has a problem, you may have to boot the system in Safe Mode to fix the problem. However, not all users know how to boot in Safe Mode. So putting Safe Mode in the Start Menu makes it easier and faster to access and troubleshoot.
In the following article, Network Administrator will guide you how to put Safe Mode in the Boot Menu on Windows 8 and 10.
2. Instructions to bring Safe Mode to the Boot Menu on Windows 8 and 10
Step 1: Add Safe Mode to the boot menu with Command Prompt
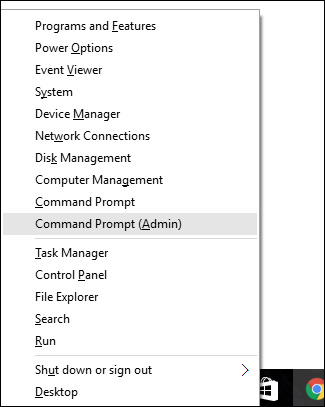
Press Windows + X key combination to open the Administrative menu. At this menu, click Command Prompt (Admin) .
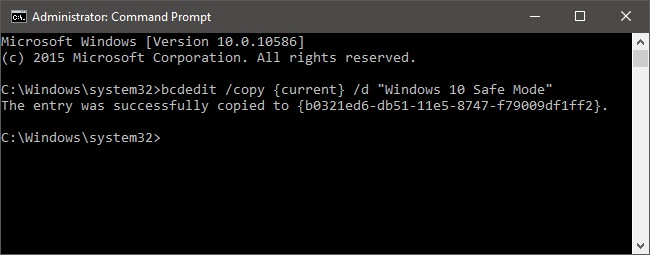
At this time, the Command Prompt window appears and enter the following command line into the window:
bcdedit / copy {current} / d "Windows 10 Safe Mode"
If you wish, you can create a Safe Mode launch item using Network (network) using the command:
bcdedit / copy {current} / d "Safe Mode with Networking"
Create an entry that starts Safe Mode with Command Prompt using the command:
bcdedit / copy {current} / d "Safe Mode with Command Prompt"
Step 2: Configure new boot options using the System Configuration Tool
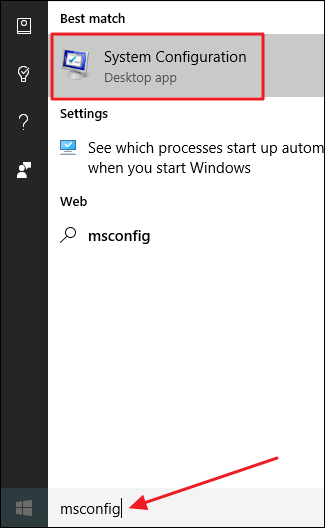
On the Start search box, enter the keyword msconfig and then click Systemm Configuration.
On the System Configuration window, you switch to the Boot tab. Here you will see the default operating system, including new options that you have just created.
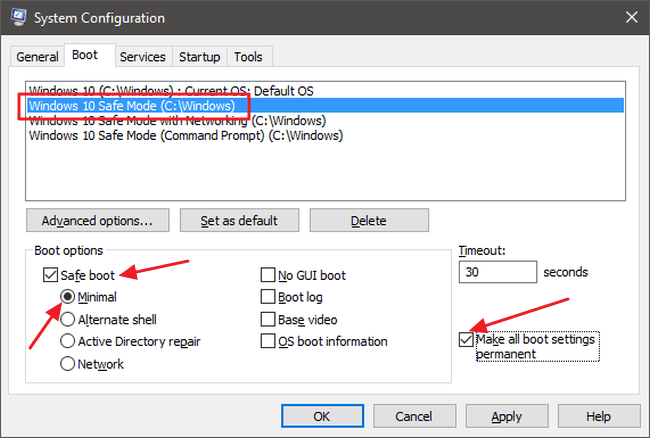
Click on the new Windows 10 Safe Mode option you created (or the option name you have set). Activate the Safe boot option by checking the checkbox, then select Minimal.
Next, check the option Make all boot settings permanent.
Alternatively, if you want, you can edit the Timeout value (the default time interval option for the operating system to boot). By default, Timeout is set to 30 seconds, but you can change any other value from 0 to 9999 seconds.
You can also set the value to -1 if you want to display the Boot Options screen until you access the operating system.
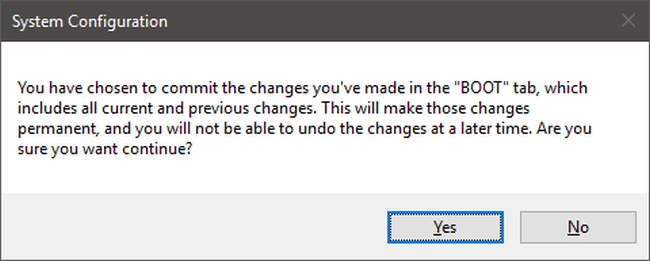
After setting the options, click OK .
At this time on the screen you will receive a notification confirming the change. Click Yes to confirm.
When you are asked to restart the computer, select Exit without restart . This way you can configure any other startup entry.
If you create Safe Mode with Networking, just follow those instructions to edit, but after activating "Safe boot", select Network option instead of selecting Minimal .
If you create Safe Mode with Command Prompt, activate the Alternate Shell option instead of the Minimal option .
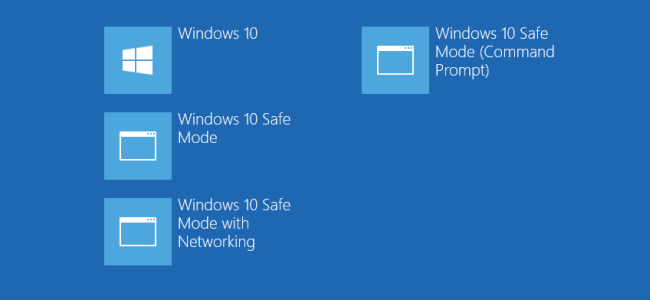
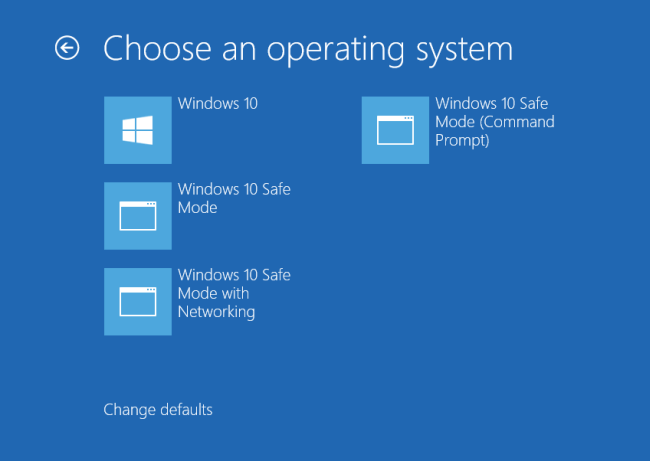
After the configuration is complete, you can proceed to restart the computer and check. During the boot process you will see the Choose an operating system interface.
3. How to remove the Safe Mode option on the Boot Menu?
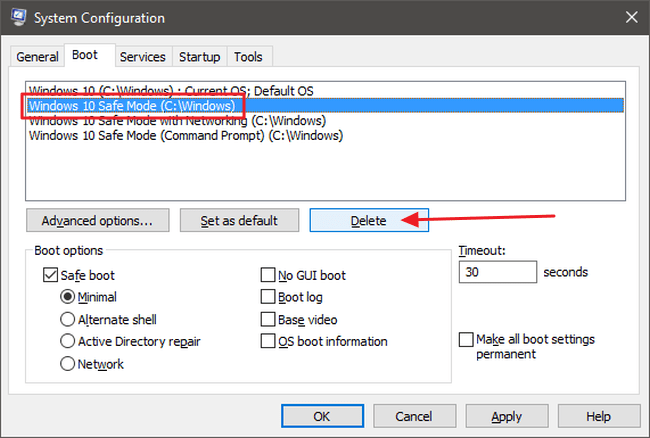
If you want, you can remove the Safe Mode option on the Start Menu.
On the Start Menu, enter the msconfig keyword in the Search box to run the System Configuration tool. Then select the boot options you created and click Delete.
Refer to some of the following articles:
-
Start Windows 7, 8, 10 in Safe Mode without F8 key
-
How to start Windows 10 in Safe Mode
-
How to use Command Prompt to manage wireless networks on Windows 10?
Good luck!
Was this article helpful?
Your feedback helps us improve.
Related Articles
 Put Safe Mode in the standard boot menu of Windows XP4 minutes read
 All problems with starting Windows in Safe Mode7 minutes read
 Instructions for setting F8 key to start Windows 8 in Safe Mode2 minutes read
 Start Safe Mode on Windows XP3 minutes read
 How to boot into Safe Mode on Mac3 minutes read
 How is Windows Safe Mode and Clean Boot different?6 minutes read
Reader Comments 0
Sign in with email or Google to join the discussion.