Table of Contents
This guide provides a clear overview of change user account picture on windows 11, including Method 1. Instructions to Change the User Picture on a Local Account, Method 2. Instructions to Change the User Picture on Microsoft Account. Use it to understand the topic, compare the available options, and make a more informed decision.
Method 1. Instructions to Change the User Picture on a Local Account
- When you use Windows without signing in with your Microsoft account, it means you are using it on a local account.
- 1. Quick Guide
- Step 1: Press the Windows + I key combination to open the Settings software. Step 2: Select the Accounts tab => Your info. Step 3: Select Open Camera or Browse files to take or choose a new photo.
2. Detailed instructions Step 1: Press the Windows + I key combination to open the Settings software.

Step 2: Go to the Accounts tab => click Your info.
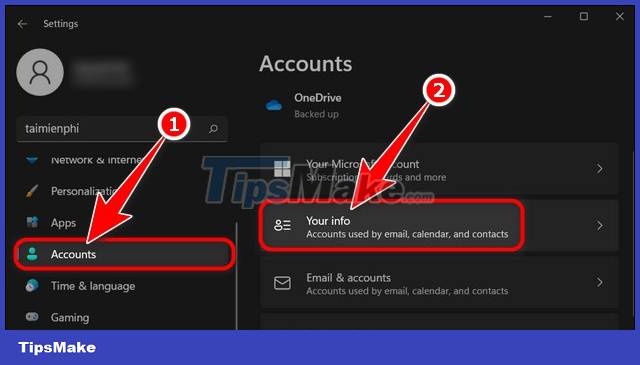
Step 3: Click Browse files to select an image on your device. - Alternatively: To take a new photo, you can select Open Camera.
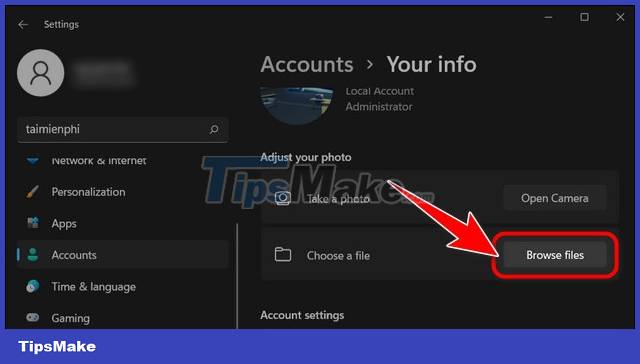
Step 4: Select the image you want and click Choose file.
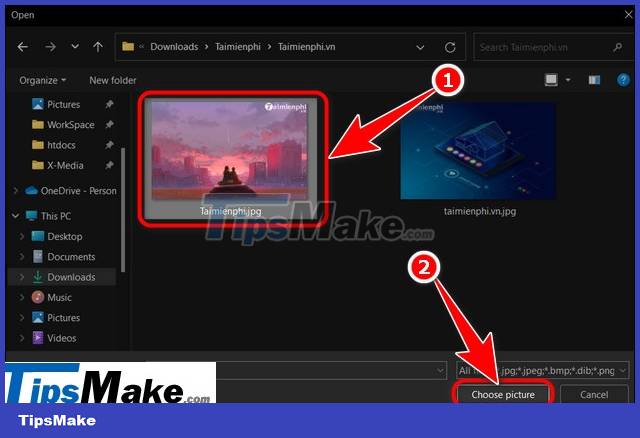
Method 2. Instructions to Change the User Picture on Microsoft Account
- If you are signed in with a Microsoft account on Windows, the profile picture of your Microsoft Account will also be the picture on Windows. As such, you can also change your Windows account picture through your Microsoft account.
- 1. Quick Guide
- Step 1: Access your personal page on Microsoft Step 2: Select Add a photo => Add a photo. Step 3: Select the image => click Open => click Save
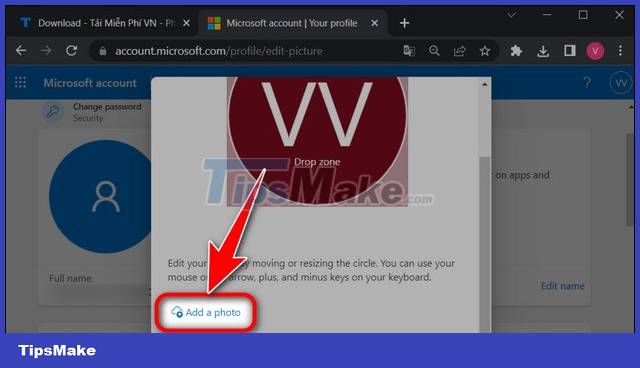
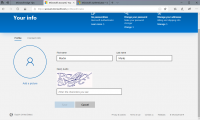
2. Detailed instructions Step 1: Open your Web browser and visit your personal information page on Microsoft HERE. Step 2: Click Add a photo.
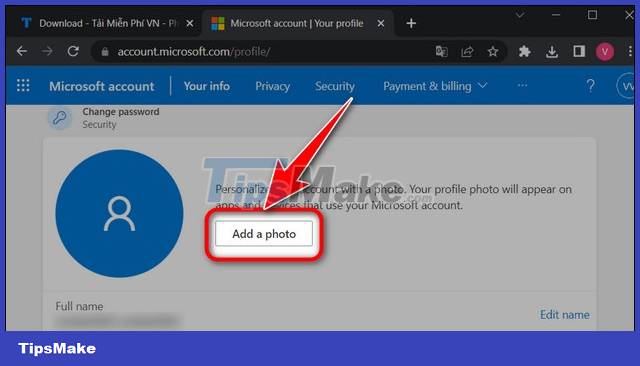
Step 3: Select the Add a photo option.
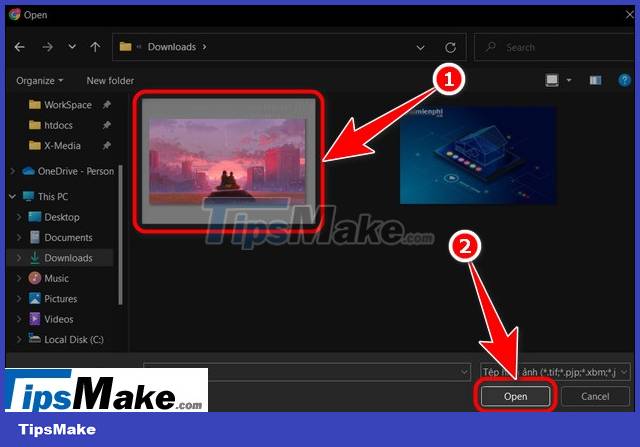
Step 4: Select your favorite image => Click Open.
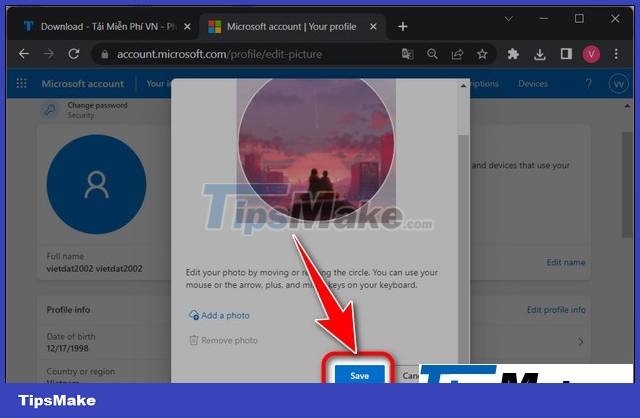
Step 5: Edit photos => Click Save to complete.
Method 3. Instructions to Change the Account Image in User Accounts Pictures
- 1. Quick Guide
- Step 1: Download or capture a new image. Step 2: Create 5 copies with sizes 32x32, 40x40, 48x48, 192x192, 448x448 respectively Step 3: Open File Explorer, access the path C:/ProgramData/Microsoft/User Account Pictures => Paste 5 images just created. Replace and rename according to 5 images available in the folder.
2. Detailed Instructions Step 1: Download or take a new photo that you love. Step 2: Create 5 copies with the name and size changed as follows: - user-32.png - 32 x 32 - user-40.png - 40 x 40 - user-48.png - 48 x 48 - user -192.png - 192 x 192 - user.png - 448 x 448
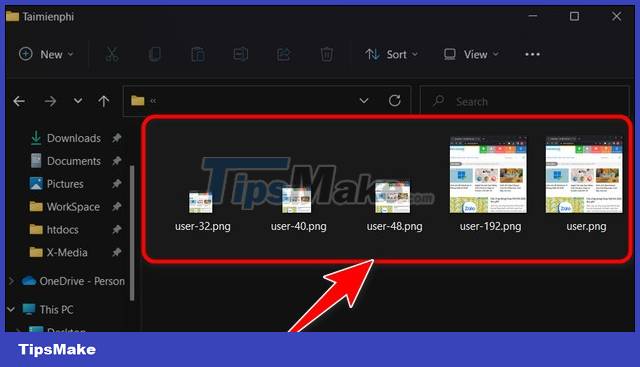
Step 3: Press Windows + E key combination to open File Explorer. Then access the User Accounts Pictures folder under the path: C:/ProgramData/Microsoft/User Account Pictures.
- Note: Some versions of Windows the last folder will be named Default Account Pictures.
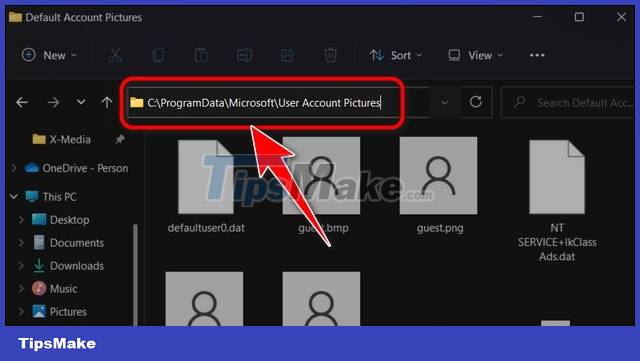
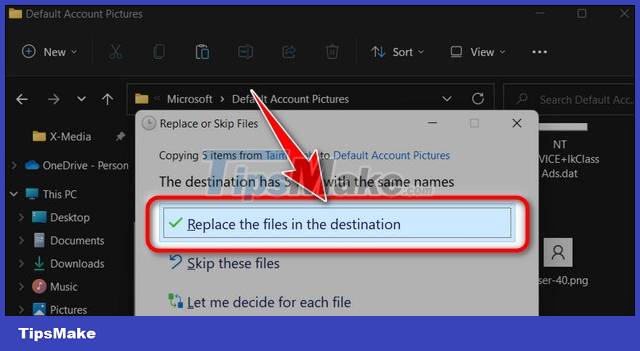
Step 4: Paste the 5 newly created images, select Replace the files in destination to replace the 5 default images here.
Step 5: Restart the computer to complete. - After doing 1 of the 3 ways above, you will get the result as shown below.
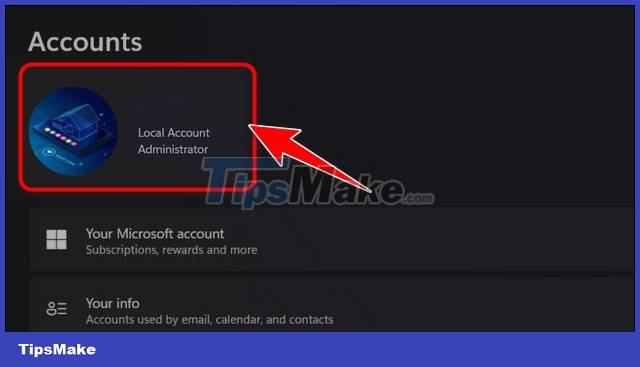
A beautiful photo as a user avatar on Windows 11 will make your computer more beautiful and personalized. For more personalization, you can also install the latest HTKK for Windows 11 for a new experience, especially on Windows 11
Conclusion
Understanding Change User Account Picture on Windows 11 makes it easier to compare options, avoid common mistakes, and apply the information in this guide more effectively. Review the relevant requirements before making changes or choosing a solution.
FAQ
What is Change User Account Picture on Windows 11?
Instructions to Change the User Picture on a Local Account - When you use Windows without signing in with your Microsoft account, it means you are using it on a local account.
Why is Change User Account Picture on Windows 11 important?
Understanding Change User Account Picture on Windows 11 helps you evaluate features, compatibility, performance, and potential limitations before you choose a product or follow a procedure.
What should you consider when using or choosing Change User Account Picture on Windows 11?
Consider your specific goal, compatibility requirements, available features, cost, security, and the practical recommendations described in this guide.
Related Articles
 How to Change User Account Picture in Windows 119 minutes read
 Click: How to Change a User Account Picture in Windows 104 minutes read
 Click: How to Change Your Profile Picture on a Mac Computer4 minutes read
 How to Change Your Account Picture, Avatar, Avatar on Windows 102 minutes read
 How to Delete Account Pictures in Windows 85 minutes read
 How to Change User Account Name in Windows 103 minutes read
Reader Comments 0
Sign in with email or Google to join the discussion.