How to apply the default account image to all users in Windows 10
When adding an account to Windows 10, the default account image will be used as the account's image by default until users change their account images or when their Microsoft account images sync.
If you like, you can normalize your account photos for all users on your PC to default account images and prevent users from being able to change their account photos later.
Note : You must be logged in as an administrator to apply the default account image to all users.
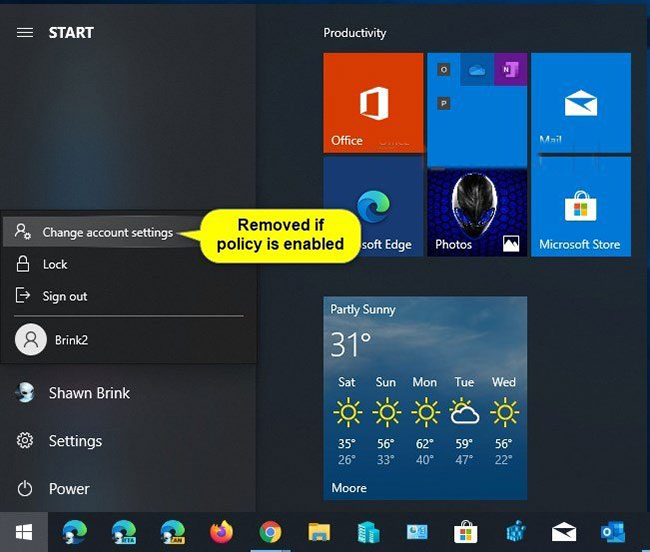
If you enable this policy to apply the default account image to all users, it will remove the Change account settings link from the user icon in the Start menu as shown below. You can still access these settings via Settings> Accounts> Your info .

Method 1: Apply the default account image to all users using Group Policy
Local Group Policy Editor is only available in Windows 10 Pro, Enterprise and Education editions.
All versions can use option 2 below.
1. Open Local Group Policy Editor .
2. In the left panel of the Local Group Policy Editor, navigate to the location below.
Computer ConfigurationAdministrative TemplatesControl PanelUser Accounts 
3. In the User Accounts panel to the right of the Local Group Policy Editor , double-click the Apply the default account picture to all users policy to edit it.
4. Follow step 5 (to turn off) or step 6 (to turn on) below for what you want to do.
5. To disable the default application of account images for all users, select Not Configured or Disabled , click OK and go to step 7 below.
6. To enable the application of the default account image for all users, select Enabled and click OK.
If you like, change the default account picture to the custom photo you want to apply to all users.
7. When done, close Local Group Policy Editor .

8. Restart the computer to apply the changes.
Method 2: Apply the default account image to all users with the REG file
The downloadable .reg files below will add and modify the DWORD value in the following registry key:
HKEY_LOCAL_MACHINESOFTWAREMicrosoftWindowsCurrentVersionPoliciesExplorer 1. Follow step 2 (to turn on) or step 3 (to turn off) below for what you want to do.
2. To enable the application of the default account image for all users:
A) If you like, change the default account picture to the custom photo you want to apply to all users.
B) Download this file and go to step 4 below.
3. To disable the feature of applying the default account image to all users, download this file and go to step 4 below.
4. Save the .reg file to the desktop.
5. Double click on the downloaded .reg file to merge it.
6. When prompted, click Run> Yes (UAC)> Yes> OK to approve the merge.
7. If you like, you can now delete the downloaded .reg file.
8. Restart the computer to apply the changes.
You should read it
- ★ How to Change a User Account Picture in Windows 10
- ★ 3 How to change the user account picture on Windows 11
- ★ How to see Instagram account profile picture
- ★ How to turn on Picture in Picture on Edge is extremely simple
- ★ Chrome on Linux, Mac and Windows will have the default Picture-in-Picture mode