Add a tree diagram (Smart Art) to a Slide in PowerPoint
The following article introduces you in detail how to add a tree diagram (Smart Art) to Slide in PowerPoint.
1. Create a tree diagram.
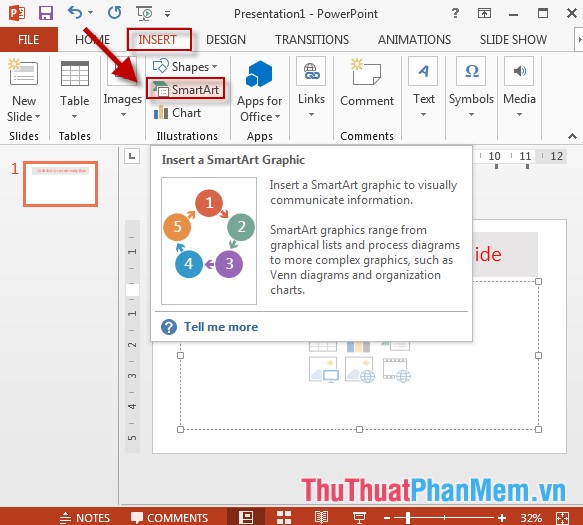
Step 1: Go to the Insert tab -> SmartArt:
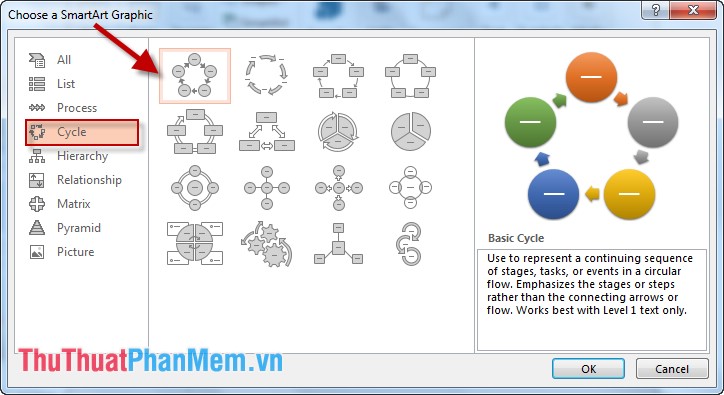
Step 2: The dialog box appears select the type of tree diagram you want to create -> click OK:
Step 3: After creating the chart, enter the content for the diagram you want to create:

2. Edit the diagram.
- To change the chart display type click the diagram -> Design -> Change Layout -> select the chart type you want to change:

- To change the color of the chart, click Change Color:

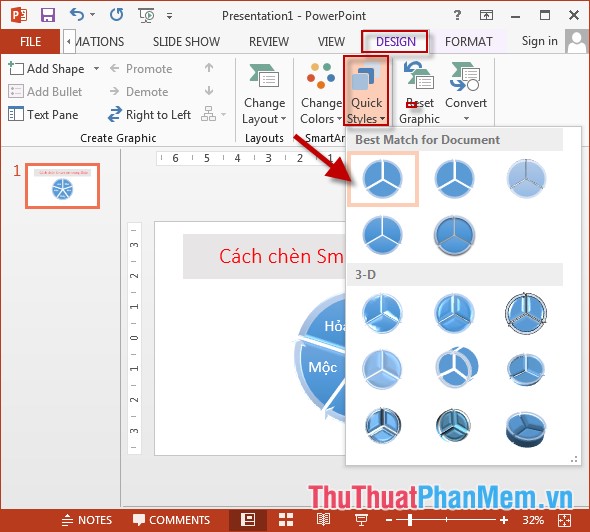
- To change the style of the diagram, click Change Styles -> select the Style that matches your chart:
- In addition, you can adjust colors, borders and effects for each component in the diagram by clicking the icons:
+ Shape Fill: Create colors for elements in the chart.
+ Shape Outline: Create color borders for elements in the chart.
+ Shape Effect: Create effects for elements in the chart.
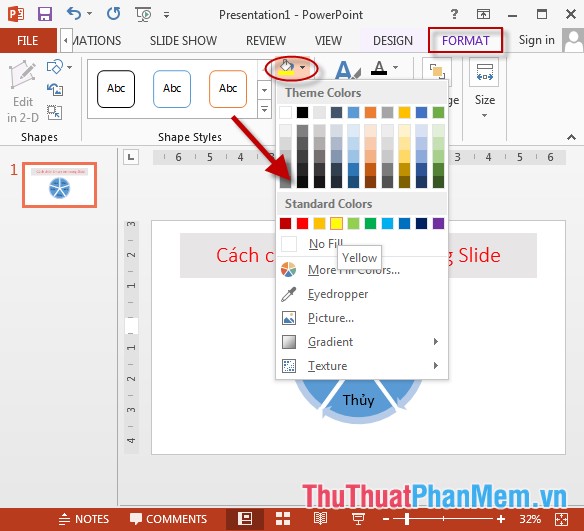
- Results after coloring the elements in the chart:
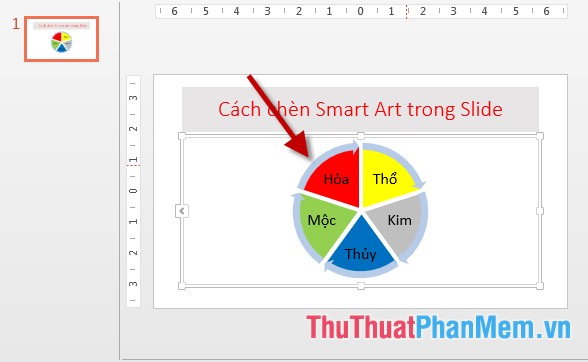
- Or you can change the font color, effects for the text through the icons:
+ Text Fill: Create color for text.
+ Text Outline: Create a border color for the text.
+ Text Effect: Create effects for text.

- Results after coloring the text in the diagram:

The above is a detailed guide on how to add a Smart Art diagram to a Slide in PowerPoint.
Good luck!