What is Swapfile.sys, how to delete Swapfile.sys?
In Windows 10 and Windows 8, there is a virtual file called Swapfile.sys . This file is stored in your drive system, along with Pagefile.sys and Hiberfil.sys . So what is the reason that Windows contains both Swap file and Page file ?
Windows exchanges some unused data into the Swap file. Currently this file is used for new "universal" applications - or Metro applications. Maybe in the future Windows will use this Swap file more.
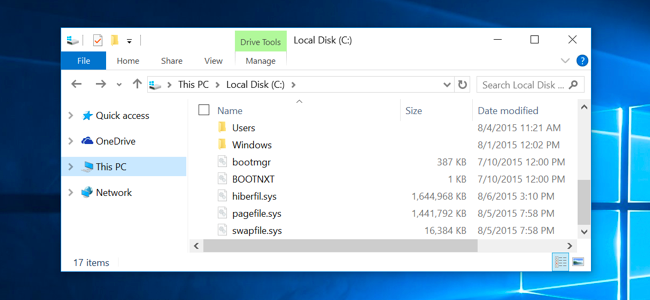
1. Swapfile.sys, Pagefile.sys, and Hiberfil.sys
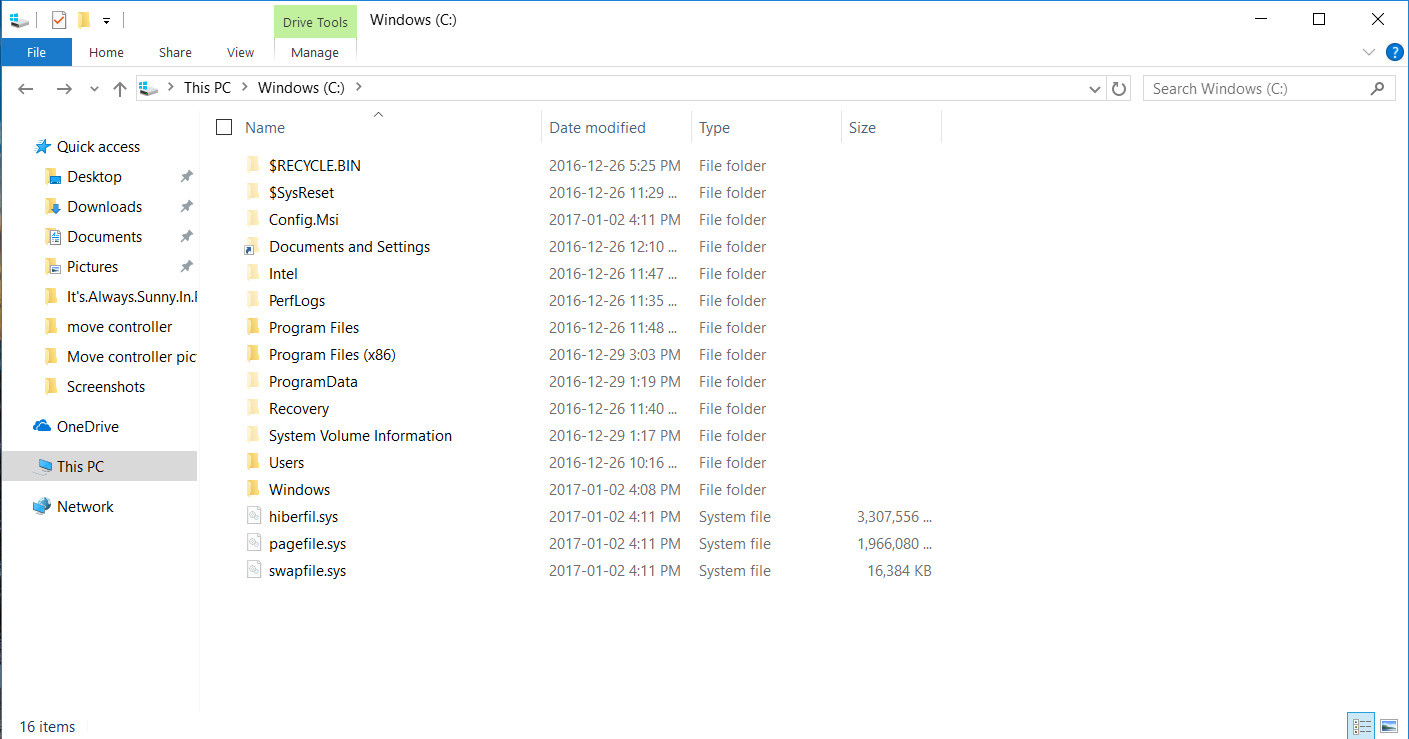
Like Pagefile.sys and Hiberfil.sys , Swapfile is stored in C drive by default. You can only see Swapfile when you enable Show hidden files and folders option and disable (disable) the option Hide protected operating system files.
Hiberfil.sys is used by Windows to store all content on RAM when you use the Hibernate feature. In addition, Hiberfil.sys file also supports the activation of new "Hybrid boot" - quick boot feature on Windows 8 and Windows 10.
Pagefile.sys is the amount of virtual RAM used by Windows if there is not enough real RAM.
2. What is swapfile used for?
There is not much official Microsoft information about the Swapfile.sys file. However, you can find some answers from Microsoft's official blog as well as forum answers.
Summary S wapfile.sys is used to swap data between new Microsoft applications such as Universal apps, Windows Store apps, Metro apps .
The way Windows manages these applications is completely different than managing traditional applications on the Desktop. Black Morrison expert of Microsoft explained Swapfile.sys :
"You might wonder why we need to add a virtual file. The reason is simple, when we introduced Modern App, we need a way to manage completely new application memory. next to the traditional way of managing using Virtual Memory / Pagefile " .
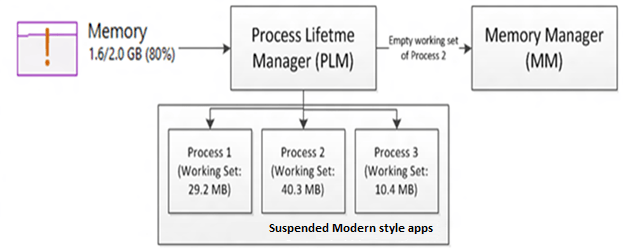
"Windows 8 can overwrite a session of a suspended Modern application to the hard disk to get more memory when the system is overloaded. This process is similar to Hibernate an application and then run. when the user opens the application, in this case, Windows 8 takes more advantage (the mechanism of suspending / restoring empty apps) . "
3. What happens when Swapfile.sys is activated?
If the computer you are using has 2 GB of RAM - the minimum amount of RAM for Windows 10 64-bit. Your RAM capacity will quickly be 'emptied' by the programs and applications you install on the system. You will then have to 'free up' the amount of RAM on your computer to make it run smoother. Using all the RAM on your computer is nothing 'wrong' but it can cause errors and problems on the system.
Instead of letting Windows work in a "slow" state due to lack of RAM, and you don't have enough free space to use, running other Windows applications, such as the minimum of the Taskbar - will be transferred to the hard drive. file, where the files will be 'swapped' in the swap file until you need to use those files. This will help you free up some free space in RAM.
If you try to access an application that is currently 'hiding' in the swap file and you don't have enough free RAM, another process in your RAM will be 'moved out' to make room for the application. You want to use. Swapfile.sys works together with Pagefile.sys to support RAM being freed.
4. What happens when Swapfile.sys is disabled?
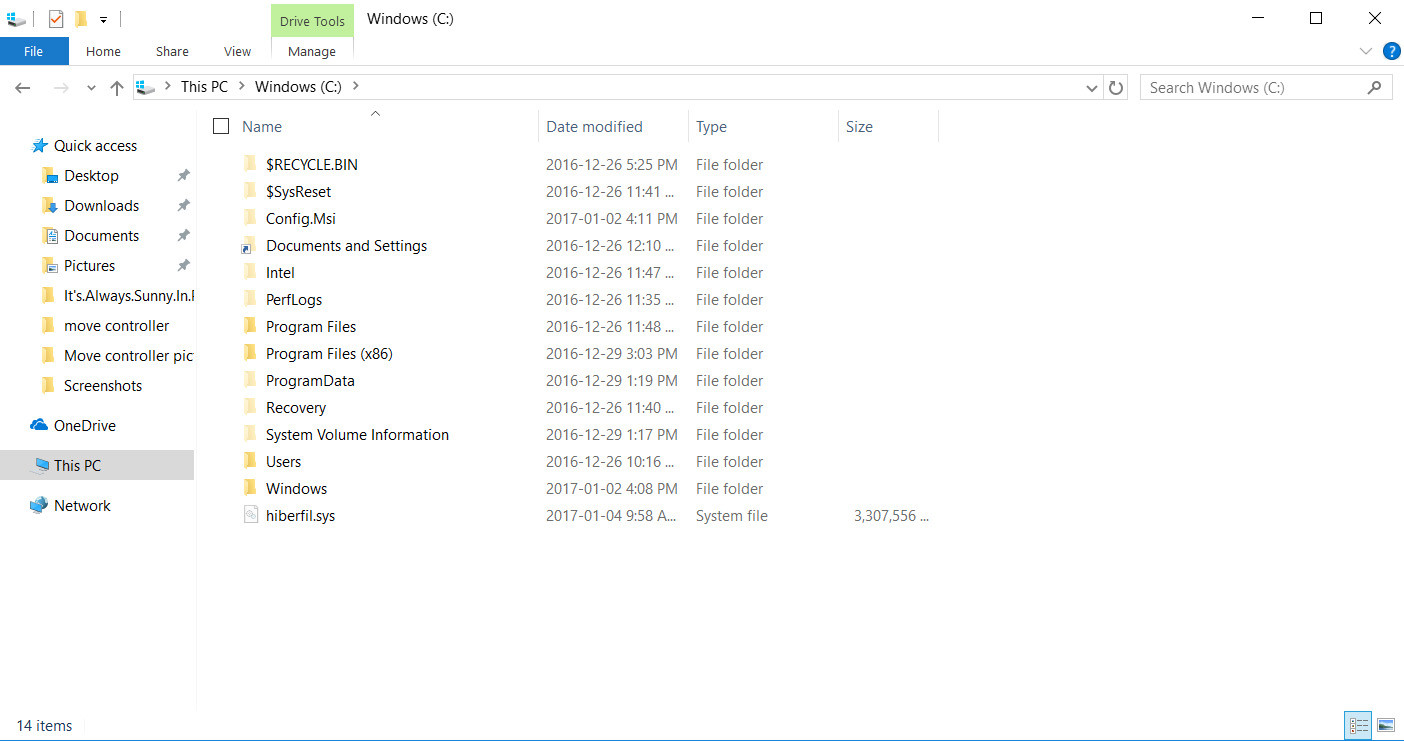
If there is no swap file, some modern Windows applications will not be able to run - or if some other application can run, it will also crash.
When Swap file or Page file is not activated, it will cause inefficient RAM and may cause an error. And once your RAM has been filled and there are no files on the hard drive moving in, it will cause the application to crash or crash.
5. Steps to disable Swapfile.sys
Note:
If you are an experienced long-time user, you should use this method to disable Swapfile.sys.
If you want to disable swap files on your computer and you do not want to edit the Registry, follow the steps below:
1. Right-click the Start button .
2. Click Control Panel .
3. Click System.

4. Click Advanced system settings.
5. Click the Advanced tab in the top corner of the window.

6. In the Performance section, click Settings.
7. Click the Advanced tab in the top corner of the window.
8. In the Virtual memory section, click Change.
9. Uncheck the checkbox next to the Automatically manage paging file size option .

10. Click on No paging file.
11. Click Set.
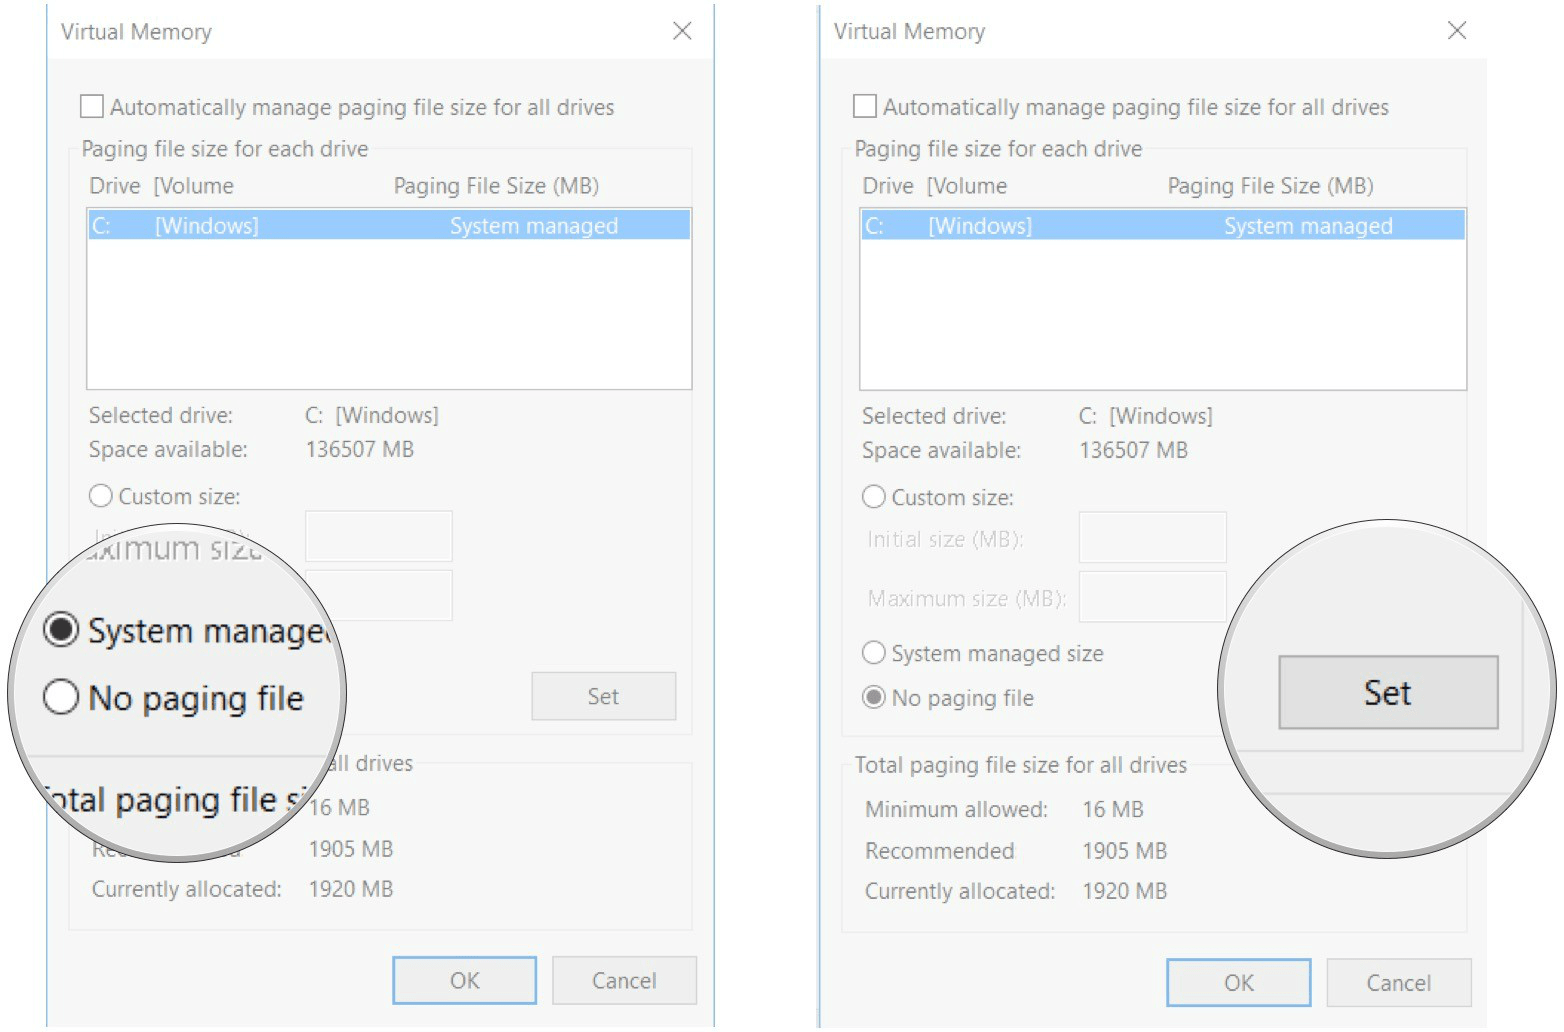
12. Click Yes.
13. Click OK.
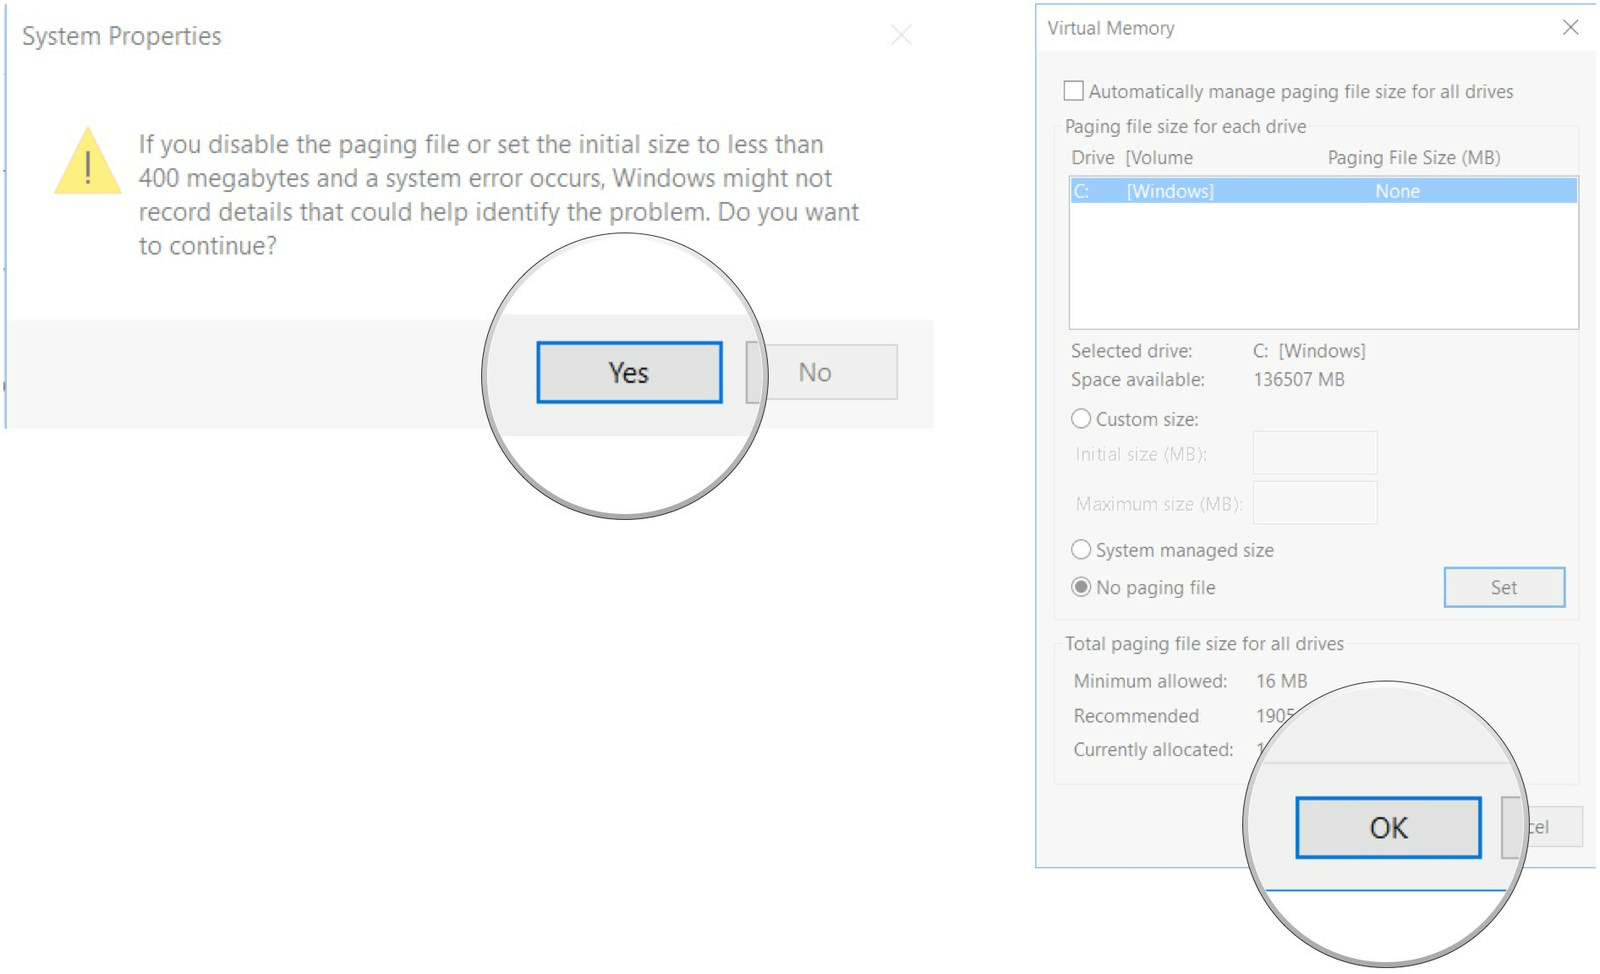
14. Restart your computer.
After starting your computer, both Swapfile.sys and Pagefile.sys are successfully disabled.
To re-enable Swapfile.sys and Pagefile.sys, perform the same steps and select Automatically manage paging file size . and restart your computer.
6. How to disable Swapfile.sys without disabling Pagefile.sys?

For some reason you want to disable Swapfile.sys but don't want to disable Pagefile.sys, you can do this through the Registry.
1. Right-click the Start button .
2. Click Run.
3. On the Run command window, enter regedit.exe and press Enter to open the Regitry Editor window.

4. In the Registry Editor window, double-click HKEY_LOCAL_MACHINE.
5. Double-click SYSTEM.

6. Double-click CurrentControlSet.
7. Double-click Control.

8. Double-click on Session Manager.
9. Click to select Memory Management.

10. Right-click any space in the right pane.
11. Click New.
12. Click DWORD (32-bit).
13. Name this new DWORD (32-bit) SwapfileControl and press Enter.

14. Restart your computer.
If you want to re-activate Swapfile.sys, do the same steps and delete the SwapfileControl item that you created.
7. How to delete the Swapfile.sys file?
Swapfile.sys file is quite small, about 256 MB. Therefore you do not need to delete the file. Even if your Tablet memory is nearly full, swapfile.sys supports applications in your computer that can run better.
The Swapfile.sys file is managed with the Pagefile.sys file. So when you disable (disable) the Pagefile.sys file, the Swapfiel.sys file will also be disabled (disabled).
However, if you want to delete this Swapfile.sys file, you can follow the steps below:
First, open the Start Menu , then type Performance in the search box, then select Adjust the appearance and performance of Windows.

On the Performance Options window, click on the Advanced tab, then click Change under Virtual Memory.

Uncheck Automatically manage paging file size for all drives , then select a drive, select No paging file , then click Set.
Then both Pagefile.sys and Swapfile.sys will be deleted from your drive.

Your next task is to reboot the device. Click OK to proceed with the reboot process.
Also you can create a Pagefile.sys file on another drive, Windows will move the new virtual files onto your drive.
You can refer to more:
-
4 Ways to Reset Windows to its original state
-
2 steps to open virtual keyboard in Windows XP / 7/8 / 8.1
-
10 tips for Windows 8.1 users to know
Good luck!
You should read it
- ★ What is pagefile.sys? Can pagefile.sys be deleted? Should Pagefile.sys be turned off
- ★ Clean up traces of Pagefile every time you turn off your Windows 10 computer
- ★ How to automatically delete Pagefile.sys on shutdown in Windows 10
- ★ Instructions for changing Pagefile.sys size and location on Windows
- ★ What is Hiberfil.sys? How to delete Hiberfil.sys?