How to install the driver has not been Signed on Windows 10
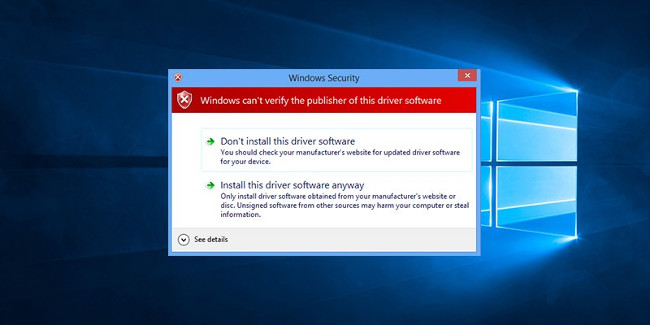
Any hardware device attached to the Windows system requires users to install the hardware driver properly. Hardware drivers have low-level access to Windows systems to work when you need them. Since the driver has access to the kernel, Windows requires the driver to be signed. Any driver that is not signed from Microsoft will not be allowed to install on Windows.
Any hardware device attached to the Windows system requires users to install the hardware driver properly. Hardware drivers have low-level access to Windows systems to work when you need them. Since the driver has access to the kernel, Windows requires the driver to be signed. Any driver that is not signed from Microsoft will not be allowed to install on Windows.
However, in some cases you will have to install an unofficial driver, the driver has not been signed or an old driver without a digital signature. In this case you will have to install a driver that has not been signed on Windows. In the following article, Network Administrator will guide you 3 ways to install unassigned drivers on Windows 10.
Note:
Only install unsigned drivers from trusted sources.
1. Install unassigned drivers on Windows 10 from the Advanced Boot Menu
The simplest way to install an unsigned driver on Windows 10 is through the Advanced Boot menu.
To do this, press Windows + X key combination to open Power User Menu, here you navigate to Shutdown, then use "Shift + left click" on Restart option to restart the system and display the Advanced Boot Menu.

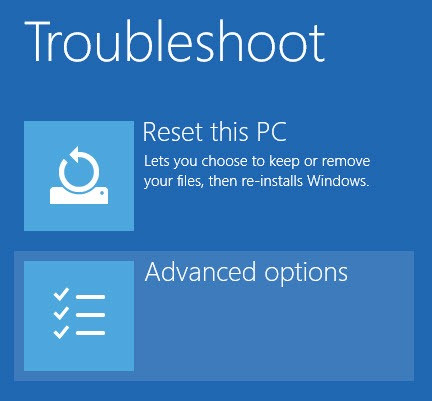
At the Advanced Boot Menu, click the 'Troubleshooting' option.

On the Troubleshoot window, select the "Advanced Options" option.
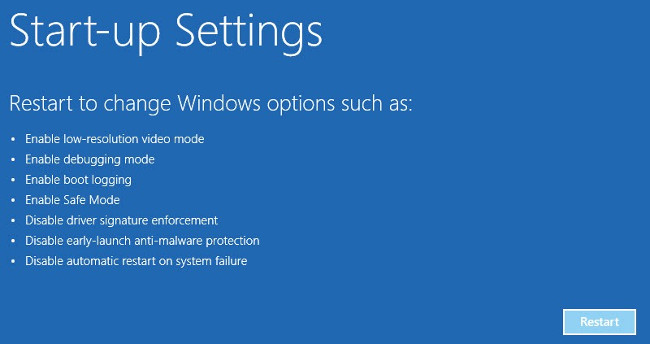
Next select "Start-up Settings".

Now the screen shows the Startup Settings window, allowing you to boot the Windows system in various modes. Your task just needs to click Restart button to continue.
Your goal is to install an unsigned driver (unsigned driver), so press the F7 key to select the option " Disable driver signature enforcement ".
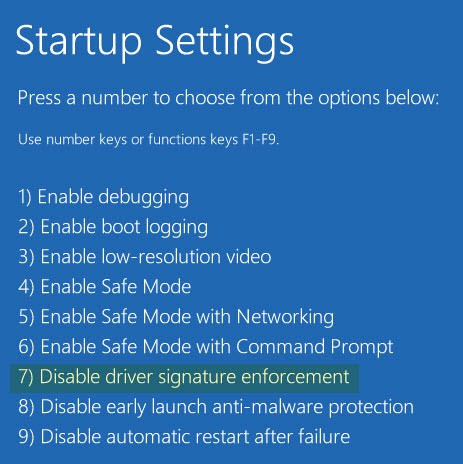
As soon as you press the key, the system will boot into Windows. Now you can install any unsigned driver you want. After installation is complete, restart the system and the Driver Signature Enforcement will automatically be activated the next time you start.
If you want to install other unsigned drivers, follow the same steps.
2. Install Unsigned Driver by activating Test Mode
In addition to this, you can install unsigned drivers by activating Test Mode on Windows 10. To do this:
First press the Windows + X key combination to open the Power User Menu, then click Command Prompt (Admin).

Then on the Command Prompt window you enter the following command into:
bcdedit / set testsigning on
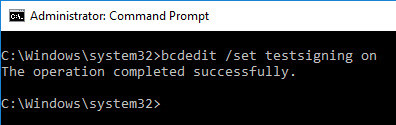
You should now see the command executed successfully. Just reboot the system and you will be booted into Test Mode.
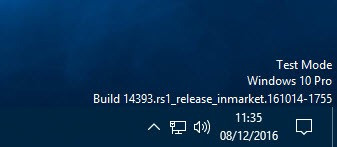
When in Test Mode you can install an unsigned driver. In addition, you will see the watermark icon like the one below so you can see that the Windows system is in Test Mode.
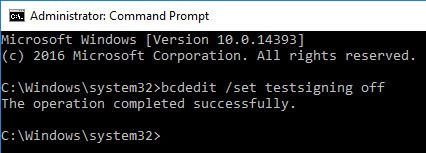
After installing the driver, the next step you need to do is to turn off Test Mode. To do this, enter the following command into the Command Prompt window and restart the system:
bcdedit / set testsigning off
3. Install Unsigned Drivers by disabling Integrity Checks
In addition, you can apply the solution to disable Integrity Checks to install un-signed drivers.
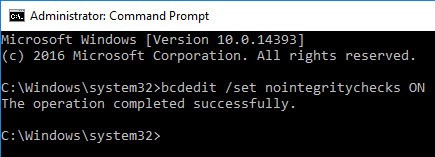
To disable Integrity Checks, open the Command Prompt under Admin and enter the following command into:
bcdedit / set nointegritychecks off
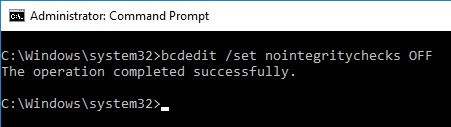
After the command finishes executing, simply reboot the system and you can install the unsigned driver on Windows 10:
Just like Test Mode, after the driver has not been signed, the next step is to re-enable integrity checks . To re-enable integrity checks, enter the following command into the Command Prompt window:
bcdedit / set nointegritychecks on
Finally restart your system.
Refer to some of the following articles:
- Summary of some ways to fix USB Device Not Recognized on Windows 7, 8 and 10
- How to root out old Windows 10 drivers?
- This is how to reset network settings on Windows 10 with just one click
Good luck!
- 3 Way How To Install Driver Windows 10
- Installing hardware drivers for Windows: easy to think but difficult?
- Driver Driver installation software for computers
- Can't install sound driver for Windows 10, what should I do?
- The best driver update software for computers
- How to install/reinstall GPU driver on Windows
- How to install the network driver with the All Main Ethernet Controller
- How to install NVIDIA drivers on Kali Linux
- Instructions for installing drivers for Windows with DriverPack Solution
- How to install MIDI drivers on Windows 10
- Instructions for converting headphones and speakers on Windows 10
- How to monitor and save Internet capacity on Windows 10 April 2018 Update
- How to use both headset and speaker simultaneously on the computer
- Instructions on how to turn off the motion effects of windows on Windows
- How to customize the Windows 10 PIN code limit
- Tutorial 4 ways to adjust the screen brightness of Windows 10
- The tricks in Windows 10 you may not know
- Some tips to free up Windows 10 computer hard drive space
- How to install Windows 10 Themes from Windows Store?
- How to add the cloud icon to the Windows 10 right-click menu
-
 What are drivers? The importance of drivers for computers.
-
Causes and the simplest, most effective ways to fix driver errors.
-
How to set up Bluetooth on your laptop quickly and easily.
-
Find VGA drivers for laptops with 3DP chips.
-
How to uninstall VGA drivers, computer graphics card drivers
-
Update AMD graphics card drivers on Windows 10
 What are drivers? The importance of drivers for computers.
 Causes and the simplest, most effective ways to fix driver errors.
 How to set up Bluetooth on your laptop quickly and easily.
 Find VGA drivers for laptops with 3DP chips.
 How to uninstall VGA drivers, computer graphics card drivers
 Update AMD graphics card drivers on Windows 10