How to Add a Mac to a Homegroup
HomeGroups allow Windows computers to easily connect to one another to share files and other resources. It is not possible to connect a Mac computer to a Windows HomeGroup, but you can setup file sharing so that you can access files from...
Table of Contents
Part 1 of 2:
Sharing Windows Files to a Mac
-
 Enable file sharing on your Windows computer. It is not possible to directly add a Mac computer to your Windows HomeGroup. Instead, you'll be sharing specific folders with the Mac. To do this, you'll need to ensure that file sharing is enabled in Windows:
- Open the Start menu or screen and type "network and sharing center" to open the Network and Sharing Center window.
- Click the "Change advanced sharing settings" link.
- Make sure "Turn on file and printer sharing" is selected.
-
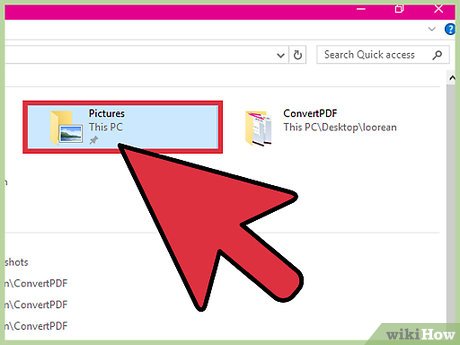 Find a folder on your Windows computer that you want to share. Sharing is done by folder, so you'll need to find a folder that you want to share with the Mac computer. Any folders inside of the folder will be shared as well.
 -
 Right-click the folder and select "Properties." This will open the Properties window for that folder.
 -
 Click the "Sharing" tab. This will display the sharing options for that folder.
 -
 Click the "Share..." button. This will open a new window with the users that are allowed to access it.
 -
 Click the drop-down menu, select "Everyone," and then click "Add." This will allow anyone on your network to access the shared folder.
 -
 Change the "Permission Level" for the new Everyone user. By default, other computers that access your shared folder will only be able to open and copy files from it. If you want to be able to add files to the folder, or make changes to the files in the folder, select "Read/Write" from the Permission Level menu.
 -
 Click "Share" to share the folder with your settings. Your sharing settings will be applied to all of the subfolders, which may take a few moments for larger folders.
 -
 Open a Finder window on your Mac computer. If your computer is connected to the same network as your Windows computer, you'll see your Windows computer appear in the "Shared" section of the left sidebar.
 -
 Select your Windows computer and log in. You'll be prompted to log in when you select the Windows computer in your Mac's Finder window. You have two options: "Guest" and "Registered User."
- Select Guest if you just need read access (copying a file from the folder, opening a file).
- Select Registered User if you need write access as well (copying files to the folder, modifying and deleting files). You'll be prompted to log in with your Windows user account.
-
 Browse the shared files. Once you're logged in, you can view all of the files and folders in the shared folder. You can open, copy, and manipulate the files just like you would any other folder on your computer.
 -
 Share more folders. You can repeat this process for sharing other folders from your Windows computer to your Mac. To share the other direction (sharing Mac folders to Windows), see the next section.
Part 2 of 2:
Sharing Mac Files to a Windows PC
-
 Click the Apple menu and select "System Preferences." Now that you can access your Windows folders on your Mac, you can set your Mac folders to appear in Windows. Start by opening your System Preferences menu.
 -
 Click the "Sharing" option in the System Preferences menu. This will open your system sharing settings.
 -
 Write down the "Computer Name" displayed at the top. You'll need this later when setting up the connection.
 -
 Check the "File Sharing" box to enable file sharing. When you select it, you'll see new options appear to the right.
 -
 Click the "Options..." button after selecting File Sharing. This will display the file sharing options.
 -
 Ensure that "Share files and folders using SMB" is selected. This is the file sharing protocol that allows you to connect to Windows computers.
 -
 Check the "On" box for your account in the "Windows File Sharing" section. This will allow you to access all of your Mac's files from the Windows computer.
 -
 Open Windows Explorer on your Windows computer. You can quickly open this by pressing ⊞ Win+E, or by opening "Computer"/"This PC."
 -
 Click the "Network" option in the left sidebar. You may have to scroll a bit to find it.
 -
 Look for your Mac in the list of network computers. It will have the name you noted in Step 3 of this section.
- If you don't see it listed here, click the address bar at the top of the window and type MacName, replacing MacName with the name from Step 3.
-
 Enter your Mac username and password. When you select your Mac, you'll be prompted to enter your username and password for your Mac user account. Once you enter this, you'll be able to view your Mac's folders and files.[1]
Was this article helpful?
Your feedback helps us improve.
Related Articles
 How to replace Windows HomeGroup8 minutes read
 What is HomeGroup? How to use and set up on Windows5 minutes read
 Instructions for setting up and managing HomeGroup on Windows 109 minutes read
 Connecting to the HomeGroup network, the home network in Windows 7.4 minutes read
 Hide and turn off the HomeGroup feature on Windows 73 minutes read
Reader Comments 0
Sign in with email or Google to join the discussion.