Table of Contents
This guide covers share folders and printers in the network with practical context and easy-to-follow details. Use it to understand the subject and apply the information confidently.
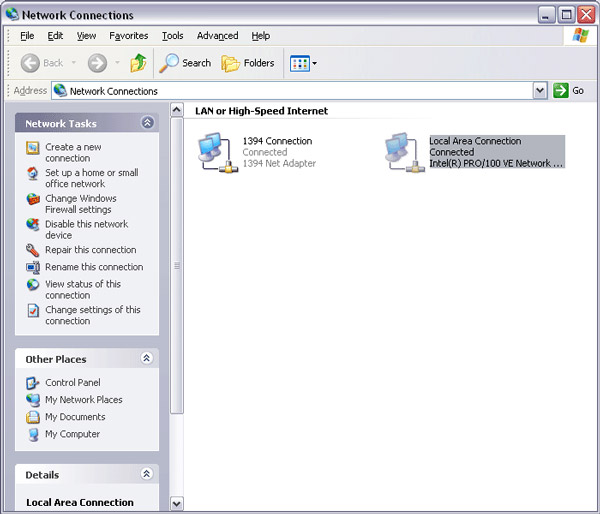 Figure 1: Double-select the network card installed on the computer
On the window that appears, select Properties .
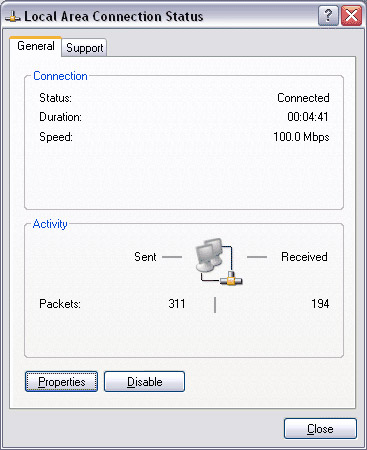 Figure 2: select Properties
In the next screen, you should check if the ' File and Printer Sharing for Microsoft Networks ' option is enabled, see Figure 3.
 Figure 3: Check to see if the file and printer sharing service is installed
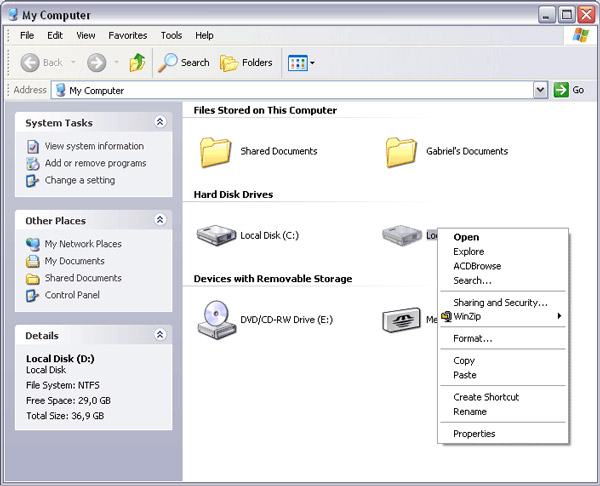 Figure 4: Select Sharing and Security on the folder you want to share
In the window that appears, select ' If you understand the risk but still want to share the root of the drive, select here '.
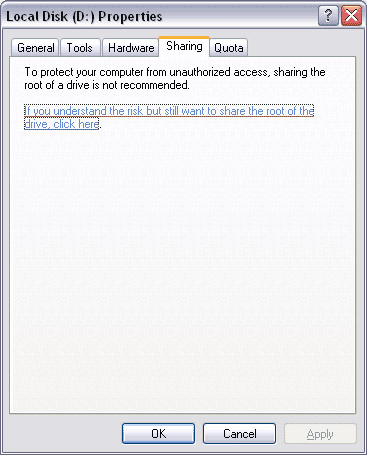 Figure 5
In the next window, you need to check ' Share this folder on the network ' and name this share on ' Share name ' (in the example ' Shared_Data '). That is the name of the shared folder from your computer that every computer in the network will see. If you want to allow people to modify files, cut and paste new files into this shared folder, you just need to enable ' Allow network users to change my files '.
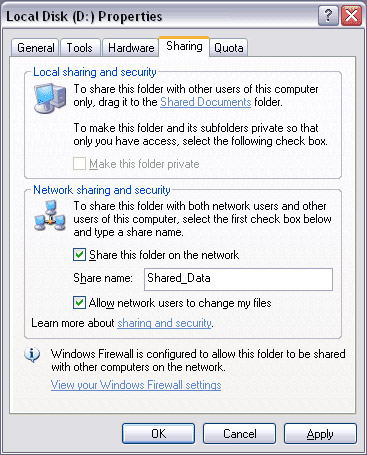 Figure 6: Allow folder sharing
Select OK And the shared folder will be accessible from other computers on the network. Now, after sharing a folder, we will show you how to access it from another computer. Access the shared folder To access shared folders on your network, select My Network Places , the icon on the Windows desktop. Double-select the shared folder you want to access and that's all you need to do.
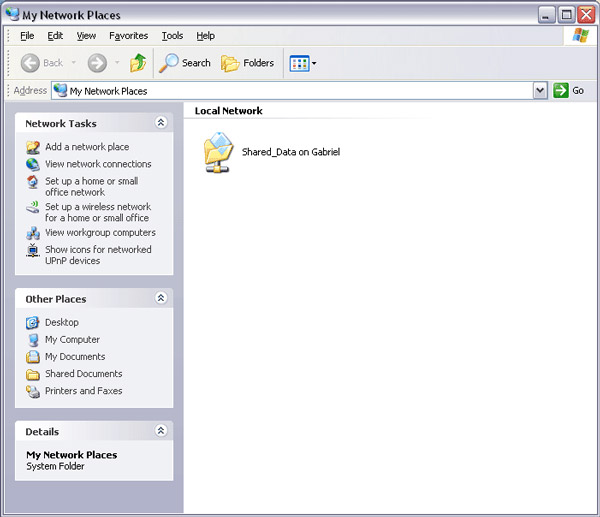 Figure 7: List shared folders in the network
If a folder that you know has been shared is not listed in My Network Places - this is a very common problem, press F5 On your keyboard. This is the shortcut for you to perform the 'refresh' function. If the shared folder you want to access still does not appear, select ' Add a network place ' (first item on the left column), then on the window that appears, select Next > Choose another network location > Next . In the next screen, you can tap the network by clicking Browse . This way will allow you to find the computer and shared folders you want to access. However, sometimes Windows does not list the full shared computer or folder here. If this is the case, you can perform additional sharing of the folder by entering its location in the Internet or network address box, using the Machine_folder_name_folder name Structure. In the case of this example, we enter GabrielShared_Data , because Gabriel Is the computer name where the shared Folder Is located and Shared_Data Is set for the shared folder. Select Next To finish this utility.
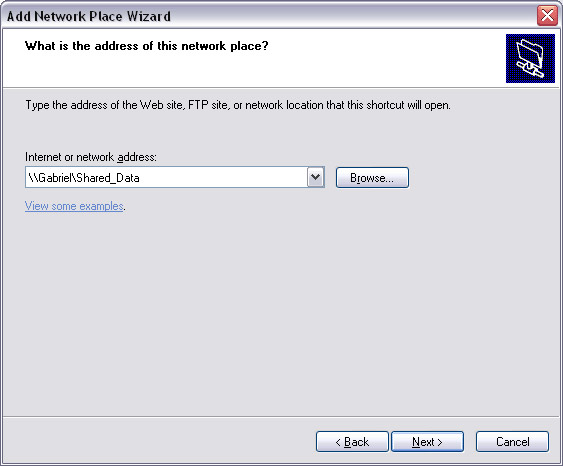 Figure 8: Ask Windows to access the shared folder
All shared folders available on the network are accessible from any Open / Save / Save As dialog box, via the My Network Places icon. Therefore, you can open a saved file in the shared folder via a favorite program. You can assign a drive letter to a shared folder. This allows easy access to shared folders. For example, instead of browsing through My Network Places, your shared folder will be accessible by F: . To do that, open My Computer > Tools > Map Network Drive .
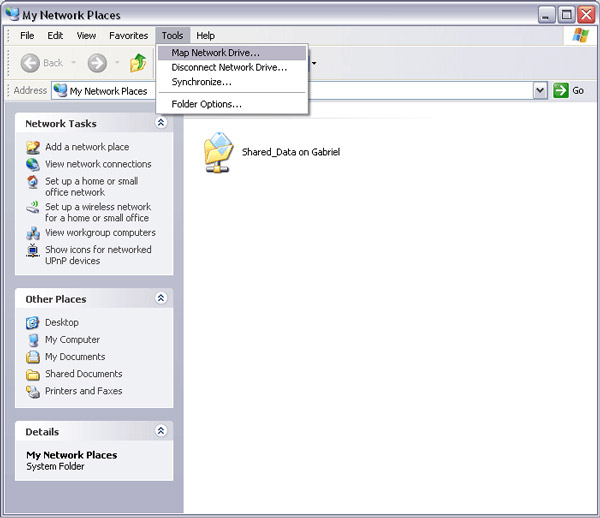 Figure 9: Path to assign drive letter to shared folder
In the screen that appears, you can select the drive letter and shared folder to assign to the drive letter. In this example we have assigned the Shared_Data Shared directory as a Z: Drive, so this folder will be accessible with the Z: drive on my computer. You can also tick the ' Reconnect at logon ' checkbox if you want this agreement to be reset when you restart the computer.
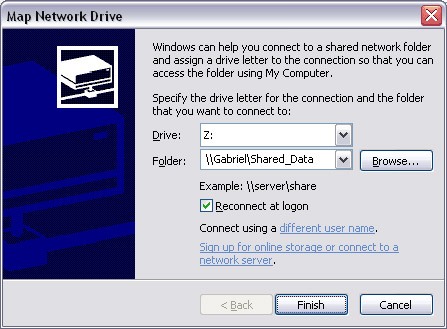 Figure 10: Assign a drive letter to a shared folder
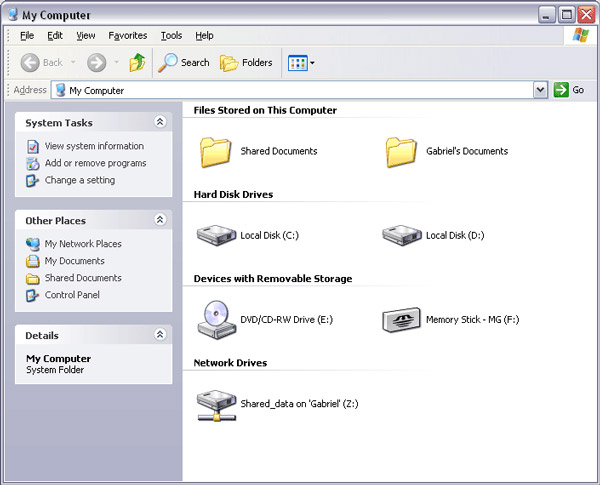 Figure 11: Shared folder is accessible by Z:
If you do not want to continue this setting in the future, right-select the drive on My Computer And select Disconnect From the right-select menu. Share the printer Printer sharing is also very easy. You just need to go to Start > Settings > Printer and Faxes , right-select the printer and select Sharing .
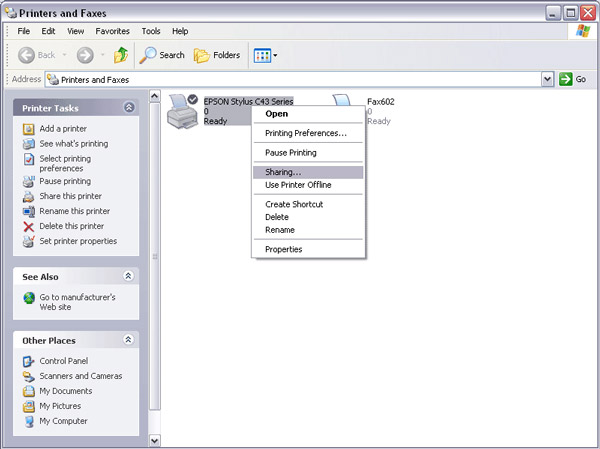 Figure 12: Path for printer sharing
In the window that appears, check ' Share this printer ' and enter a name for the shared printer in the Share name Box. This will be the name of the known printer for other computers on the network.
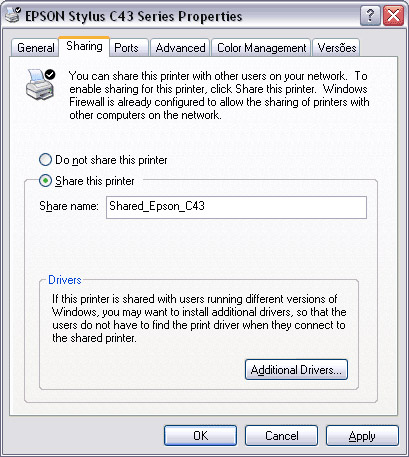 Figure 13: Printer sharing
Select OK And the printer will be ready to be accessed by other computers on the network. See how these computers can access the shared printer. Access to shared printer To print via a printer located on another computer on the network, you first need to install it on your computer. To do this, go to Start > Settings > Printers and Faxes > Add a printer (the first item in the left column). Select Next On the next screen that appears, on the second screen, select ' A network printer, or a printer attached to another computer '.
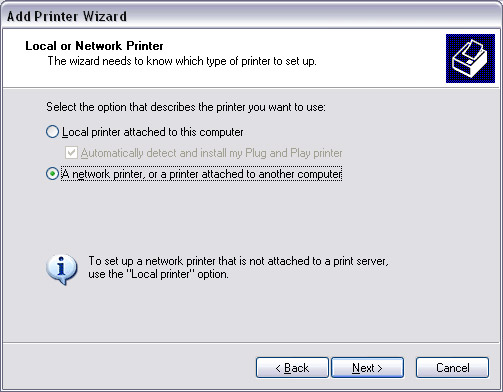 Figure 14: Install network printer
Select Next And you will see there are three options. Select the first option ' Browse for a printer ', to locate the printer. Then select Next .
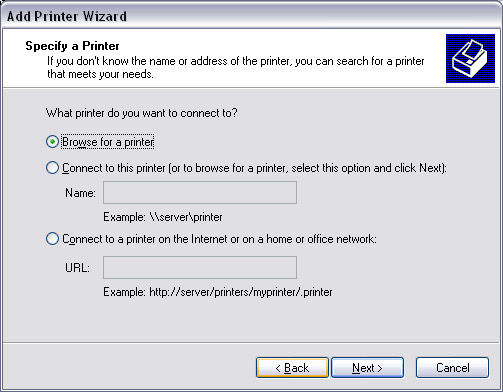 Figure 15: Installing a network printer
In the next screen, you need to browse to the network to locate the printer you want to install on your computer. Select Next And answer Yes When you have a question that the utility will ask.
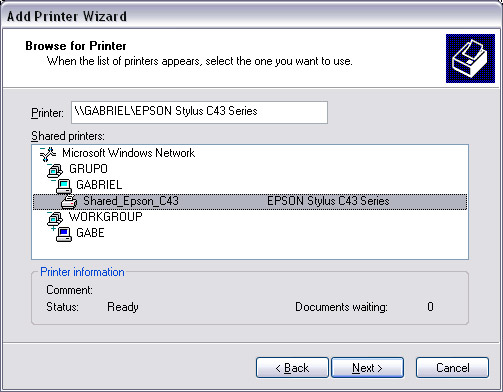 Figure 16: Installing a network printer
In the next screen, you will be asked if you want to set up this printer as a default printer for your computer. If your computer has no other printer attached, you should answer Yes . Then select Next And in the next screen select Finish .
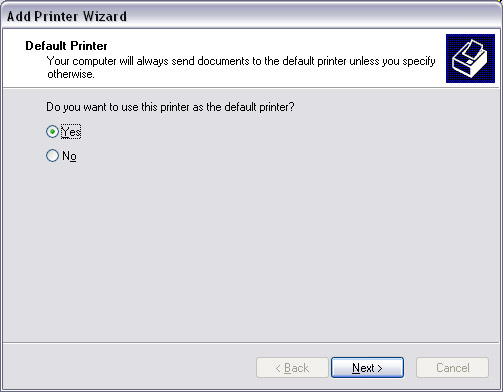 Figure 17: Select the default printer on this computer
After performing these steps, the network printer will be installed on your computer. Using it is very simple, completely the same as performing on a printer installed on a computer, and accessible from all programs.
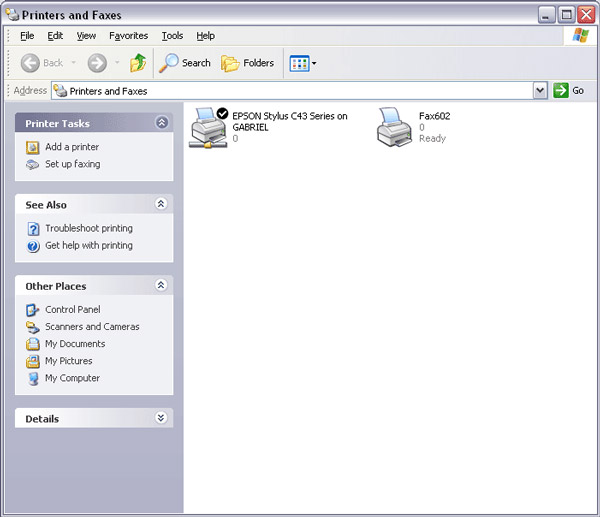 Figure 18: Network printer after installing in the computer
FAQ
What should I check before following these steps?
Confirm device and software compatibility, save important data, and make sure you have the required permissions, files, and account access.
Why might the process not work?
Common causes include outdated software, missing permissions, incompatible hardware, an unstable connection, or completing a step in the wrong order.
Can I undo the changes if necessary?
That depends on the tool or setting. Use built-in restore options when available, keep a backup, and record the original configuration first.
Related Articles
 How to Share a Printer: Step-by-Step Guide7 minutes read
 How to Share Folders, Drives in Windows3 minutes read
 Photo Printers for Phones: Top 6 Best Mobile Photo Printers 20197 minutes read
 How to Sync Folders: Practical Guide12 minutes read
 Tips to Help You Easily Share Folders on Windows with Android4 minutes read
 Share Printers: Share Files and Printers Windows 7 and Windows Xp8 minutes read
Reader Comments 0
Sign in with email or Google to join the discussion.