'Turn' your Mac into a Wi-Fi Access Point
In the twentieth century, the lack of network was almost like blocking all information about life, and all the need to communicate about the work of a diligent employee..
TipsMake.com - The worst thing about holidays or long trips is that you cannot connect to the Internet in places you need to work. A Wi-Fi network is not always available to use. In the twentieth century, the lack of network was almost like blocking all information about life, and all the need to communicate about the work of a diligent employee.
 We have previously shown you how to set up a wireless hotspot from the Windows operating system. Through this setting you can share documents or even connect to the Internet with many other digital devices without the need for a 'jumper wire'.
In this article, also for the purpose of setting up a wireless access point, this time we will guide you to set it up on a Mac. The essential thing to do is a PowerBook and an Internet connection service (probably at the hotel where you rented it). This setting is guided by us for both Mac OS X 10.4 Tiger and Mac OS X 10.5 Leopard operating systems
Security issue
Creating a wireless access point is the most important point to make sure that the shared documents on your computer are safe. Go to Preferences | Sharing pane and remove the selected item at all sharing options. This will prevent anyone who is connected to a Wi-Fi network from accessing your computer or files on your computer remotely. However, make sure you remember all the necessary settings when you need to share the file again.
Wi-Fi sharing in this way will not affect your Mac system; You can still work while everyone uses Wi-Fi connection via Mac.
Guide
Follow these instructions to get a Mac Wi-Fi Access Point.
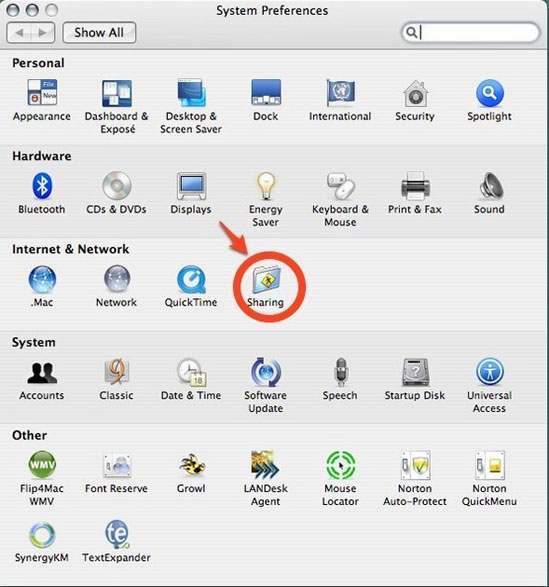
1a. In Mac OS X 10.4 Tiger select System Preferences from the Apple menu in the upper left corner of the screen

2 a. Then select Sharing
3a. Select the Internet

4a. In Share Your Connection From , select your Internet connection source. In this case, select Built-in Ethernet because this laptop has a wired Internet connection.
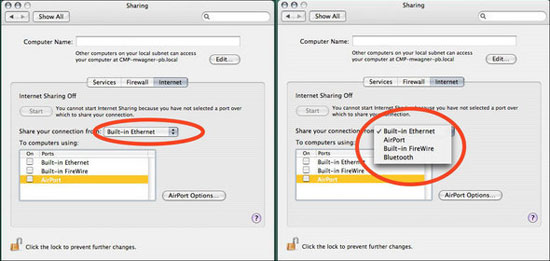
5a. In To Computers Using select AirPort
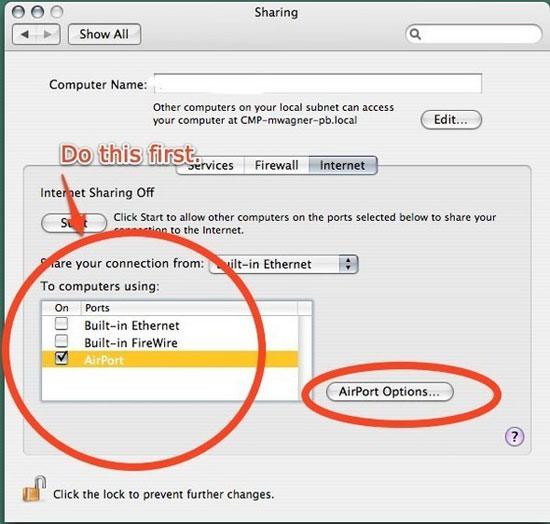
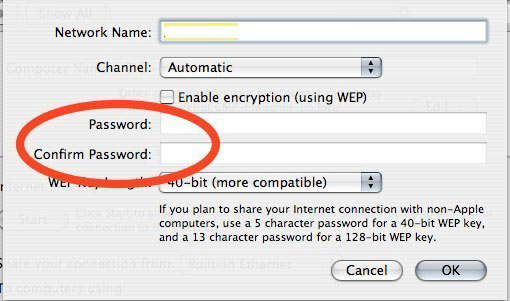
6a. Then click on Airport Options . Name the network and select Automatic in the Channel section.
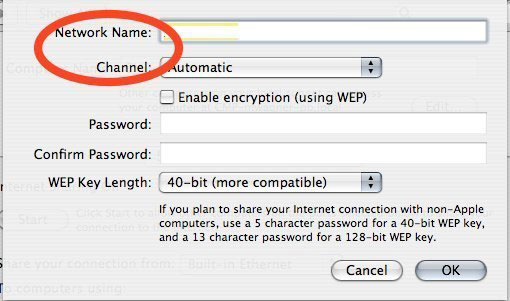
7a. Set your password to protect your network, then click OK
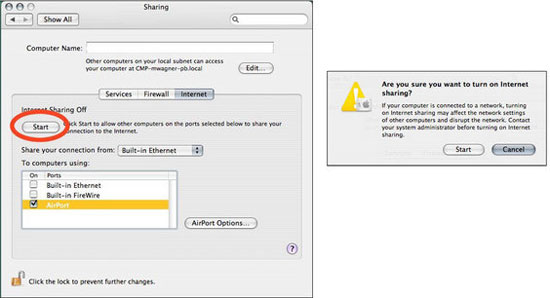
8a. Return to the Internet tab. Click the Start button. You will receive a confirmation window; Click Start on that window.
9a. Once done, the shared Wi-Fi network icon is located in the upper right corner of the display screen (there is a nested arrow in the Wi-Fi wave icon).
1b. In Mac OS X 10.5 Leopard, go to System Preferences and select Sharing . Then select Internet Sharing .
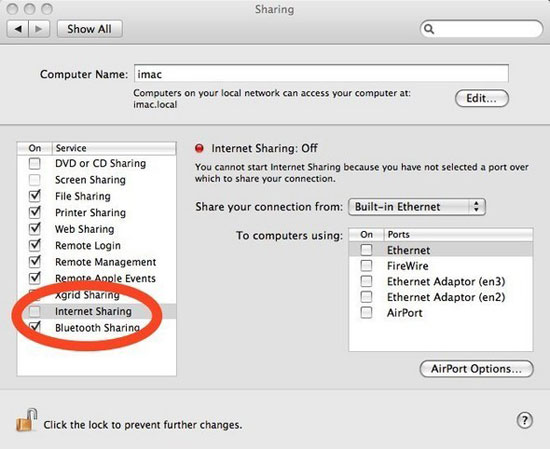
2b. In the drop down dialog box Share your connection from, select Built-in Ethernet. In To computers using AirPort.

3b. Select Airport Options ., name your network and switch Channel to Automatic.
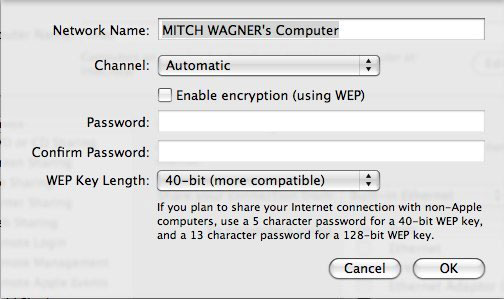
4b. Do the same thing as step 7a above to secure the network. Find the up arrow button in the Wi-Fi wave icon on the menu bar to confirm that your Wi-Fi network has been shared.