How to turn a Raspberry Pi into a wireless access point
You are looking to create multiple indoor access points without any latency and connection issues often associated with using WiFi extender. In this article, you will learn how to turn a Raspberry Pi into a wireless access point..
Are you looking to create multiple indoor access points without any latency issues and connectivity is often related to WiFi extender use? In this article, you will learn how to turn a Raspberry Pi into a wireless access point.
When the wireless access point is working, anyone with a password can connect to the Raspberry Pi as if it were a mini router, ideal for everyone from cafe owners who want to provide it to customers. Free WiFi, to employers who need to create a private network for employees or even someone who likes the idea of having multiple WiFi networks at home!
Things to prepare
To complete this tutorial, you will need:
- The Raspberry Pi 3/4 runs Raspbian. Without Raspbian, you can get the latest version and flash it with Etcher.
- The power cable is compatible with the Raspberry Pi
- External keyboard and how to attach it to a Raspberry Pi
- HDMI or micro HDMI cables, depending on the Raspberry Pi model
- External screen
- Ethernet cable. Because the purpose is to turn the Raspberry Pi into a wireless access point, you will need to connect via Ethernet rather than WiFi. This also means it is impossible to use Raspberry Pi 2 or Raspberry Pi Zero, because they are missing Ethernet ports or wireless network cards.
Get started: Set up a Raspberry Pi
To get started, connect all peripherals to the Raspberry Pi, including an Ethernet cable.

When the Raspberry Pi has finished booting, you should check to see if you are running the latest version of Raspbian. Launch Terminal by clicking the application icon on the toolbar. Type the following command:
sudo apt-get updatePress Enteron the keyboard and wait for the command to execute.
Enter the next command and press Enteragain:
sudo apt-get upgradeAfter the upgrade, it is best to restart the Raspberry Pi for all system changes to take effect. Run the following command:
rebootInstall the hostapd, dnsmasq and firewall plugins
Please install hostapd (host access point daemon), this is a software package that can convert network interface card (Network Interface Card) into access point.
To install hostapd on Raspberry Pi, open Terminal and run the following command:
sudo apt install hostapdActivate the wireless access point and set it to run automatically on startup:
sudo systemctl unmask hostapd sudo systemctl enable hostapdNext, install dnsmasq, provide the Domain Name System (DNS) caching and the Dynamic Host Configuration Protocol (DHCP) server designed for small networks.
To install this package, run the following command in Terminal:
sudo apt install dnsmasqFinally, install netfilter-persistent and iptables-persistent, two plugins responsible for saving and loading firewall rules on the Raspberry Pi:
sudo DEBIAN_FRONTEND=noninteractive apt install -y netfilter-persistent iptables-persistentSpecify a static IP address
The Dynamic Host Configuration Protocol server requires a static IP address, so in this section, you will configure a static IP for the Raspberry Pi.
To get started, run the following command in Terminal:
sudo nano /etc/dhcpcd.confRaspbian will open the configuration file for dhcpcd. Scroll to the bottom of this file and add the following lines:
interface wlan0 static ip_address=192.168.4.1/24 nohook wpa_supplicantSave the changes by pressing Ctrl+ O, followed by Ctrl+ X.
Allow routing
The Raspberry Pi access point is currently running its own independent wireless network. However, if you want to allow customers to access computers on your Ethernet network, then you will need to enable routing.
To allow routing, create the routed-ap.conf file using the following command:
sudo nano /etc/sysctl.d/routed-ap.confThis command creates the routed-ap.conf file and opens it for editing in the Nano editor. In the text editor, type the following:
net.ipv4.ip_forward=1Save the changes.
Add a new firewall rule to the Raspberry Pi by running the following command:
sudo iptables -t nat -A POSTROUTING -o eth0 -j MASQUERADEFinally, use netfilter-persistent to ensure new rules are loaded on startup:
sudo netfilter-persistent saveConfigure service DHCP and DNS
The dnsmasq package provides a default configuration file, but you don't need all the options included in this file.
To make things easier, rename the default configuration file dnsmasq. And create a completely blank replacement file.
Then open this new dnsmasq.conf file in the Nano editor and add only the configuration options you really need.
To get started, run the following Terminal commands:
sudo mv /etc/dnsmasq.conf /etc/dnsmasq.conf.orig sudo nano /etc/dnsmasq.confAdd the following configuration options:
interface=wlan0 dhcp-range=192.168.4.2,192.168.4.20,255.255.255.0,24h domain=wlan address=/gw.wlan/192.168.4.1Save the changes.
Create network name and password
Configure the wireless access point by editing the hostapd configuration file.
To open this file and edit, run the following command:
sudo nano /etc/hostapd/hostapd.confAdd some information for the wireless access point, including naming and password security. To help protect the access point, the password must be 8 characters or more, a combination of letters, numbers and symbols.
This tutorial creates an access point named NetworkName with the password PassphrasePassphrase. But make sure you use something more secure for your network!
interface=wlan0 ssid=NetworkName hw_mode=g channel=7 macaddr_acl=0 auth_algs=1 ignore_broadcast_ssid=0 wpa=2 wpa_passphrase=PassphrasePassphrase wpa_key_mgmt=WPA-PSK wpa_pairwise=TKIP rsn_pairwise=CCMPSave the changes.
Connect to the wireless access point
Congratulations, you have turned your Raspberry Pi into a wireless access point.
To verify that everything is working properly, you should restart your Raspberry Pi and check if the access point can be connected after this reboot.
Once the Raspberry Pi has been rebooted, grab any WiFi-enabled device and scan for nearby wireless networks. You should see a network with the name you specified in the hostapd.conf file of the Raspberry Pi.
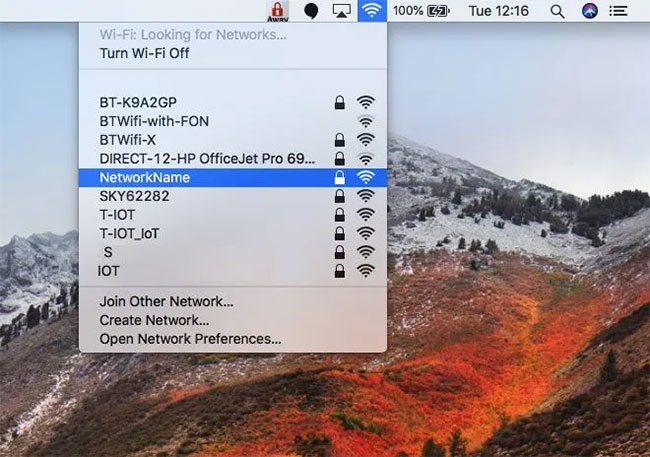 The network with the specified name will appear
Try connecting to this network and you will be prompted for a password. Enter the passphrase from the hostapd.conf file and after a few moments, you will be successfully connected to your wireless access point.
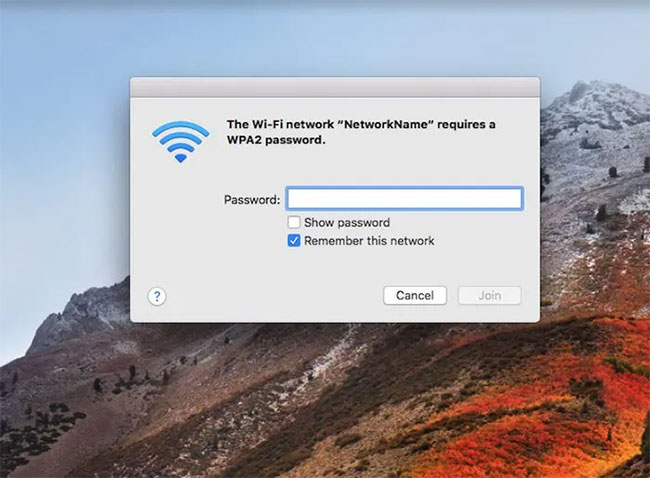
You can now surf the Internet on WiFi-enabled devices as if it were directly connected to the router.