Table of Contents
This guide provides a clearer, better-organized overview of The Simplest Way to Schedule a Windows 10 Computer Shutdown. It focuses on the essential facts, practical steps, and common questions readers are most likely to have.
One of the big benefits of using the Windows 10 computer shutdown timer Feature is saving energy and reducing operating costs. When the computer automatically turns off after a period of non-use, it will help users reduce power consumption while improving information security and increasing user experience.
5 Simplest Ways to Schedule Windows 10 Computer Shutdown in 2024
Similar to Scheduling a computer shutdown on Windows 11 , you can schedule a Windows 10 PC to shutdown in many ways. You can use the system's built-in features or use code and even the intervention of 3rd party software to automatically turn off your Windows 10 computer quickly and effectively. All are Free Download, detailed introduction below for readers to easily apply
Set a Timer to Turn Off Your Windows 10 Laptop with the Run Command
This is a simple and quick way for users to schedule a Windows 10 computer shutdown. Just open the Run dialog box and enter the command to turn off the computer shutdown timer with Windows 10 to complete the setup.
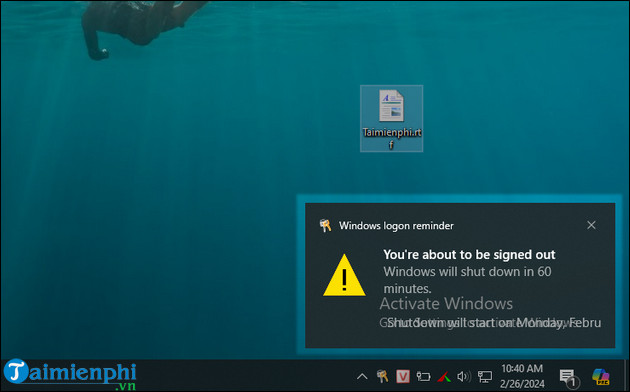
Step 1: select the Windows + R Key combination to quickly open the Run dialog box. Step 2: Enter in the dialog box the command " Shutdown -s -t 3600 " => select OK . - In which: + Shutdown : Command to turn off the computer + S : Abbreviation for shutdown. + T : Abbreviation for time + 3600 : Shutdown timer time. This value is measured in seconds and is optionally set by the user.

- At this point, the notification that the computer will automatically turn off after the time you just set appears in the bottom right corner of the screen.
Schedule Windows 10 Computer Shutdown Using Command Prompt
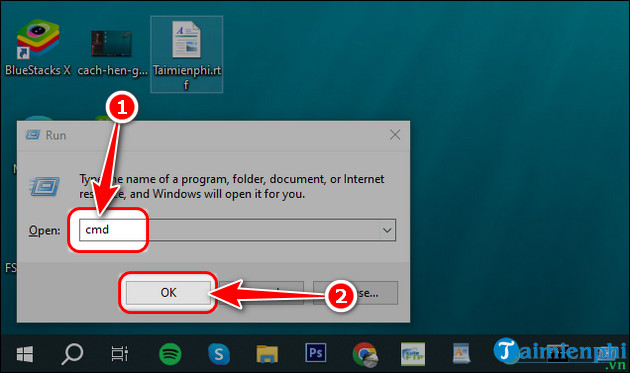
Step 1: select the Windows + R Keyboard shortcut to quickly launch the Run dialog box . Step 2: Enter the Cmd Command => select OK To open the Command Prompt dialog box.
Step 3: Enter the command Shutdown -s -t 3600 (ie 60 minutes the computer automatically shuts down) and select Enter . The system will count down the time and turn off the computer after 60 minutes.
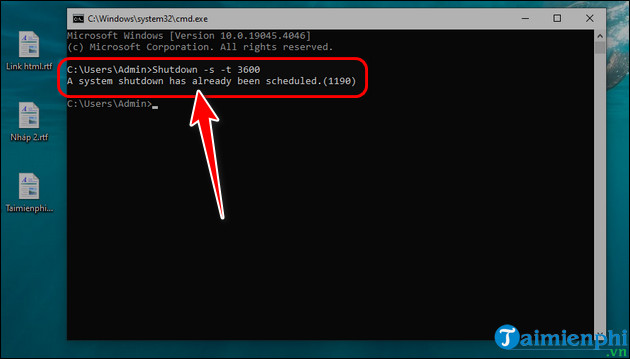
Windows 10 cmd shutdown timer
Schedule Windows 10 Computer Shutdown via Windows Powershell
Step 1: Right select the Windows icon => Select Windows PowerShell (Admin).
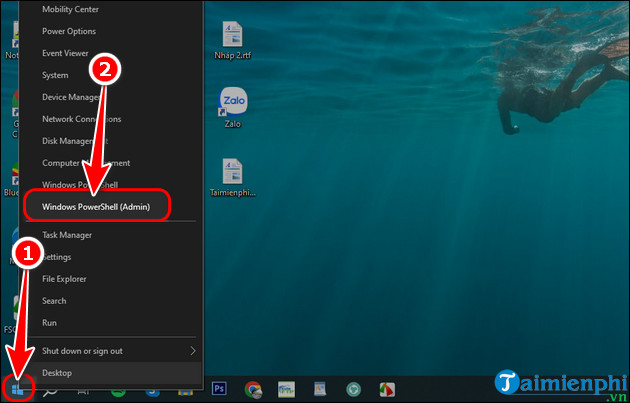
Step 2: Enter the command line Shutdown -s -t 3600 And select Enter To set up automatic shutdown of Windows 10 computer after 60 minutes of operation.
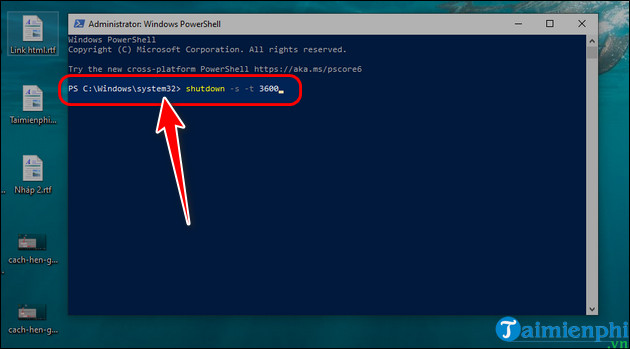
Schedule shutdown of Windows 10 PowerShell
Schedule Windows 10 Computer Shutdown Using Task Scheduler for Multiple Days
Performing a shutdown via the Shutdown command in part 1 can only schedule a one-time shutdown and when you want to continue working, the computer will still turn off at the set time. Here, if you use Scheduler, it allows you to schedule your laptop to turn off in multiple days with the available schedule and overcome the above disadvantages.
Step 1: Select the key combination Win + S To open the Search dialog box => Enter the keyword Tash Scheduler In the empty box. Step 2: Open the Task Scheduler software .
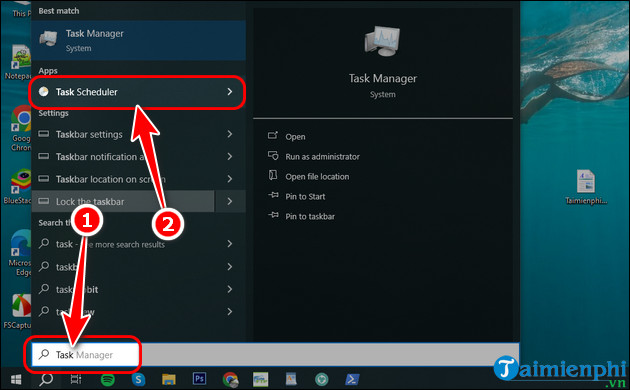
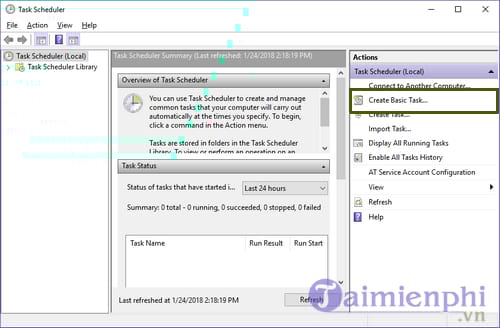
Step 3: Select Create Basic Task.
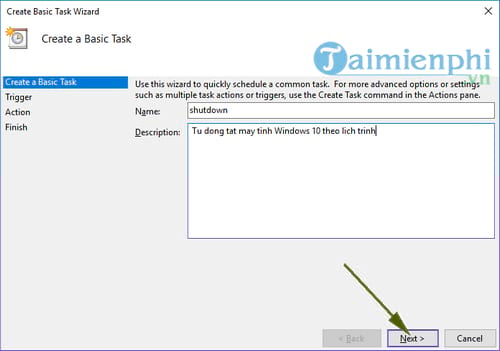
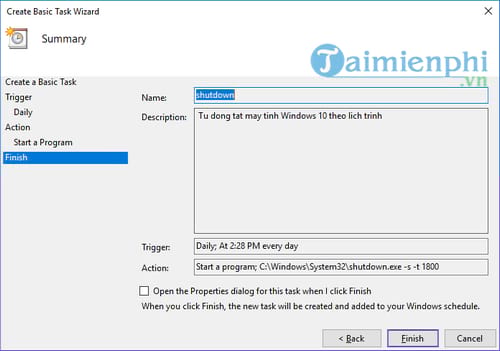
Step 3: Fill in the information required in the Create a Basic Task Tab. - Name: You enter the name you want to give the task, for example, here I set it as Shutdown. - Description: You write the description as shown below => select Next To open the next step.
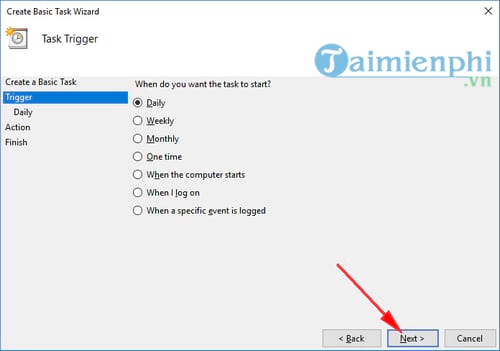
Step 4: Switch to the Trigger tab - Customize the newly created task launch schedule daily (Daily), weekly (Weekly),.=> select Next.
- In the Start section: You choose the time to schedule automatic shutdown and the date to start implementing this setting. - In the Recur Every section: Fill in the periodic shutdown time, you can select 1 day to perform the scheduled shutdown every day => select Next .
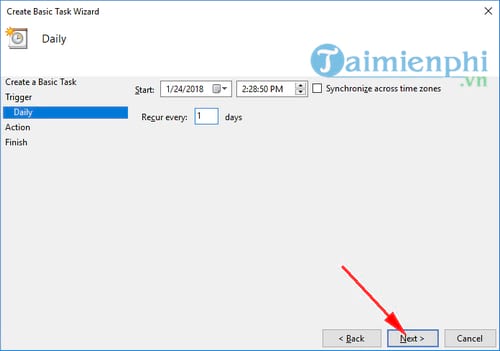
Note: If computer users frequently change time zones by location or country, they should check the Synchronize across time zones Box to automatically synchronize the task to the correct time zone and turn off the computer on schedule. you have installed.
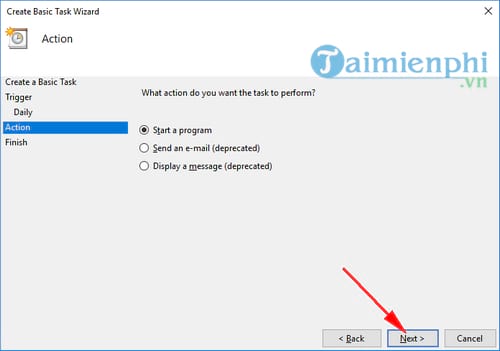
Step 6: Next interface, select Start a program => select Next.
Step 7: Switch to Action Tab => Select Start a Program. - At Program/Script: Paste the path C: WindowsSystem32 and select Shutdown. exe Into the empty box. - At Add arguments: Enter parameters -s -t 1800 (1800 is a unit of seconds equivalent to 30 minutes) => select Next
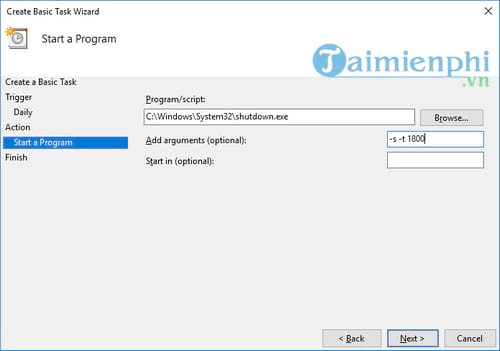
Step 8: Select Finish To complete and activate the active task.
Use Windows 10 Laptop Shutdown Timer Software
In addition to using the features available on the system, using Windows 10 computer shutdown timer software also brings many advantages, additions and expansions compared to features available in Windows. Some advantages when using computer shutdown timer software: - Flexibility: Windows 10 computer shutdown timer software often provides greater flexibility than features available in Windows. you can set up many different types of computer shutdown schedules, including turning off the computer after a specific amount of time, at a certain time, or after a specific task is completed. - Advanced features: Computer shutdown timer software often comes with advanced features such as custom energy saving modes, the ability to turn off the computer remotely via the internet and the ability to customize warnings before Turn off the computer so the user can save his work. - Cross-platform support: Some computer shutdown timer software is available not only for Windows but also for other operating systems such as macOS and Linux, allowing users to manage computer uptime across multiple platforms. different platforms. - Friendly interface: Windows 10 computer shutdown timer software often has an easy-to-use and user-friendly graphical interface, helping them easily set up and manage computer shutdown schedules effectively..
Some outstanding Windows 10 computer shutdown timer software that you can download and use are: Auto Shutdown , ShutdownGuard, Shutter, Windows Shutdown Assistant,.
If you are downloading data using IDM, you can also optionally set a Timer to turn off the computer using IDM When downloading the file is complete through setting Options right on this software itself.
How to Cancel Computer Shutdown Timer on Windows 10
Method 1: Cancel the Computer Shutdown Timer with Command
+ select the Windows + R Key combination and enter the command: Shutdown -a
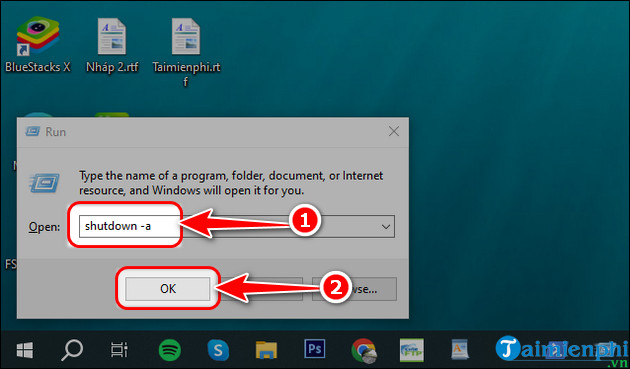
+ select Enter Or select OK And you will see a message displaying that you have canceled the command to turn off the computer
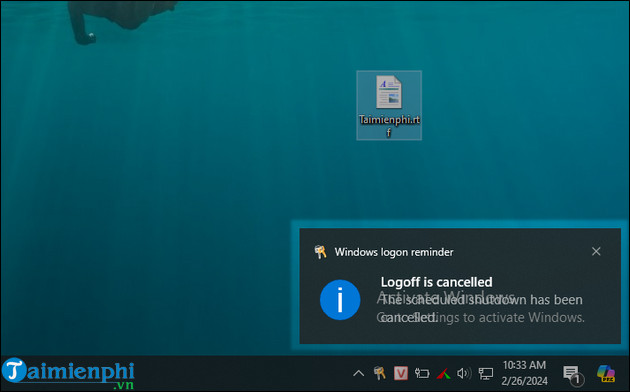
Method 2: Cancel the Computer Shutdown Timer Using Task Scheduler
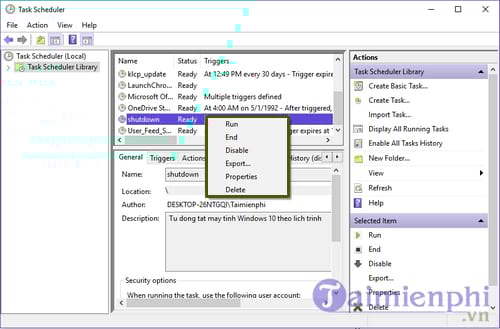
- open Task Scheduler => Select Task Scheduler Library. - Right-select the task name you just created (Shutdowwn) and select the options you want. + End : Completely stops the task and can restart it if desired. + Disable : Temporarily turns off the task and can be reactivated. + Delete : Delete and stop the task completely.
Above are 5 ways to set a timer to turn off your Windows 10 computer that readers can apply to help your current work go smoothly and not affect your other working time much. Wishing readers success!
FAQ
What is the main point of The Simplest Way to Schedule a Windows 10 Computer Shutdown?
One of the big benefits of using the Windows 10 computer shutdown timer feature is saving energy and reducing operating costs.
Why might the details change over time?
Software versions, prices, policies, services, and product availability can change. Check the official source before making a purchase or changing important settings.
How can I use this information safely?
Follow official instructions, verify downloads and claims, back up important data, and avoid sharing passwords or sensitive account information.
Related Articles
 4 Easiest, Quickest, and Simplest Ways to Schedule Your Computer to Shut Down29 minutes read
 PC Shutdown Timer: Simple and Easy Ways to Schedule PC Shutdown8 minutes read
 Shutdown Command - Schedule the Shutdown of Windows 10 with the Shutdown4 minutes read
 6 Quick Ways to Schedule Windows 10 Computer Shutdown: Best Options Compared9 minutes read
 How to Turn Off the Computer Automatically10 minutes read
 How to Use the Shutdown Command to Schedule Shutdown and Restart the3 minutes read
Reader Comments 0
Sign in with email or Google to join the discussion.