The simplest way to insert images into Word on Android and iPhone phones
Instructions on how to insert images into Word on your phone extremely quickly and effectively. You just need to follow a few steps below:....
- Instructions for downloading Microsoft Word to your phone
- How to insert images into Word on different phone lines
- Some notes when inserting images into Word on the phone
- Open the Word app on your phone
- Open the document you want to insert the image into
- Select the location where you want to insert the image and use the Insert tab to insert it.
- Select the photo you want to insert from your phone's library
- Edit the size and alignment of the image
- Use high resolution images
- Check image file size before inserting
- Adjust text line breaks
- Resize image after insertion
- Add captions to photos
- Check alignment for proper fit
- Save all changes
- Check layout before printing
Your job requires a lot of work on Word and you want to find a way to insert images into Word on your phone effectively? This is a common task to help the text look more professional and attractive. In the article below, TipsMake will guide you in detail how to insert images into Word on Android and iPhone phones.
Instructions for downloading Microsoft Word to your phone
Microsoft Word is one of the most popular office applications, helping you create and edit documents easily right on your phone. To download Microsoft Word to your phone, you can follow these steps:
- Step 1: Access the app store: for iPhone, open the App Store, and for Android phones, open the Google Play Store.
- Step 2: Use the search bar and type "Microsoft Word" => Select the Microsoft Word application from the search results.
- Step 3: Click on the "Download" or "Install" button -> Wait for the download and installation process to complete.
- Step 4: Open Microsoft Word application after installation -> Sign in with your Microsoft account or create a new account if you don't have one.
Once you've completed the steps above, you're ready to use Microsoft Word on your phone.
How to insert images into Word on different phone lines
To insert a picture into word, you will follow these steps:

How to insert images into Word on different phone lines
Open the Word app on your phone
First, you'll need to open the Microsoft Word app on your phone. If you're not already signed in, sign in with your Microsoft account.
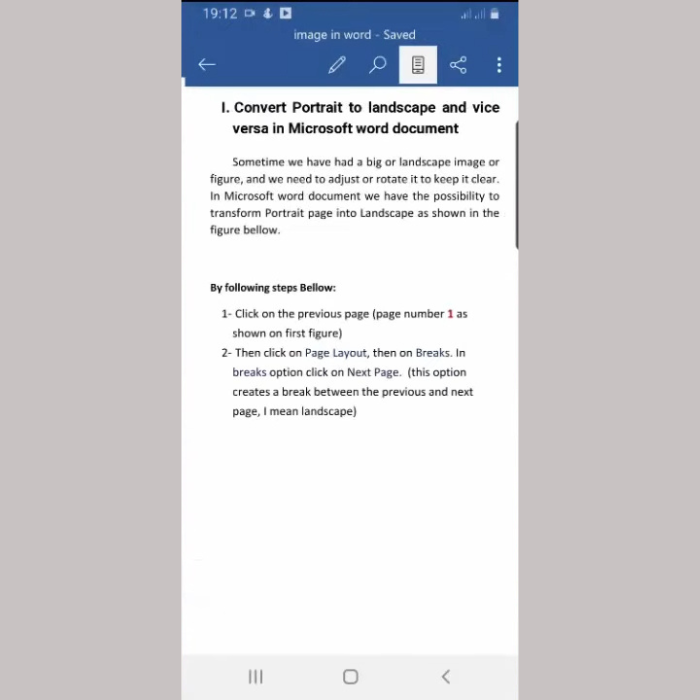
Open the document you want to insert the image into
After opening the application, you do:
- Select "Open" to open a document that is already available on your phone or in the cloud.
- Create a new document by selecting "New Document".
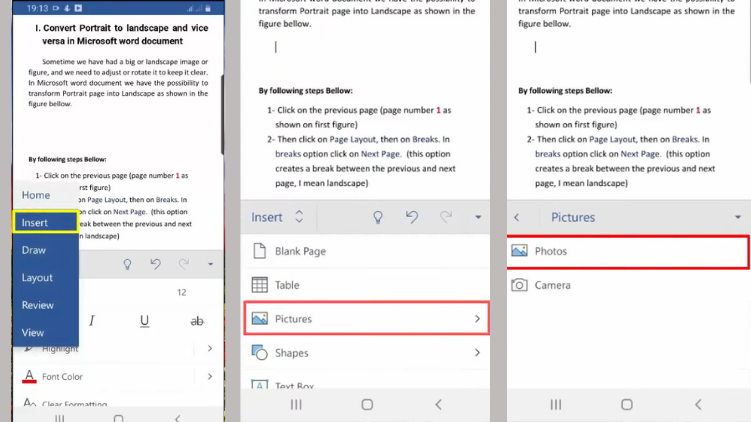
Select the location where you want to insert the image and use the Insert tab to insert it.
Once you have your document open, follow these steps to insert a picture:
- Move the cursor to the location where you want to insert the picture in the document.
- On the toolbar, select the "Insert" tab.
Select the photo you want to insert from your phone's library
Select "Pictures" in the Insert tab.
Microsoft Word will allow you to select a photo from your phone's photo library. You can browse and select the photo you want to insert into your document.
Edit the size and alignment of the image
Once the image has been inserted into your document, you can edit the size and margins of the image to suit your needs:
- To resize you need to tap on the photo you want to work with, then use the dots in the corners of the photo to drag and resize.
- To align, tap the photo you want to work with, use the alignment options on the toolbar to align left, right, center, or justify.
Some notes when inserting images into Word on the phone
Inserting images into Word documents on your phone can do a lot of things, from livening up your document to illustrating important points. But there are a few things to keep in mind when doing so:
Notes when inserting images into Word on the phone
Use high resolution images
High-resolution images will make your document look more professional and easier to read. Avoid using blurry or low-resolution images, as they will reduce the overall quality of your document.
To get the best images, you can use photo editing tools or camera apps on your phone. This will help you ensure that your photos are of the best quality before inserting them into your document.
Check image file size before inserting
If the image file is too large, it can make the Word document bulky and difficult to open on some devices. Especially if you need to send the document via email or share it via messaging apps.
Before inserting an image, you should check and reduce the file size if necessary. Photo editing applications or online image compression tools can help you reduce the file size without losing too much quality.
Adjust text line breaks
After inserting an image into a document, adjusting text wrapping is an important step to ensure that the text and images are properly aligned. This will help make your document easier to read and visually appealing.
You can use text wrapping options in Word to control how text around pictures is displayed. Options like "Wrap Tightly" or "Wrap Perpendicularly" can help create a layout that's logical and easy on the eyes.
Resize image after insertion
The size of an image may need to be adjusted after it has been inserted into a document to ensure that it fits within the overall layout. An image that is too large may take up too much space and unbalance the layout, while an image that is too small may not be clear enough to illustrate the main point.
In Word on your phone, you can easily resize a photo by dragging its corners. Be careful to maintain the proportions of the photo, and avoid stretching or shrinking the photo too much, which can cause it to lose its original shape.
Add captions to photos
Captions help readers better understand the content of a photo and clarify the relationship between the photo and the text. You can add captions to photos by using the caption inserter in Word. Keep your captions short, concise, and directly related to the content of the photo.
Check alignment for proper fit
You need to check and adjust the position of the image so that it does not disrupt the flow of the text and creates a harmonious layout. In Word, you can use the alignment tools to move the image and make sure it is in the right place. Try different alignment options such as left, right, center, or justified to find the layout that works best for your document.
Save all changes
After making changes and edits, it is important to save your document. Make sure you save all changes to avoid data loss and ensure that your document is up to date with the latest edits.
On your phone, saving a document is easy using the save options in Word. Save your document to your device's memory or to the cloud for easy access and sharing.
Check layout before printing
Before printing your document, you should double-check your layout to make sure all elements are aligned properly and your document looks professional. Double-check alignment, image size, and text wrapping to make sure your document is error-free and ready to print.
You can use the print preview in Word to check your layout before printing. This will help you detect problems that may affect print quality and make adjustments before sending your document to print.
Above are all the steps to insert images into word on your phone. Hopefully with the above sharing, you have useful information to apply successfully.
- How to insert pictures into Word, edit size and format
- How to insert images into Word 2007
- The simplest ways to insert pictures in Word 2019
- How to insert images in Word 2010
- Word 2013 Complete Guide (Part 15): Insert Images and Text Wrapping functions
- Word 2013 Complete Guide (Part 16): Image format
- How to insert images for text pages in Word
- How to insert text into images on Word
- Guide to inserting images under text in PowerPoint - Changing image position
- Detailed instructions on how to install Microsoft Office 2021 on Windows and Mac.
- The most detailed guide on how to number pages, skipping the first page and starting from any page in Word.
- How to use the IMPORTRANGE function in Google Sheets
- How to use Copilot to create a PowerPoint presentation in just minutes.


-
 These are some free software options that can replace Microsoft Word.
-
Wordle hint: Tips and strategies for playing Wordle
-
Comparing Google Docs and Word Online, which one should you use?
-
How to quickly display the Ruler in Word using keyboard shortcuts.
-
How to write fractions in Word simply and quickly.
-
How to print a document in Word without errors, easily.
 These are some free software options that can replace Microsoft Word.
 Wordle hint: Tips and strategies for playing Wordle
 Comparing Google Docs and Word Online, which one should you use?
 How to quickly display the Ruler in Word using keyboard shortcuts.
 How to write fractions in Word simply and quickly.
 How to print a document in Word without errors, easily.
-
Application
-
Web Email
-
Website - Blog
-
Web browser
-
Support Download - Upload
-
Software conversion
-
Social Network
-
Simulator software
-
Online payment
-
Office information
-
Music Software
-
Map and Positioning
-
Installation - Uninstall
-
Graphic design
-
Free - Discount
-
Email reader
-
Edit video
-
Edit photo
-
Compress and Decompress
-
Chat, Text, Call
-
Archive - Share
-
-
System
-
Mac OS X
-
Hardware
-
Game
-
Tech info
-
Technology
-
Science
-
Life
-
Electric
-
Program
-
Mobile