Save toner, preview 3D print by priPrinter
The priPrinter software is considered to be one of the best software for giving users a preview of the print in 3D just like on paper. Besides, it also has many options to help save ink when printing. In this article I will guide you how to use priPrinter software to save ink and preview 3D print through the following specific steps:
Step 1: Your computer needs to install priPrinter software, you can click here to download it.
Step 2: Install and then run the software. Software interface as shown below:
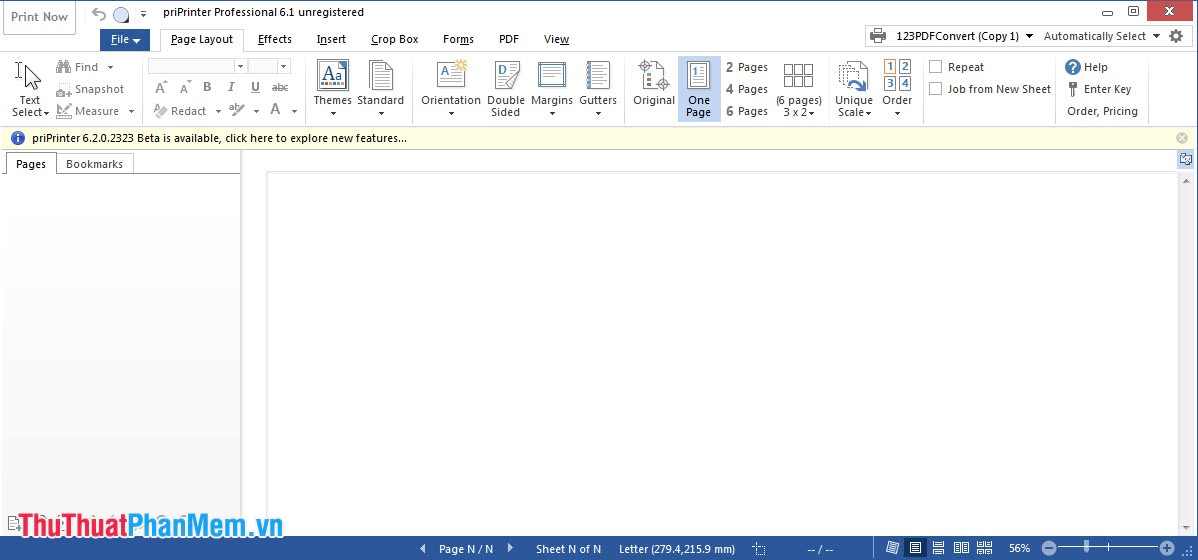
Once installed, priPinter will automatically integrate a virtual printer into the Print function of Windows. To transfer the content of the file to print into priPrinter, open the file you want to print using a commonly used application, select the Print function and select the printer name as priPrinter. Next, click OK to export the content of the file into .priPrinter format.
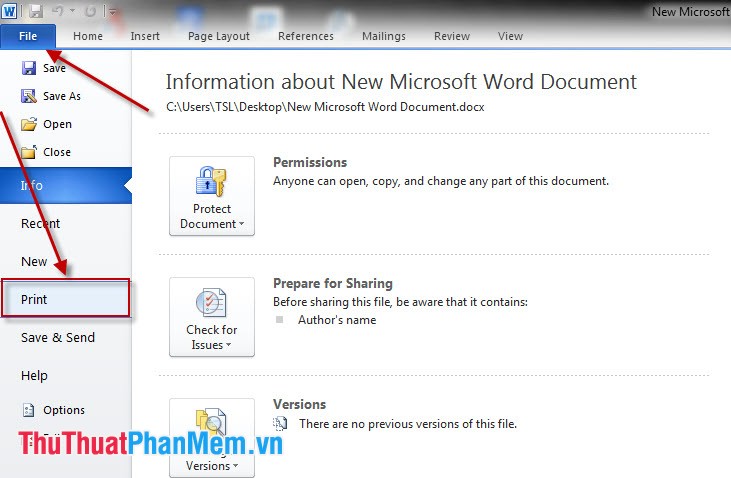
Example: In Word you click File click Print .
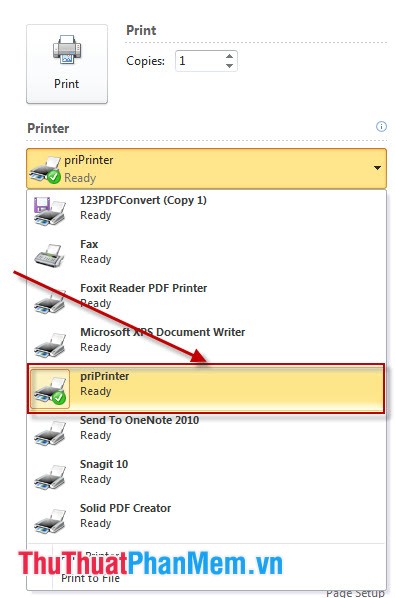
In the Printer section, choose priPrinter :
As soon as you press Print in Word and export the file successfully, priPrinter will automatically start and display the content of the file to print.
Step 3: You can change the view of printed page content on the main interface of priPrinter by selecting View -> 3D . The printed pages will display as 3D documents as if you were printing them on paper.
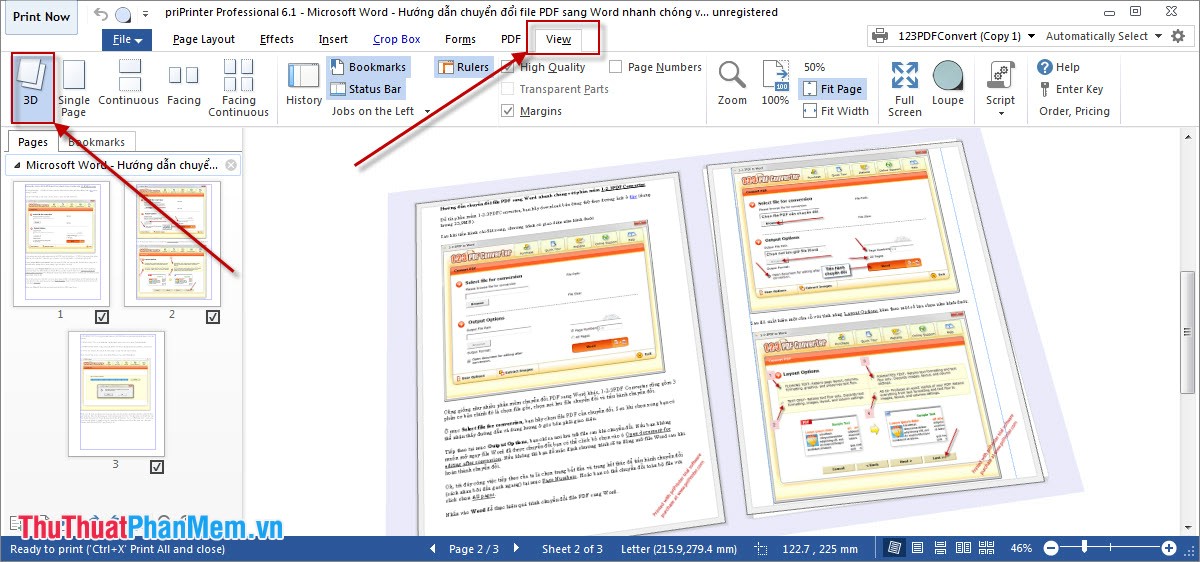
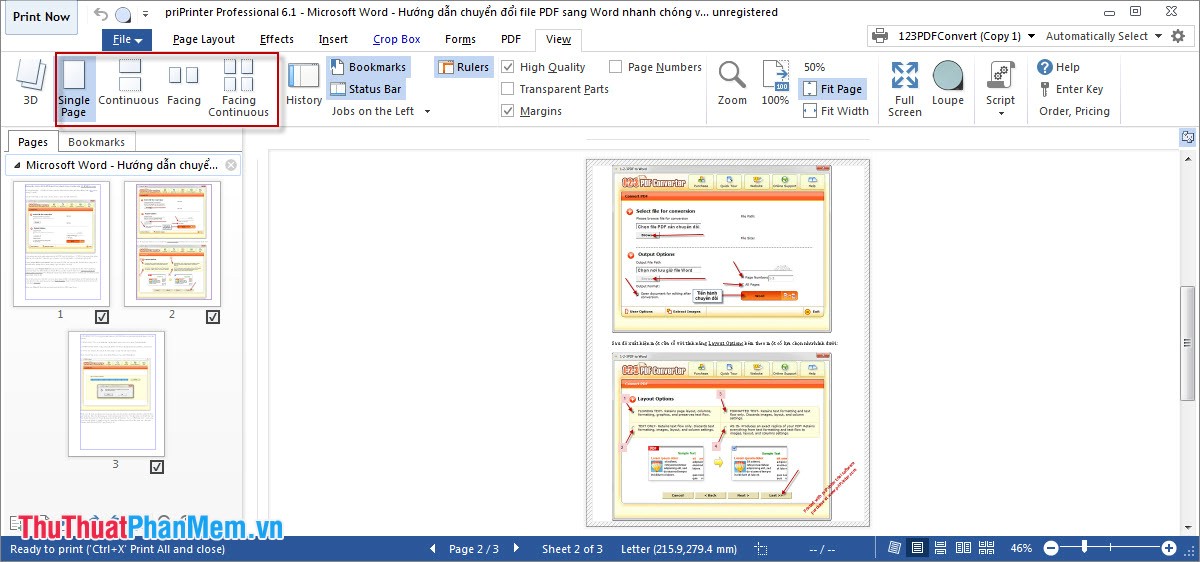
Also in this View you can view the printed page with many other options such as:
Single Page: View as a single page page.
Continuous: Arranges the page to print from top to bottom.
Facing: Arrange four rows of print pages.
Facing Contimuous: Shows each row of four pages printed from top to bottom.
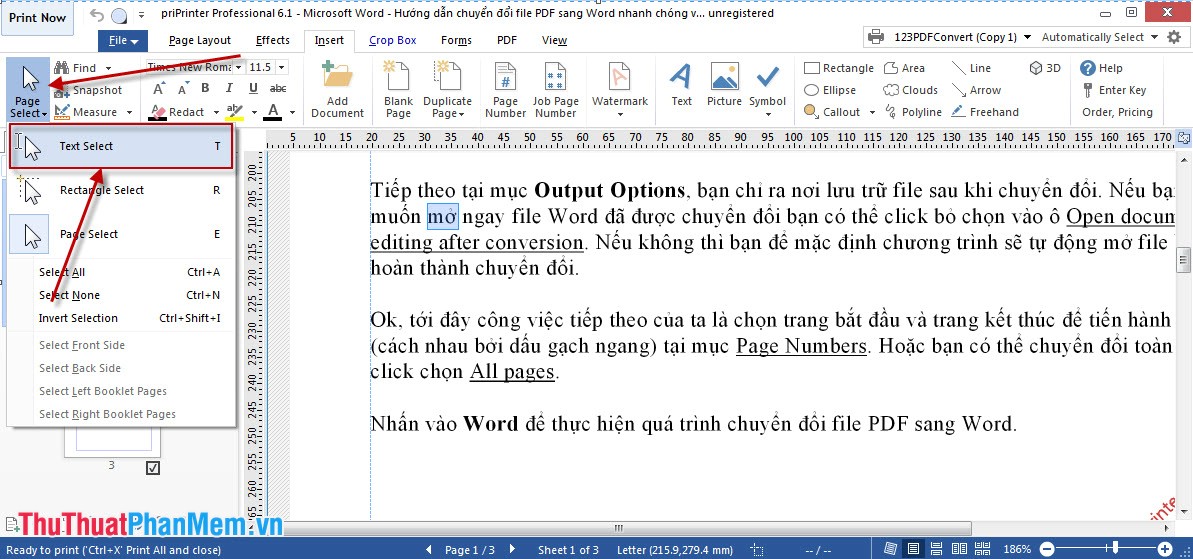
If you see a content error or error, you can correct it directly on priPrinter without opening the original file. Click Insert, select Page Select and then click Select Text , click on the text to be revised.
To move the content on the printed page, select Insert -> Page Select -> Page Select and then drag and drop the content to any position on the printed page.
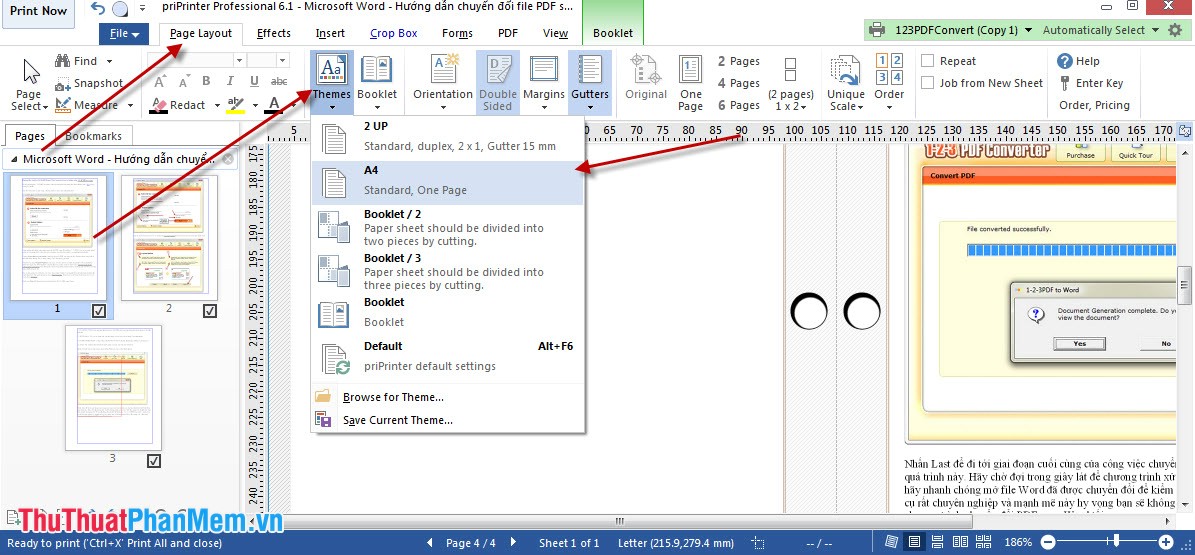
priPrinter contains a number of beautiful print templates to choose from for printing your documents. From Page Layout, select Themes , want to see more other patterns, select Browse for Theme and browse to C: Documents and SettingsUsernameMy DocumentspriPrinter filesThemes (username is the Windows login on your computer). Then select the print template from the list and click Open .
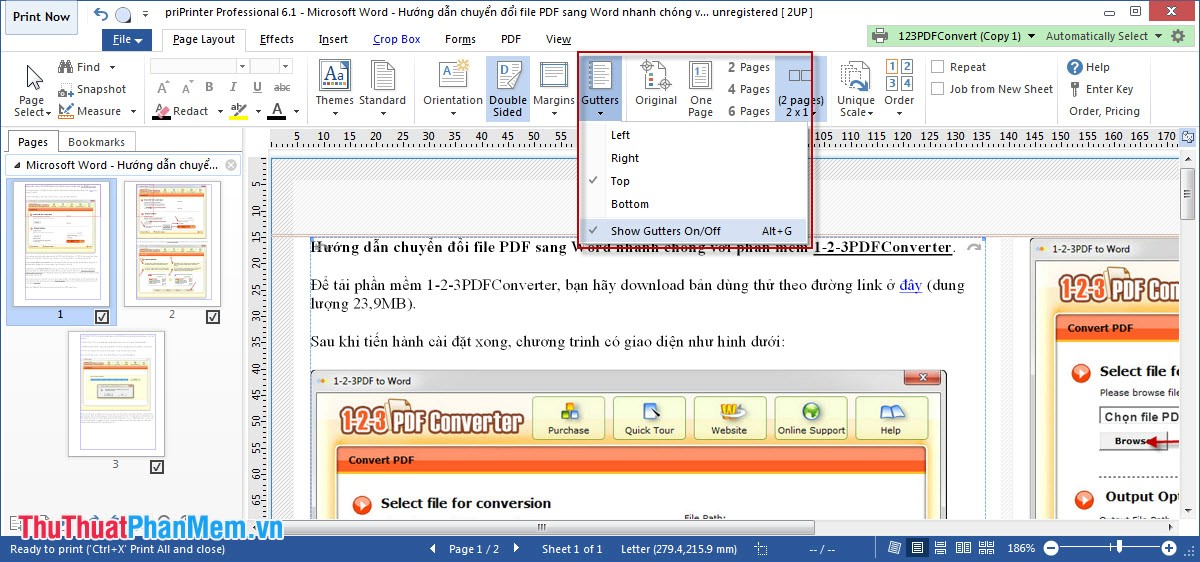
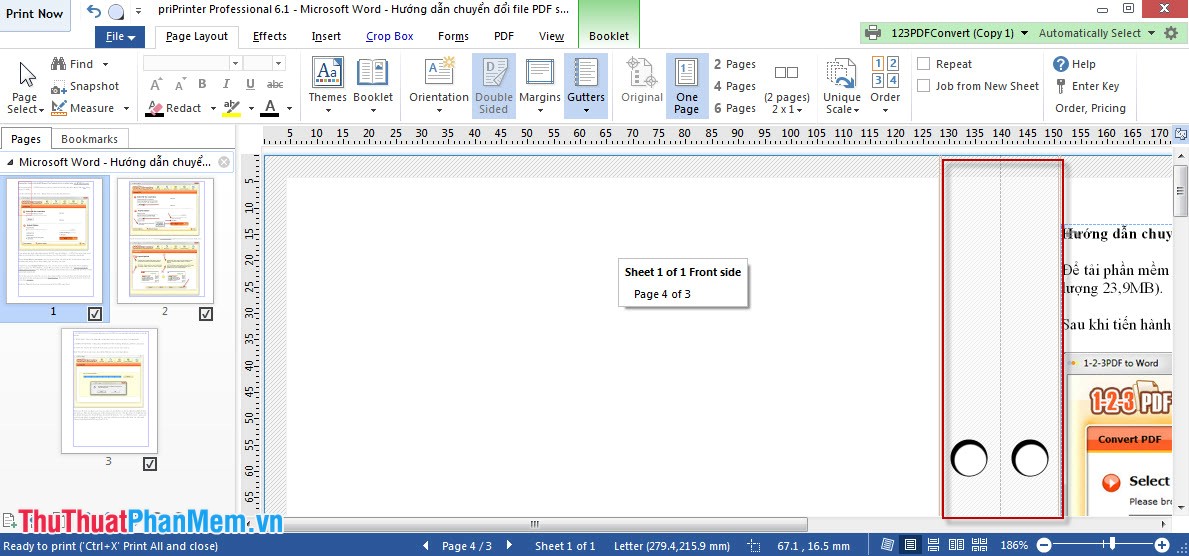
By default, the program will always leave a reasonable space to make spines, depending on the printing pattern, the placement of the spines may vary. To know the exact location of the spine you can choose Page Layout -> Gutters -> Show Gutters On / Off .
When the spine position appears, you can adjust the spine size in an important way by dragging the mouse to the edge of the spine and dragging the border to create an appropriate distance to the content of the printed page.
Save toner when printing with priPrinter
In the main window of priPrinter choose Effects and then choose one of the following tools:
Page Color: The color of the printed page, so select No Color if it is not necessary to print the color.
Page Borders: Print page borders, should not be selected.
Grayscale: Convert the entire page content to black and white, so choose if you do not print the color
Remove Graphics: Do not print images.
Black Text: Converts all text to black, suitable for black and white prints.

Next, click the Print Now button to print the paper.

In addition to printing on paper, priPrinter also integrates the tool to export printed page content into PDF format suitable for making e-books. In the priPrinter window you open PDF and select the resolution mode at Reduce to , select image quality in JPEG , name in the Title and content of the subject in the Subject .

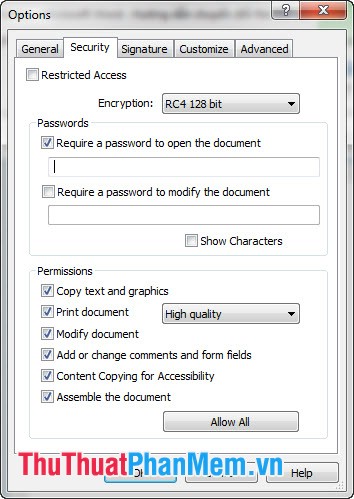
You can set a password for the PDF file by clicking Protect Document and selecting Options .

In the Options dialog box, click on the Security section you can set arbitrary password.
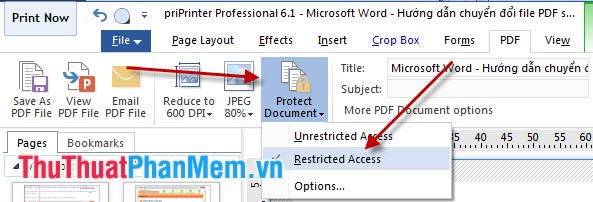
After setting the password, click Protect Document and then click Restricted Access .
Click Save As PDF :
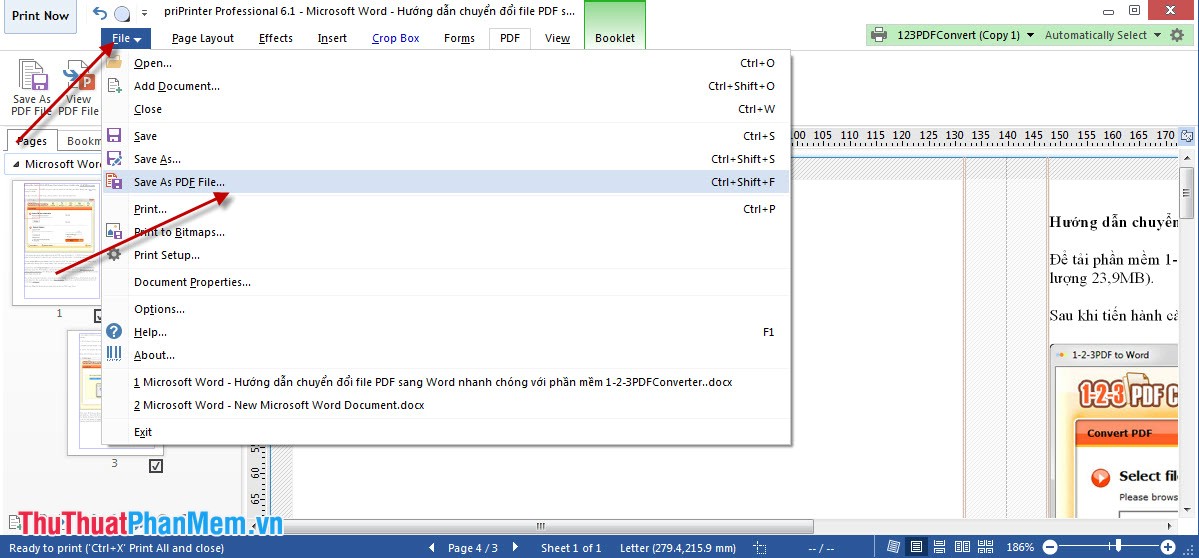
Name the file and then select the folder to save the PDF file after exporting, then click Save to finish.