Table of Contents
This practical guide walks through how to set up paper duplex printing on Windows 11, explains the main requirements, and highlights common issues that may appear along the way.
Depending on the printer, you'll use manual duplexing or automatic duplexing. If your printer supports automatic duplexing, the next pages in the print job are automatically loaded into the printer. In contrast on a manual duplexer, you will have to manually add pages to your printer to print on both sides of the paper. In this tutorial, we will use a manual duplexer.
Set up duplex printing for an individual print job on Windows 11
First, open the document you want to print in a supported application. For example, To print a WordPad document, open it in the WordPad app.
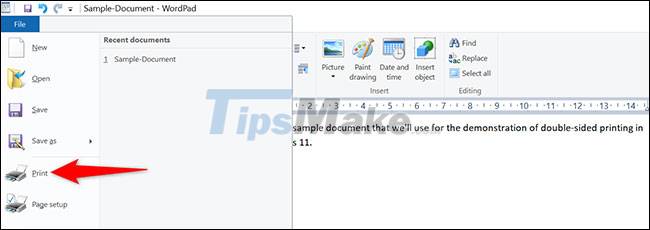
In the WordPad interface (or any other application where you open your document), you press Ctrl + P to open the print window. Or you can also click File > Print (in most applications), and the print setup window will open immediately.
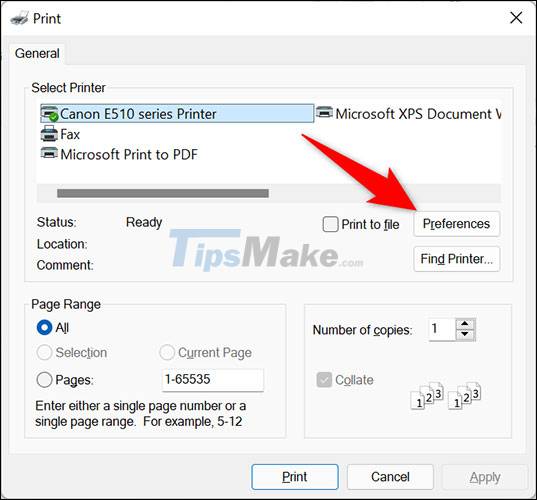
On the print settings window, select the printer you want to use, then click the 'Preferences' button.
On the 'Preferences' window that opens, activate the 'Duplex Printing (Manual)' option. Then, at the bottom of this window, click 'OK'.

(Tip: If your printer offers a 'Duplex Printing (Automatic)' option, select it. This is an automatic duplexing option that allows you to not have to manually insert pages into the printer like normally.
You are now back in the 'Print' window. Here, click 'Apply' and then 'Print' to start the process of printing the document on both sides of the paper.

How to set up two-sided printing as the default printing option on Windows 11
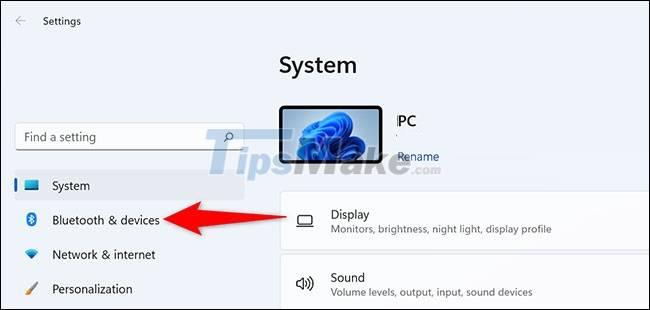
First, open the Settings Windows application by pressing the Windows + i key combination. In the Settings application interface that appears, from the list on the left, click 'Bluetooth & Devices'.
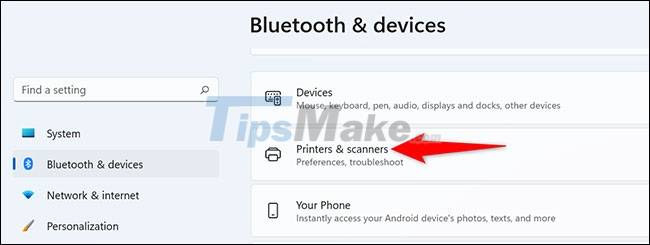
On the 'Bluetooth & Devices' settings page, click 'Printers & Scanners'.
On the 'Printers & Scanners' page, select the printer you want to use.
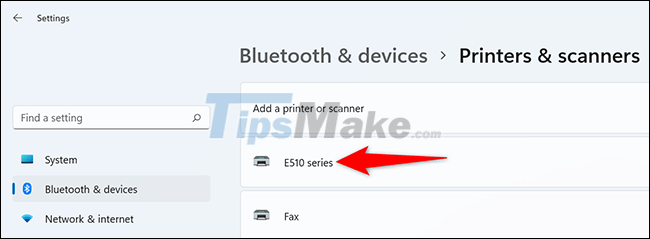
The printer setup page opens. At the top of this page, you click the 'Printer Settings' tab. Then select 'Printing Preferences'.

You will see your printer customization window. Here, enable the 'Duplex Printing (Manual)' option. Then click 'Apply' and press 'OK' at the bottom of the window.

Accomplished! From now on, duplex printing will be the default printing option on your Windows 11 PC.
Key Takeaways
Use the information above as a practical reference for how to set up paper duplex printing on Windows 11. Review each step carefully, confirm any requirements, and choose the option that best fits your situation.
FAQ
What does this guide explain about Set up Paper Duplex Printing on Windows 11?
It explains the main concepts, practical considerations, and useful steps related to set up paper duplex printing on Windows 11 without requiring advanced knowledge.
Who can benefit from learning about Set up Paper Duplex Printing on Windows 11?
This information is useful for readers who want a clear overview, practical guidance, and reliable steps related to set up paper duplex printing on Windows 11.
What should I check before applying this information?
Review the requirements, confirm that your device, software, or situation matches the instructions, and back up important data before making major changes.
Related Articles
 How to Enable Two-sided Printing on Windows: Clear Instructions4 minutes read
 How to Enable Duplex Printing in Windows 103 minutes read
 How to Print 2 Sides in Excel Word: Step-by-Step Guide7 minutes read
 Instructions for Printing Two-Sided Paper in Word, PDF, Excel6 minutes read
 Learn About Simplex, Half Duplex and Full Duplex10 minutes read
 New Invention: Light-printed Paper, Renewed by Temperature and Reuse 80 Times4 minutes read
Reader Comments 0
Sign in with email or Google to join the discussion.