Table of Contents
This article provides a clear overview of Repeat Wi-Fi Wi-Fi - Receive Wi-Fi Source and Playback, with the main facts, useful context, and practical details organized for easy reading.
If you may need to turn your laptop into a Repeater - Get Wifi and share it with other computers. Refer to: Wifi generator software for Laptop
This feature is very useful in the design of WiFi networks in the home, because often the indoor terrain is often complex and obstructed, resulting in the intensity and range of the Router greatly affected. The solution to this problem is usually 2 types.
Quick Adsense WordPress Plugin: http://quickadsense. com/Solution 1: Buy a long-range and powerful router like TL-WR940N or TL-WR1043ND or TL-WR1042ND . But this solution is still not really optimal, because even though the device is strong and high penetration after passing through the thick concrete layer of the 3 4-storey building, it is also weakened at points far from the Router.
Solution 2: Buy a mid-range R outer like TL-WR841N, TL-WR841ND , can take TL-WR940N As the main WiFi transmitter directly connected to the modem, Then buy weaker routers like TL-WR740N, or take TL-WR841N for strong, located in the weak or weak WiFi points, captures the WiFi of the main Router and replays that area. This solution is not more expensive than buying a powerful router and still ensures the same intensity and coverage throughout the building.

Configure Repeat Wi-Fi - Wi-Fi Reception and Playback on TP-Link TL-WR841ND Wi-Fi Modem
For each type of Router, each FirmWare usually has different configuration ways. Here I would like to guide how to configure the TP-Link TL-WR841ND repeat wave of TL-WR720N Router.
Preparation: You need a TL-WR841ND WiFi transmitter, and a TL-WR720N WiFi transmitter (knowing the SSID and password), a Laptop.
You must first turn off the computer's WiFi, why do so, because TP-Link WiFi Routers usually have the default admin page IP address of 192.168.0.1. If you do not turn off WiFi and your Laptop is accessing the WiFi of another TP-Link Router , this will result in IP conflict.
Step 1: Connect the router to the computer . Use the LAN cable to plug into the LAN port on the TL-WR841ND WiFi transmitter (yellow port) and the other end into the Laptop. Open a web browser (Chrome, Firefox, IE) and type in the address bar 192.168.0.1 You will see the administration page of Router TL-WR841ND.
Note: You can access the address 192.168.0.1 without plugging in a LAN connection cable if you have connected to the Wifi that is playing from that Modem .
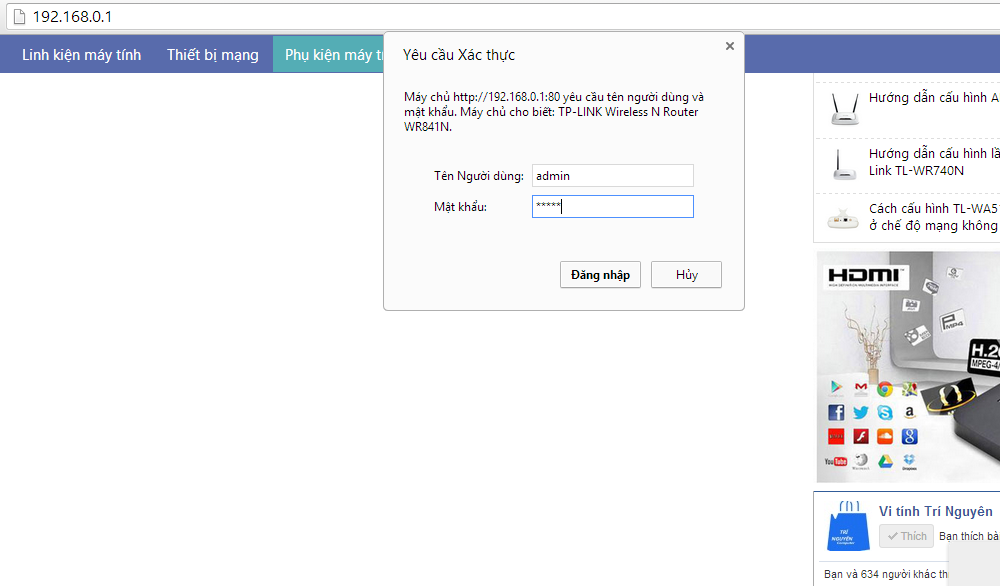
Username and password respectively admin / admin .
Step 2:Turn on WDS mode to Repeater wave . After successful login, you will be redirected to the router 's administration page . Continue to select menu Wireless → Wireless settings. Scroll down below you will see the Enable WDS Bridging checkbox , click it to display the WiFi selection box for Repeat.
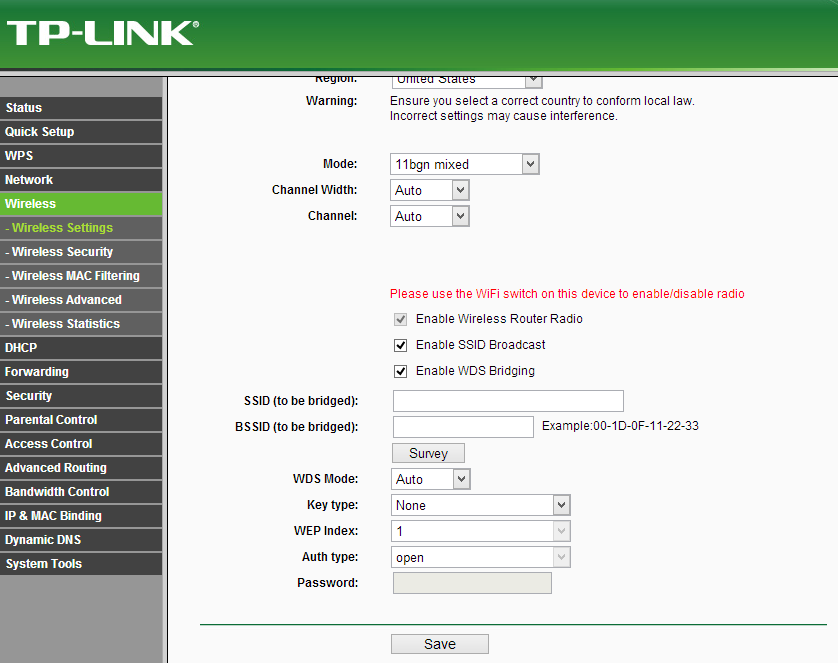
Step 3: Search for WiFi waves to record and play back Click Survey to search for all available WiFi waves and below are the results.
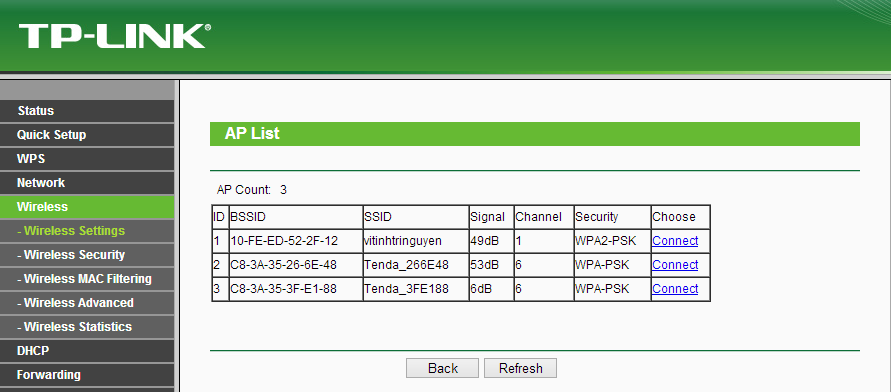
At the detected WiFi list, Find the SSID of WiFi transmitted by TL-WR720N , here the SSID is vitinhtringuyen. Click connect to connect.
Quick Adsense WordPress Plugin: http://quickadsense. com/Note: You also notice the Chanel of the original Wifi above. Chanel is 1. Security is WPA2-PSK.
The browser will return to the previous page for you to enter the password of the WiFi you may need to repeat and click Save . Remember, you have to select Chanel in the Chanel box and Chanel of the router and choose the right password encryption in the Key Type box . Many of you did the right steps but forgot this step can not be repeated. After entering the password - Password, you must Reboot the Router to save the changes.
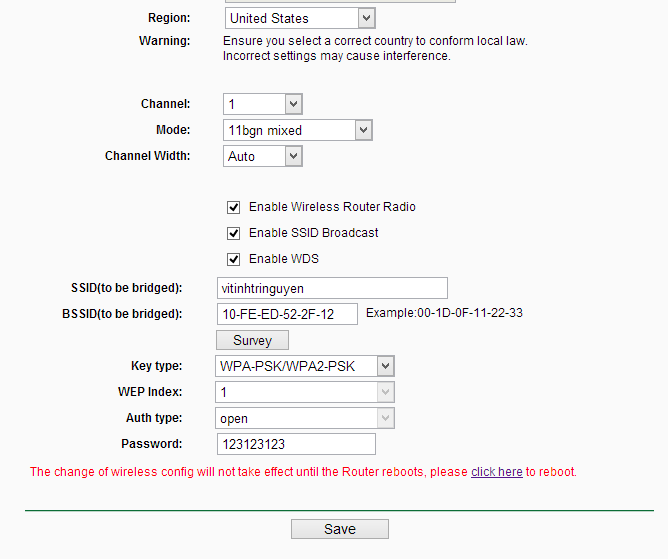
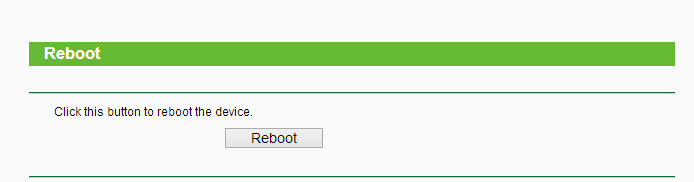
Step 4:Click Reboot to reboot the Router
Customize Connectivity
So you've finished repeating the WiFi signal of TP-link TL-WR720N and playback. But maybe you wonder if you may need to connect to the TP-Link TL-WR841ND 's WiFi router now to connect. There are 2 options.
Method 1: Share the SSID of the source router, which is the main router that TL-WR841ND receives and plays back. To do so, you must turn off the DHCP feature in Router TL-WR841ND . Thus 2 routers will share 1 SSID. This way is very convenient because when moving, you need to reconnect. For example, you put the TL-WR720 on the 1st floor. The TL-WR841ND on the 2nd floor receives and replays on the 3rd floor. If you use an SSID, when bringing a laptop or phone from the 3rd floor to the 1st floor, you still connect as usually without having to disconnect from TL-WR841ND to switch over TL-WR720N .
Method 2: is to use 2 different SSIDs. To do so, you must turn on the DHCP feature on the TL-WR841ND Router . And go to Wireless settings to configure WiFi name as well as set a password for the second SSID.
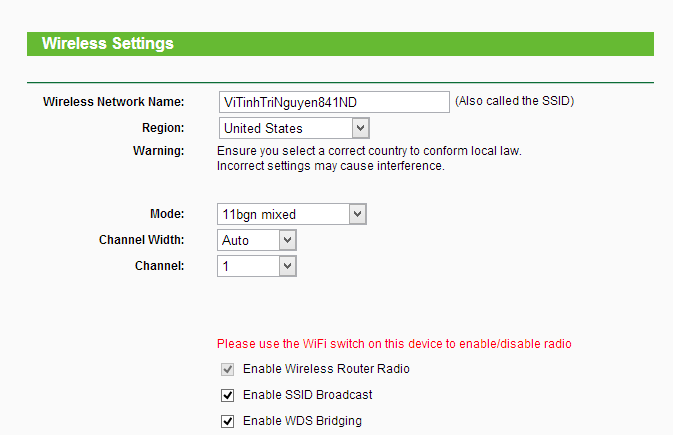
Here I set ViTinhTriNguyen841ND to distinguish it with the SSID of the main router. Next is to set a password for this new SSID
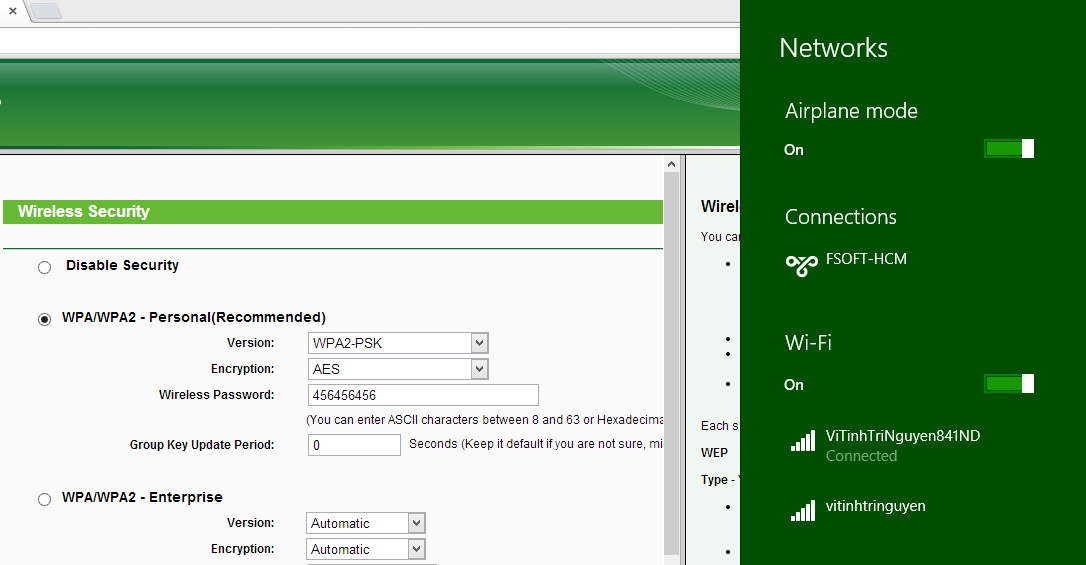
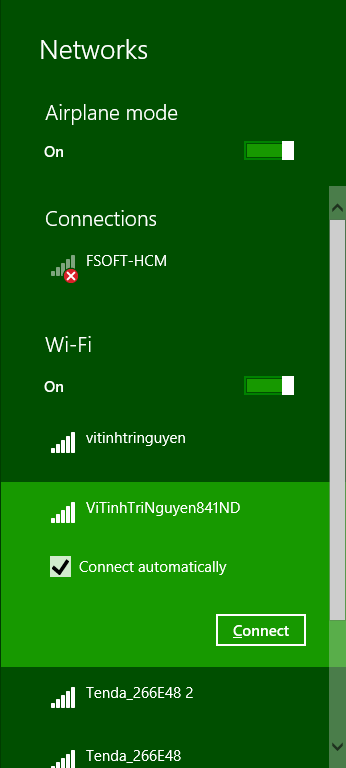
Finally, when connecting to WiFi on the computer you will see 2 SSIDs. One of the main Router and one of the Router Repeater .
For ease of management, you should change the default IP address of Router configuration page TL-WR841ND , because both routers now have the same admin page IP of 192.168.0.1.
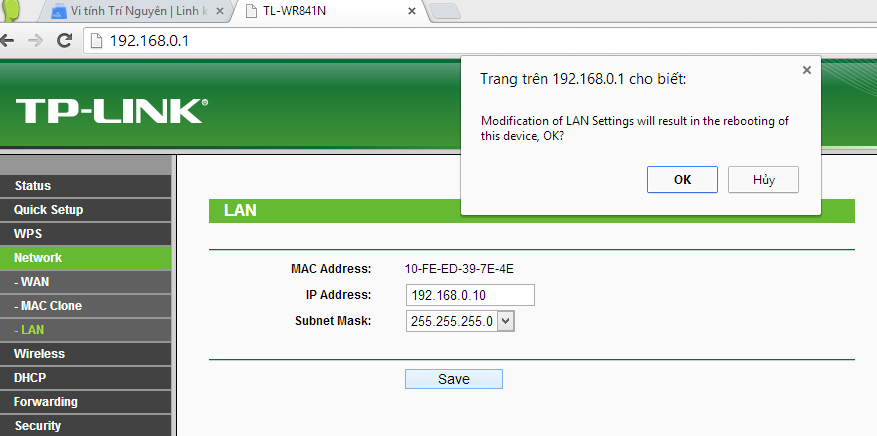
You changed it back to 192.168.0.10. If you may need to log into the main Router's management page, type 192.168.0.1. If you may need to manage TL-WR841ND, type 192.168.0.10.
Finally, unplug the initial plug and try connecting to TP-Link TL-WR841ND WiFi Router with WiFi.
ShareitFAQ
What is the main focus of Repeat Wi-Fi Wi-Fi - Receive Wi-Fi Source and Playback?
The article explains the most important facts, context, and practical details related to Repeat Wi-Fi Wi-Fi - Receive Wi-Fi Source and Playback.
Who may find this information useful?
It is useful for readers who want a clear overview, practical context, and a better understanding of the subject.
What should readers verify before taking action?
Check current product versions, official requirements, regional availability, and any details that may have changed since the original publication.
Related Articles
 2 Ways to Replay, Replay YouTube Videos Automatically7 minutes read
 How to Troubleshoot Repeated Messages on Android3 minutes read
 Wi-Fi Tuner: 6 Wi-Fi Boosters, Amplify the Best Wi-Fi Wave 20203 minutes read
 9 Best Free Wi-Fi Playback Software and Download Link5 minutes read
 Top 6 Best 3G // 4G Mobile Wi-Fi Transmitters9 minutes read
 What Is USB Wi-Fi? Features, Uses, and Key Details7 minutes read
Reader Comments 0
Sign in with email or Google to join the discussion.