Table of Contents
Remove the Folder's Lock Icon in Windows 7 is easier to understand when the core ideas are paired with practical examples. The sections below explain the topic clearly, highlight useful steps, and point out details that can prevent common errors.
In the following article, we will present some basic steps to remove the folder Lock icon in Windows 7. Whenever locking any folder, the system will appear a lock icon outside the folder. That, whether you can access it or not.
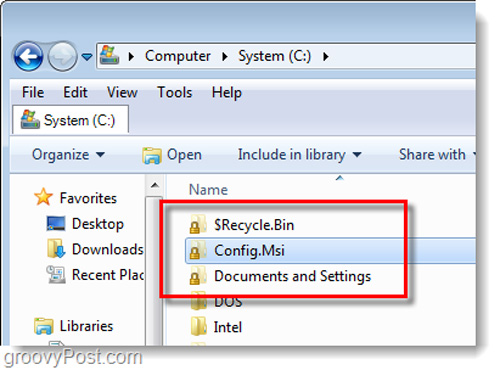
First, right-click the folder with the lock icon and select Properties :

Next, select the Security> Edit tab, the Permissions window appears, select Add :
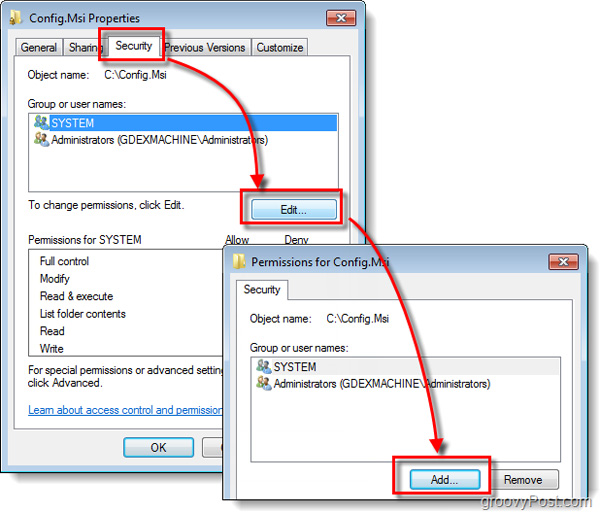
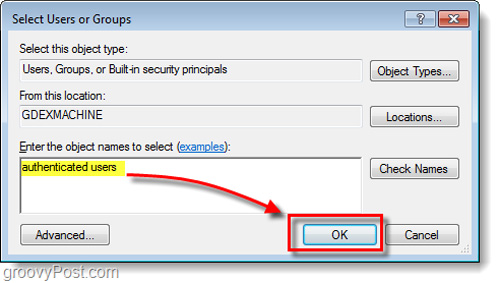
Type authenticated users in the empty box and click OK:
The Authenticated Users information line will appear in the Security list, click OK twice to apply changes and close the window:
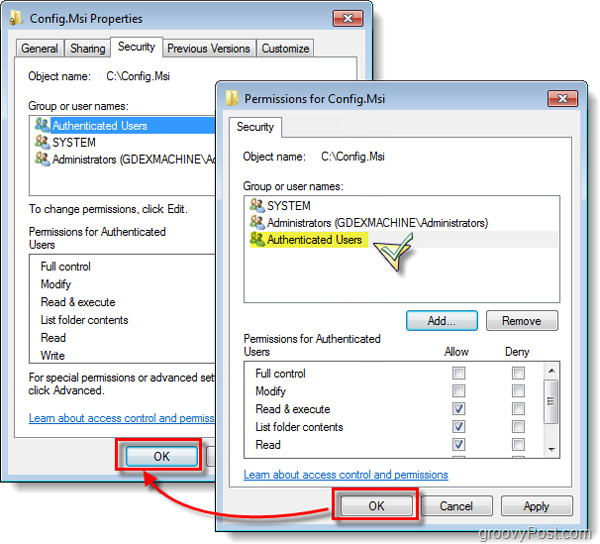
And the Lock icon will disappear from that folder:
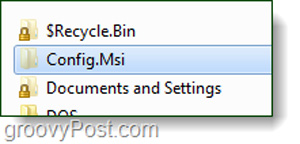
If you are worried about this, you can change it at the Permissions settings page, uncheck the check box & read . Good luck!
FAQ
What is Remove the Folder's Lock Icon in Windows 7?
In the following article, we will present some basic steps to remove the folder Lock icon in Windows 7.
Why is Remove the Folder's Lock Icon in Windows 7 important?
A clear understanding of Remove the Folder's Lock Icon in Windows 7 helps you make informed decisions, avoid common mistakes, and use the relevant tools or techniques more effectively.
How should beginners approach Remove the Folder's Lock Icon in Windows 7?
Start with the fundamental concepts, follow the examples step by step, and test each change in a safe environment before applying it to important systems or data.
Related Articles
 Why Is There a Lock Icon on the Drive and How to Remove It?4 minutes read
 Remove Network Icon on Lock Screen Lock Screen Windows 104 minutes read
 How to Delete 'Learn More About This Picture' Icon Windows 113 minutes read
 Steps to Change Icons for Specific File Formats in Windows6 minutes read
 Guide to Lock, Hide and Secure Files and Folders with Hide Folders Software4 minutes read
 Lock Folders, Set Folder Passwords, Folders Easily and Safely5 minutes read
Reader Comments 0
Sign in with email or Google to join the discussion.