Table of Contents
This guide provides a clear overview of change file icon, including how to Change Icons for File Formats with Types, how to Change Icon for File Format Using Default Programs Editor. Use it to understand the topic, compare the available options, and make a more informed decision.
However, you can still change the icons for file formats with some third-party software. Types and Default Programs Editor are two desktop applications that include options to change icons for file formats in Windows. Below we look at how you can change the file format icons with those software packages.
How to Change Icons for File Formats with Types
Types is a free desktop application (more specifically donationware) that runs on all Windows platforms dating back to XP. It is a very light program that hardly takes up any hard drive storage space (66KB). You can change icons with Types like this.
Step 1. Download Types software here.
Step 2. Press the Win + E hotkey and open the folder that includes the ZIP Types file in File Explorer.
Step 3. Double-click the zipped ZIP Types archive.
Step 4. Click Extract all on the File Explorer command bar.

Step 5. Select the option Show extracted files and click the Extract button.

Step 6. Double-click Types.Setup.exe to open the window in the snapshot directly below.

Step 7. Select the Desktop shortcut check box.
Step 8. Click the. button to change the installation directory if you want.
Step 9. Click the Install button.
Step 10. Then double-click the Types shortcut on the desktop.
Step 11. Double-click the file format to change the icon. You can find a specific format by entering the file extension in the search box.
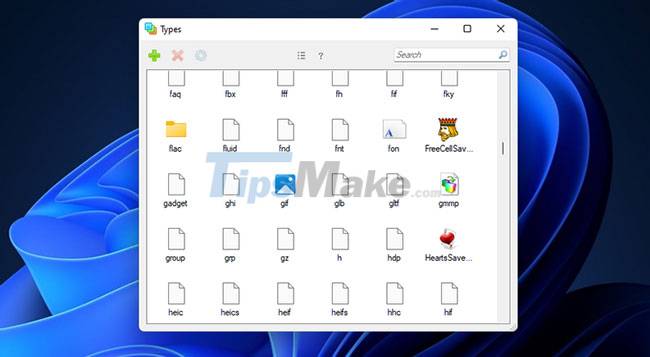
Step 12. Select the Icon tab on the Types window.
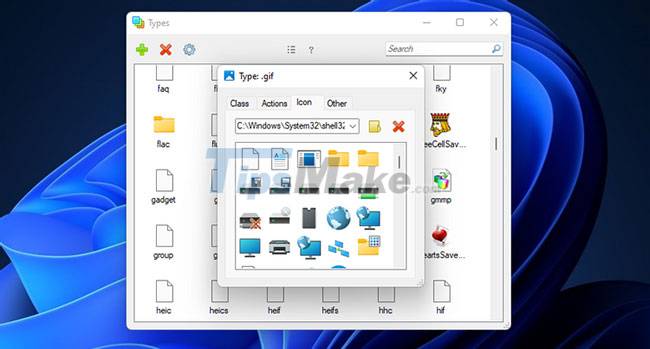
Step 13. Choose an alternative icon from the System32 folder. Alternatively, you can click the Select Icon file button to select a file in a different folder.
If Types doesn't include the format you want to change the icon to, click the + button. Enter the format in the text box. Then click on the Add option and select the added format in the window.
How to Change Icon for File Format Using Default Programs Editor
Default Programs Editor is another freely available program with which you can change the file format icons. It is compatible with Windows platforms from XP to Windows 11. Default Programs Editor is also a portable application that you can add to a USB stick. Here's how to change the file format icons with this software.
Step 1. Download Default Programs Editor here.
Step 2. Double-click the Default Programs Editor ZIP archive in File Explorer.
Step 3. Extract the Default Programs Editor ZIP file as stated in the previous method.
Step 4. Then double-click Default Programs Editor.exe in the extracted folder to open the software.
Step 5. Click File Type Settings in the Default Program Editor window.
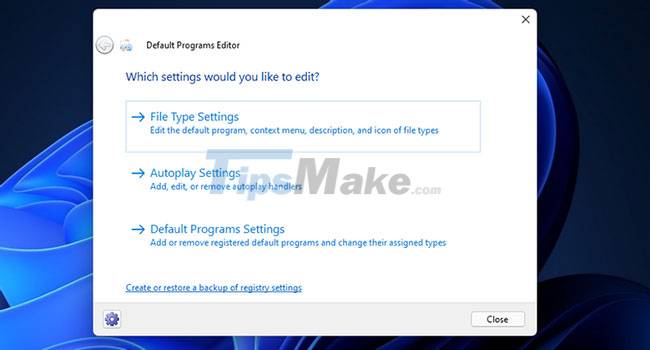
Step 6. Select the Icon option.
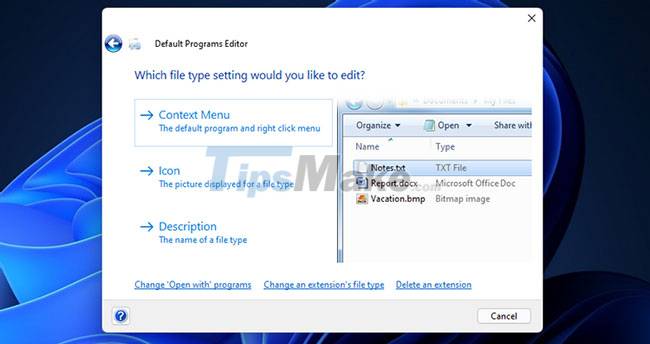
Step 7. Select a file format to customize the icon in the list and click Next button.
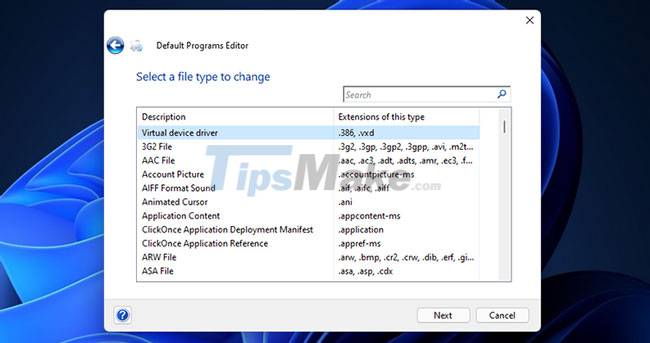
Step 8. Click Browse to open the Change Icon window.
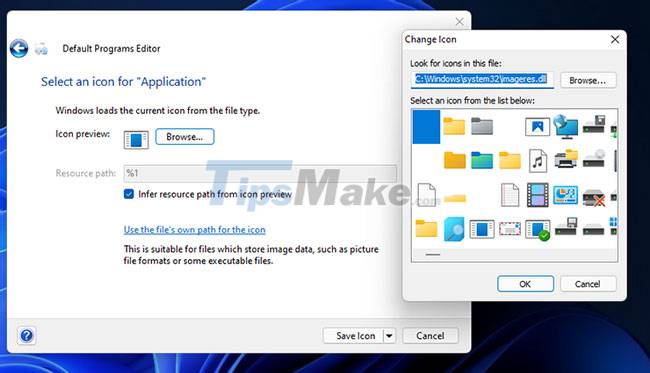
Step 9. You can choose another icon in the default System32 folder. Or click Browse to select an icon in another folder.
Step 10. Click OK on the Change Icon window.
Step 11. Click the Save Icon button.
Step 12. The default program editor also has other options. You can select Context Menu to customize context menu options for file formats. Select Autoplay Settings to configure autoplay options for different types of media files. The Default Programs Setting option allows you to modify the file extensions associated with software packages.
It's quick and simple to change file format icons using both Types and Default Programs Editor. Since Default Programs Editor has more extensive options, some users may prefer this software. Whichever tool you choose, they'll let you create files in Windows 11 with more attractive icons from IconArchive and many other sources. You can even design your own icons for file formats using photo editing software if you like.
Conclusion
Understanding Change File Icon makes it easier to compare options, avoid common mistakes, and apply the information in this guide more effectively. Review the relevant requirements before making changes or choosing a solution.
FAQ
What is Change File Icon?
Types and Default Programs Editor are two desktop applications that include options to change icons for file formats in Windows.
Why is Change File Icon important?
Understanding Change File Icon helps you evaluate features, compatibility, performance, and potential limitations before you choose a product or follow a procedure.
What should you consider when using or choosing Change File Icon?
Consider your specific goal, compatibility requirements, available features, cost, security, and the practical recommendations described in this guide.
Related Articles
 How to Change or Create Desktop Icons on Windows: Clear Instructions13 minutes read
 How to Change the Default Icon on Windows 107 minutes read
 How to Change Icon Icons on Windows 103 minutes read
 File: How to Change Mac Os X Icons7 minutes read
 Resize Icons in Windows 10: Tips and Examples4 minutes read
 Using File Opener Plus Opens Multiple File Formats6 minutes read
Reader Comments 0
Sign in with email or Google to join the discussion.