Some basic Terminal commands in Linux Mint 11
In the following article, we will show you some basic Terminal command syntax that is widely and widely used in Linux Mint 11. However, just like the open source operating system versions. Previously, they were very difficult to use and could have unfortunate consequences if the user did not grasp the basic concepts.
Root account:
On Linux Mint , there is only one account with the highest administrative rights, called root user. However, any account in the system can log in as root to execute the corresponding commands. In this test, we will start with logging in to the root account, open Terminal and type the command:
su
The system will require you to enter a password (you will not see any characters appear but actually the password is still entered) and press Enter. After logging in as root, the command line's font color will change from green to red, and if you want to exit this root account, type:
exit
Instead of having to keep the root account active for the entire working period, we can set and change to apply certain functions and tasks by adding sudo before the command, wallet The example is as follows:
sudo shutdown -r 16:00
However, you will have to enter the password each time you type the command if this method applies.
Application management:
In Linux Mint, we can use Terminal to manage and monitor programs and software in the system instead of the usual way. To do this, you need to login under the root account. Then, use apt-get syntax to install the program, for example:
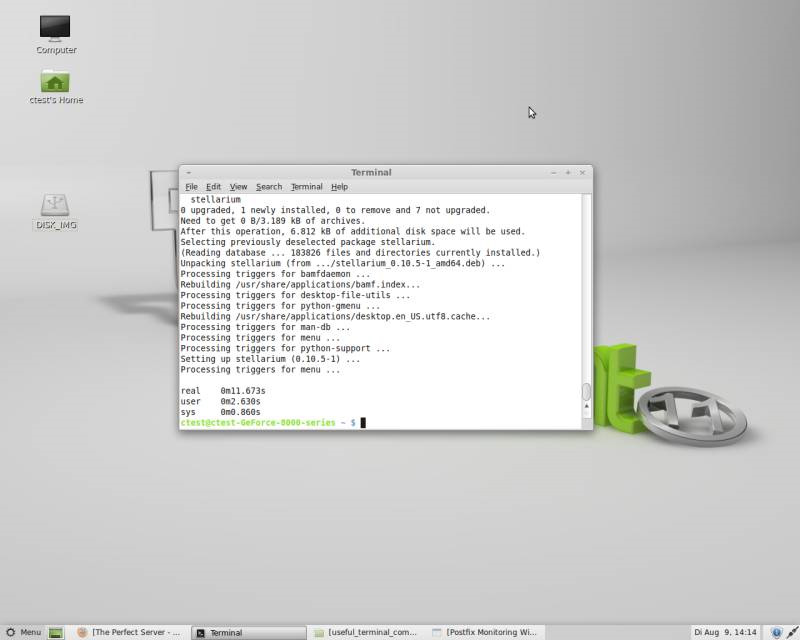
apt-get install stellarium
If you don't want to log into the root account, add sudo before the command:
sudo apt-get install stellarium
Enter the password to install the program. If you want to remove the application, you just need to replace the install with remove:
apt-get remove stellarium
or:
sudo apt-get remove stellarium
When you first started using Linux Mint, some users will probably feel that there is a lack of basic features like Windows, and one of those numbers is Task Manager. In case the programs and applications do not continue to operate because of an error, Linux Mint can use the task-manager structure to process. If you want to get information about active processes, type the command:
ps -u [username]
and replace [username] with the account name that is executing that process. Besides, we can use the top option to see more details about this process:
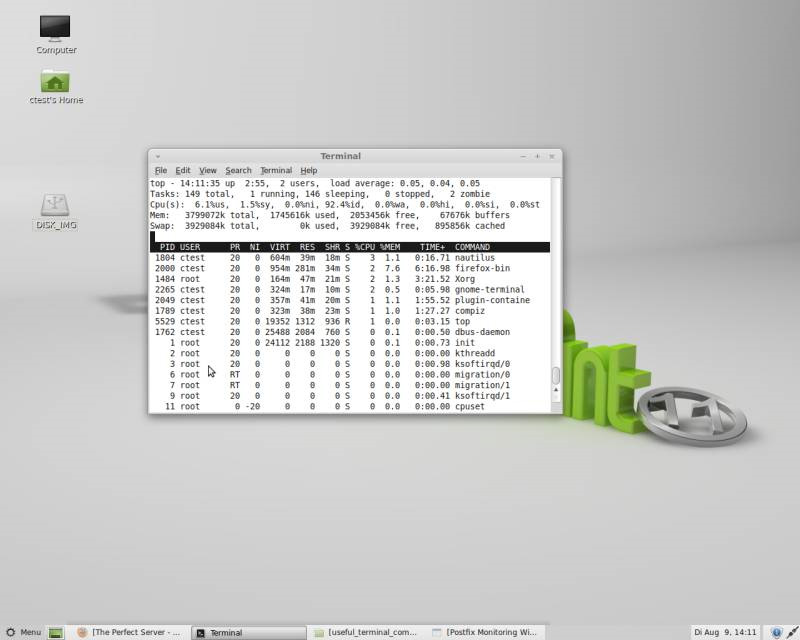
top

When using one of the above commands, you need to pay attention to the numbers that appear in the first column with the name PID. This is the ID parameter we need to specify to turn off the corresponding applications and programs. The general basic syntax here is to use the kill command, then the corresponding PID number, for example:
kill [PID]
or add parameter 9 in the middle to 'force' the program to turn off. However, you must be very careful with this command, because if the wrong operation will cause the system to be paralyzed, stop working:
kill 9 [PID]
However, you need to be aware that this PID number is not always the same, so check carefully before turning off a certain program in this way. A fairly useful command syntax here is time, which will indicate the amount of time needed to complete the command:
time [command]
Examples are as follows:
time sudo apt-get install stellarium

To turn off or restart the computer, we can use the shutdown command, set off mode immediately or over time:
shutdown [hh: mm] [message]
In which, [hh: mm] is the time format used here, and [message] is the message line that appears before the computer shutdown command is executed. If you want to reboot after you have turned off the computer, you add the -r option in the middle. Examples are as follows:
shutdown -r 16:00 Going home after reboot, yay!
To compress files or folders in Linux Mint, we will use the gzip command. Please go to the folder containing the file to be compressed, then type the command:
gzip [filename]
The original file will be replaced with a gzipped package, but if you want to extract it, use the command:
gunzip [filename]
or:
gzip -d [filename]
Edit text:
With this, we have a lot of options to implement, and all of these support tools are used via Terminal. For example, if you want to open any text file with gedit, type the following command:
gedit [textfilename]
Of course, you must go to the directory containing the file and replace [textfilename] with the file name. Some other support programs are nano and vi, the same structure used as gedit:
nano [textfilename]
vi [textfilename]
Besides such programs, we can also open text files directly inside Terminal, for example, more, head or tail have the function to display certain parts of the file:
more [textfilename]
The more command allows users to switch to the next page in the text.
head - # [textfilename]
This head command only displays the top content of the text, replacing the # character with the corresponding line number, similar to the tail command below.
tail - # [textfilename]
is used to display the content of the last line or any line depending on the value of #.
The simplest way to display the text file contents in Terminal is cat:
cat [file name]
If you want to add any content to the text file, we will use the syntax:
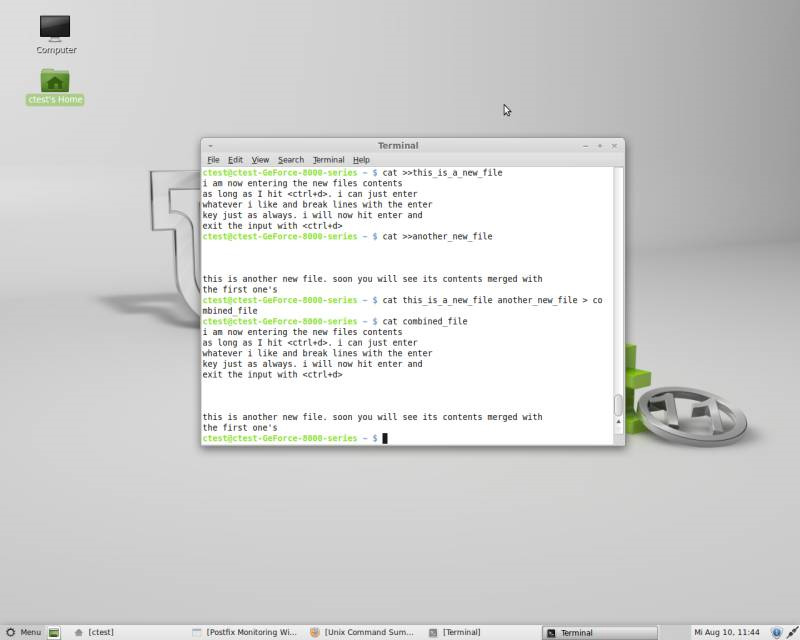
cat >> [filename]
then type the content to add. Press Ctrl + D to exit this process, and if you want to merge multiple text files of the same format into a single file, type the command:
cat [file_1] [file_2] . [file_n]> [newfile]

Search file:
If you want to search for files in any system or any file, use the locate command, then the file name and extension:
locate bla.txt

If we want to find executable files, we need to use the syntax which :
which [executable file's name]

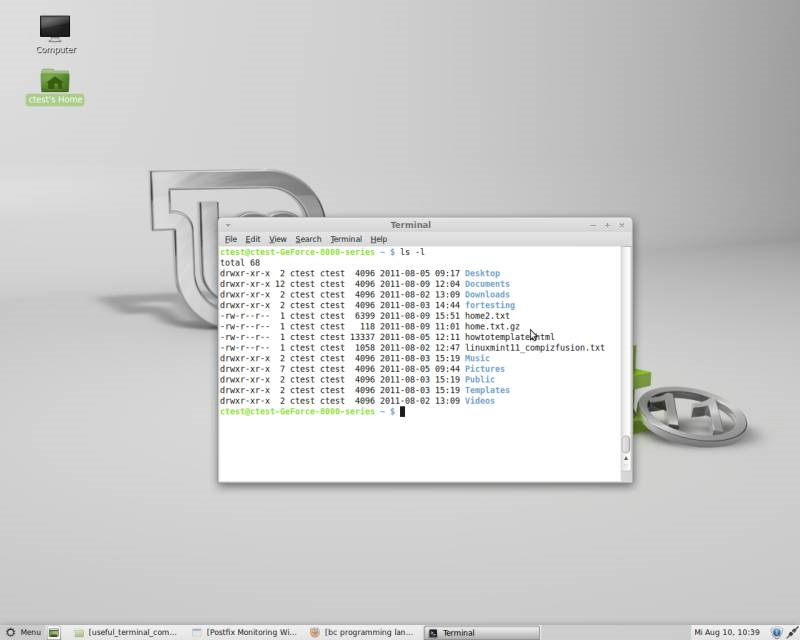
To display the list of components in the current directory, type ls, and -l to display the owner name right next to the file:
ls -l

Good luck!