Table of Contents
This practical guide explains how to fix Quickly Fix the Error 'This Site Can't Be Reached' on in a clear sequence, including preparation, key settings, common mistakes, and troubleshooting steps.
What This Guide Covers
- 1. Restart DNS client
- 2. Change IPv4 DNS address
- 3. Reset TCP/IP
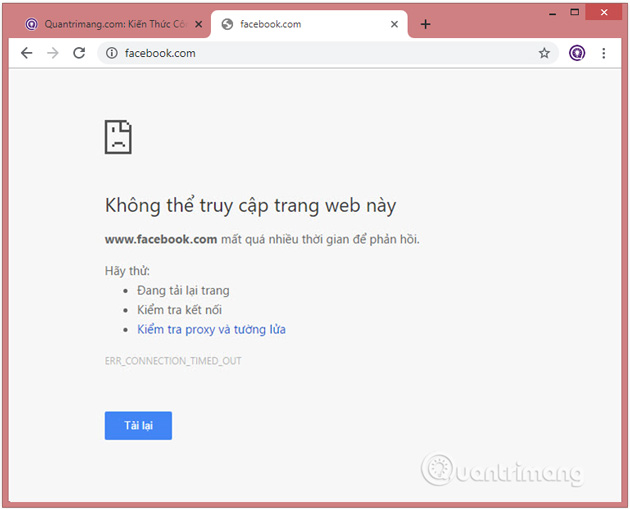
If you are a Windows user, when you encounter the error "This site can't be reached" on Chrome browser, you will probably immediately think about losing your network connection and immediately apply the solution. Fix network loss error with troubleshooter. However, troubleshooting with this solution only focuses on scanning basic problems such as the connection between the server and the computer, but does not check DNS issues to actually solve the problem.
In the article below, Network Administrator will guide you through 4 ways to fix the error "This site can't be reached" on Chrome browser.
1. Restart DNS client
Follow the steps below to start DNS Client :
Step 1: Press the Windows + R key combination to open the Run command window, then enter services.msc there and press Enter to open the Services window.

Step 2 : On the Services window , scroll down to find the item named DNS client.
Step 3 : Right-click on DNS client and select Restart.

Step 4 : At this point, your DNS client will restart. After restarting, check to see if the error still exists.
2. Change IPv4 DNS address
Step 1: Right-click the network icon in the system tray and then click Open Network and Sharing Center .
Step 2 : On the Network and Sharing Center window , click on the network you are connecting to, select Properties.

Step 3: On the Wifi Properties window , find and click Internet Protocol Version 4 (TCP/IP) , then click Properties.
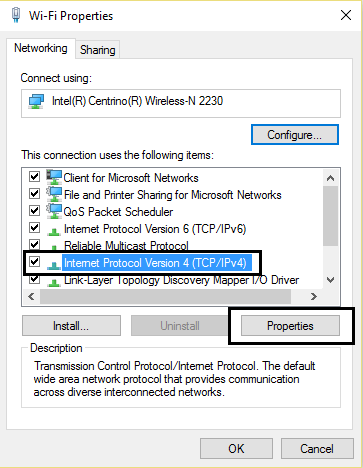
Step 4 : Check Use the following DNS server addresses.
Step 5 : Enter the address below into the Preferred DNS server and Alternate DNS server boxes respectively:
Preferred DNS Server: 8.8.8.8 Alternate DNS Server: 8.8.4.4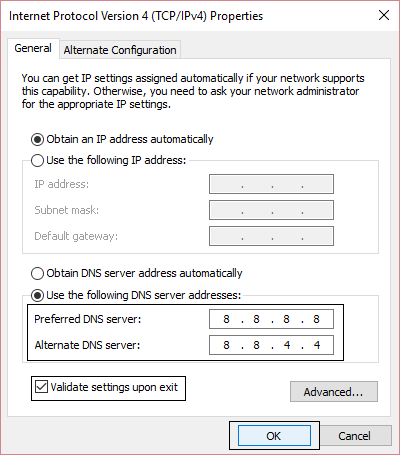
Step 6 : Check Validate settings upon exit , then click OK and close the window.
Step 7 : Finally check to see if the error still exists or not.
In addition, readers can learn more about how to change DNS usage to surf the web faster here.
3. Reset TCP/IP
Step 1: Right-click the Start button in the bottom left corner of the screen, click Command Prompt (Admin).
Or another way is to press the Windows + X key combination , then click Command Prompt (Admin).
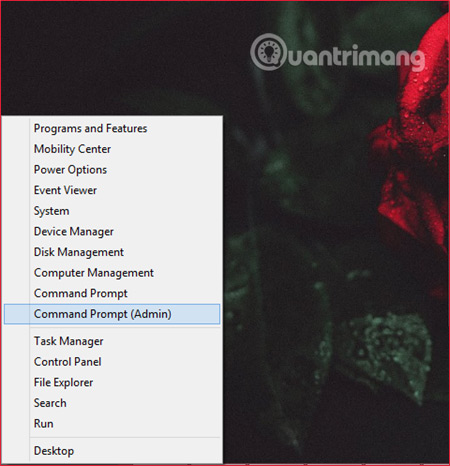
Step 2: On the Command Prompt window , enter each of the following commands one by one::
ipconfig /release ipconfig /all ipconfig /flushdns ipconfig /renew netsh int ip set dns netsh winsock resetStep 3: After executing the commands, restart your computer and check to see if the error still appears.
4. Run Network Troubleshooter to troubleshoot network problems
Step 1: Press the Windows + R key combination to open the Run dialog box .
Step 2: Enter inetcpl.cpl into the Run command window and press Enter.
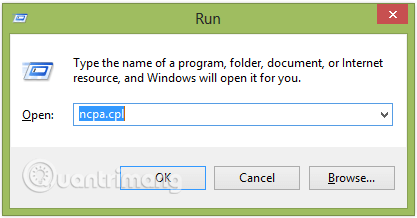
Step 3: Right click on the Wifi Connection you are using and select Diagnose .
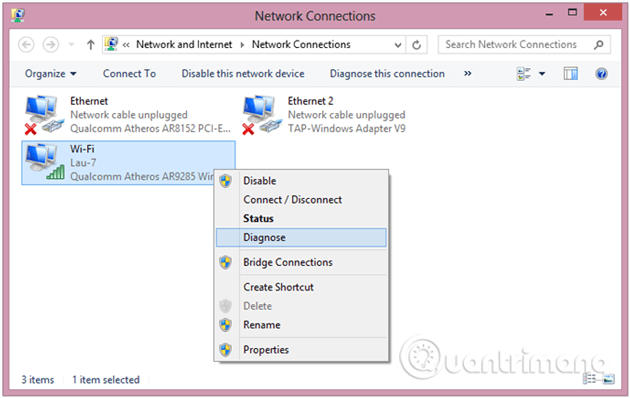
Step 4: Let the Network Troubleshooter run and if it says DHCP is not enabled for "Wireless Network Connection" , perform the following steps to fix the error.
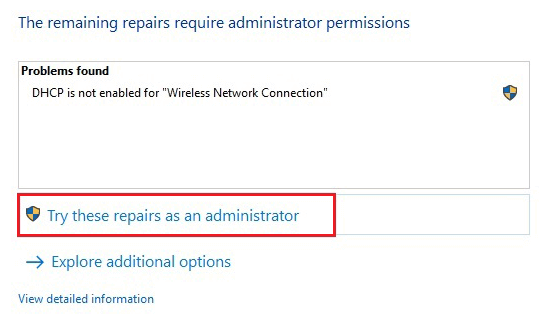
Step 5: Click Next to fix the error, then click Try This Repairs as an Administrator.
Step 6: On the next prompt window, click Apply this Fix.
Step 7: Restart the computer to apply the changes and check if the "This site can't be reached" error still persists or not.
5. Check the Automatically detect settings option
Step 1: Go to the Internet Options menu in Control Panel.
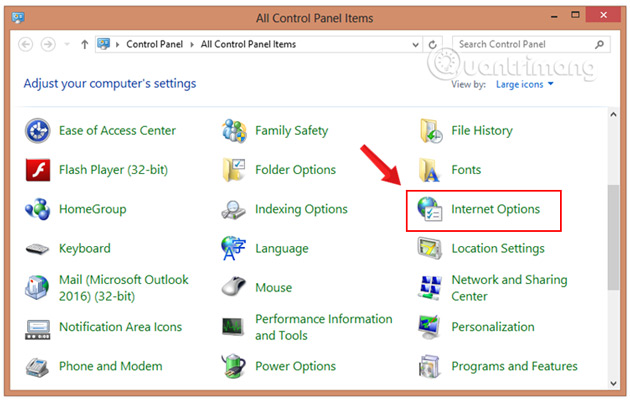
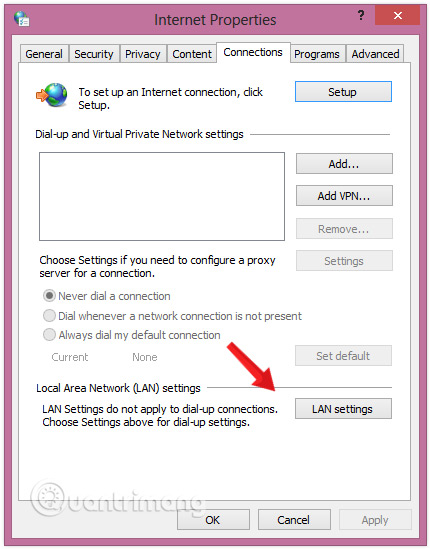
Step 2: On the next window, select the Connections tab and then click on LAN Settings .
Step 3: Select Automatically Detect Settings then click OK.
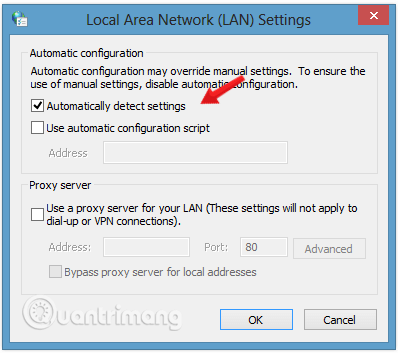
Step 4: Make sure Use a Proxy Server for your LAN is not selected. If it is selected, uncheck it.
6. Clear DNS cache (flush DNS cache)
Step 1 : Go to Start, enter the phrase cmd in the search bar to find Command Prompt.

Step 2 : On the Command Prompt window , enter the command below and press Enter:
ipconfig /flushdns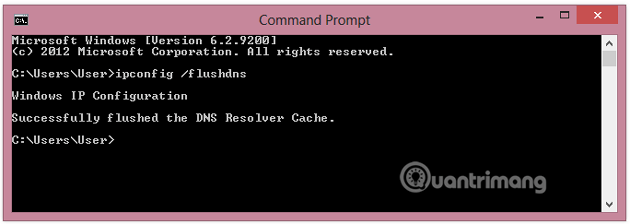
Step 3 : This command will clear the Windows DNS cache and fix DNS errors (if any).
Finally check to see if the error persists or not.
7. Disable Experimental Quic Protocol
Step 1 : Open Chrome browser on your computer.
Step 2 : Next enter chrome://flags in the browser URL address bar and press Enter .
Now the screen displays the available Experiments list window.
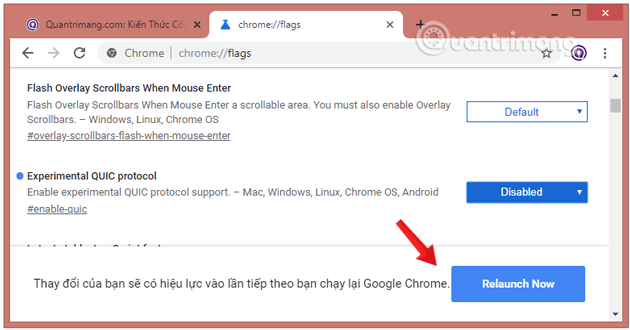
Step 3 : Next find the Experimental QUIC Protocol section and click on the Disabled option from the drop-down menu .

Step 4 : Finally click the Relaunch Now button to apply the changes.
8. DNS Prefetching
Step 1 : Open the Chrome browser on your computer, then enter chrome://settings/ in the address bar and press Enter to open the Chrome Settings window .
Step 2 : Scroll down to the Settings window , find and select the option named Advanced to display advanced settings on the Chrome browser.
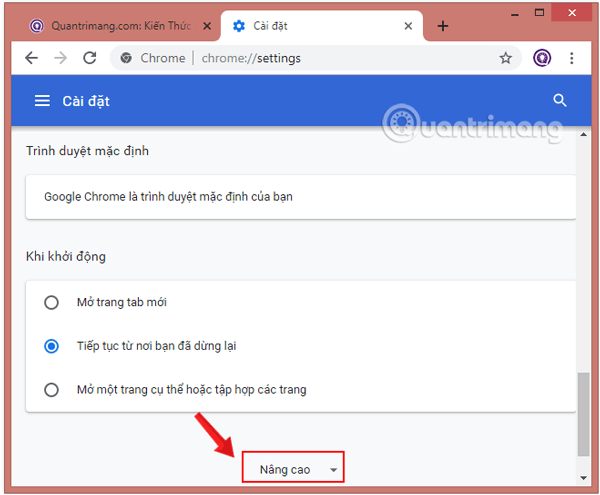
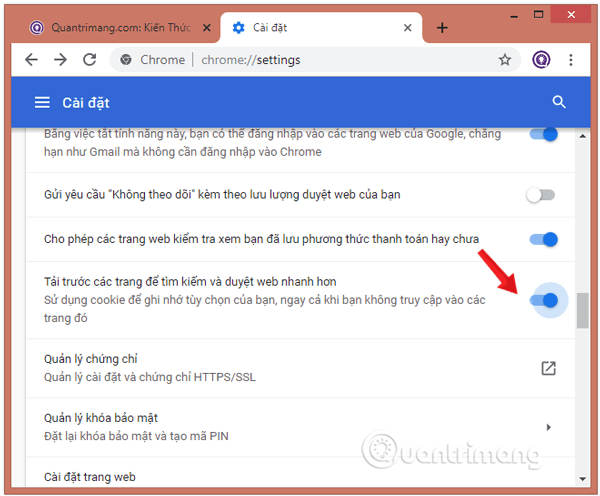
Step 3 : Next find and enable the option called " Preload pages for faster searching and browsing ". Choosing this setting will improve web loading times.
9. Specific site can't be reached error
In some cases, some websites fail to load and display errors. To fix this error:
Step 1 : Open the Command Prompt window by right-clicking the Start button , then selecting Command Prompt from the Power User Menu.
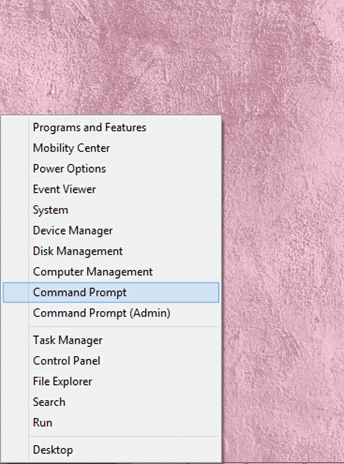
Step 2 : On the Command Prompt window , enter the command below and press Enter :
tracert www.sitename.com
Note: In the above command, replace www.sitename.com with the address of the website where you encountered a loading error.
Step 3 : If the ping is still running, but the website cannot be accessed, you need to immediately contact your Internet service provider (ISP).
10. Reset Google Chrome settings
Step 1: Enter chrome://flags/ into the Chrome browser address bar and press Enter.
Step 2: On the next window, find and click the Reset all to default button in the right corner of the screen and restart your Chrome browser.
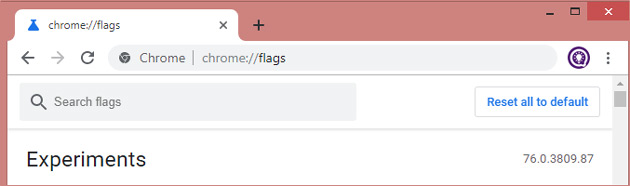
Step 3: Finally, restart the browser to apply the changes and check if the "This site can't be reached" error still persists or not.
11. Reinstall Chrome browser
Step 1: Access Control Panel, then find and click Uninstall a program and then uninstall Chrome browser from your computer.

Step 2: Navigate to the following path and delete everything in the folder.
C:Users%your_name%AppDataLocalGoogle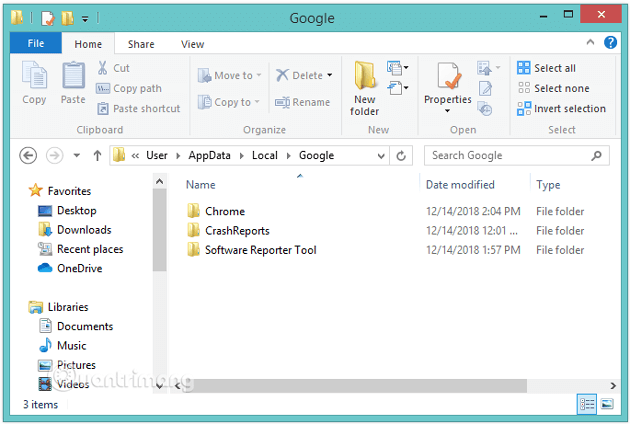
Step 3: Download the latest version of Chrome browser to your device and install.
Step 4: Restart your computer, then reopen Chrome browser to see if the error persists.
Refer to some more articles below:
Good luck!
Final Thoughts
Use the instructions and checks above in order, verify the result after each major step, and keep a backup whenever the process changes important files or system settings.
FAQ
What should I check before starting?
Confirm that your device or software version matches the instructions, save important data, and note the original settings before making changes.
What should I do if the steps do not work?
Restart the app or device, install available updates, review any error message, and repeat the steps carefully in the same order.
Can I undo the changes?
Many changes can be reversed, but the exact method depends on the feature. A backup or restore point gives you the safest way to recover.
Related Articles
 Quickly Fix the 'This Site Can't Be Reached' Error on Chrome10 minutes read
 Fix the 'This Site Can't Be Reached' Error in Chrome Browser7 minutes read
 How to Fix the Error Site Can't Be Reached on the Google Chrome Browser9 minutes read
 How to Fix This Site Can't Be Reached5 minutes read
 5 Most Effective Ways to Fix 'This Site Cannot Be Reached' Error11 minutes read
 Quickly Fix the 'Your Connection Was Interrupted' Error on Chrome6 minutes read
Reader Comments 0
Sign in with email or Google to join the discussion.