Table of Contents
This practical guide explains how to set Up a Motion Detection Webcam in Ubuntu: Step-by-Step in a clear sequence, including preparation, key settings, common mistakes, and troubleshooting steps.
What This Guide Covers
- Install Motion Server
- Configure Motion for the system
- Change default save location
The following article will show you how to install Motion and set up a motion detection webcam in Ubuntu Linux.
Install Motion Server
By default, Motion is included in the official Ubuntu repository. This means you can install this program through your apt package manager:
sudo apt install motion v4l-utilsNote : We mention Ubuntu in this article, but Motion will also work with most Linux distributions.
Confirm that Motion Server is working properly by opening the program's help prompt:
motion -hConfigure Motion for the system
Before starting to configure Motion, it is necessary to copy the configuration file to the Home folder to have a clean backup of the original. Open Terminal and copy the configuration file to the Home folder:
cp /etc/motion/motion.conf ~/motion.conf.backupOpen the root configuration with your favorite editor:
sudo nano /etc/motion/motion.confOne of the easiest adjustments you can make to your Motion Server is to change the image and video output quality. By default, the server sets the resolution at 640×480, which may be too small for modern webcams.
To change this, run the following command in the new terminal to check the available resolutions for the camera:
sudo v4l2-ctl -d /dev/video0 --list-formats-ext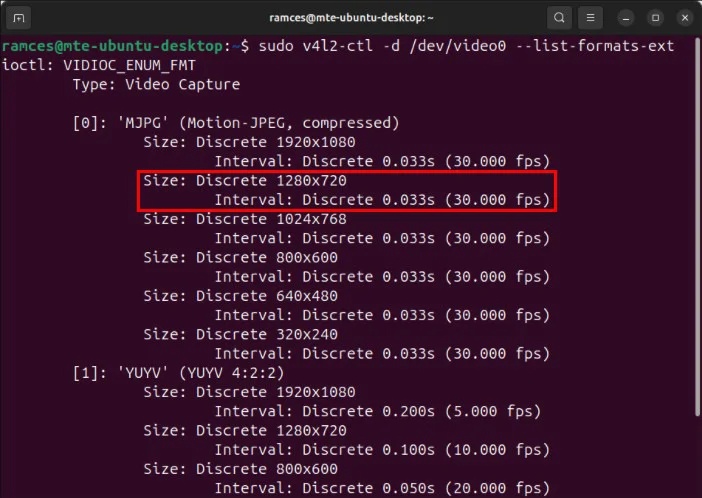
Back in the Motion configuration, scroll down to the 'Image Processing' category, then find both the width and height variables.
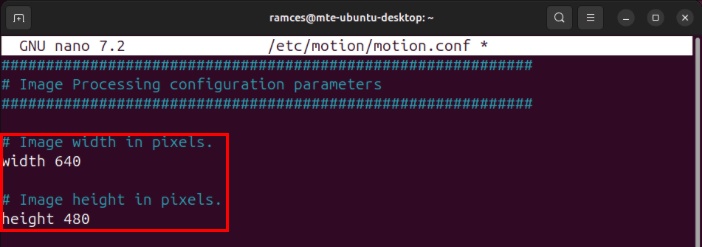
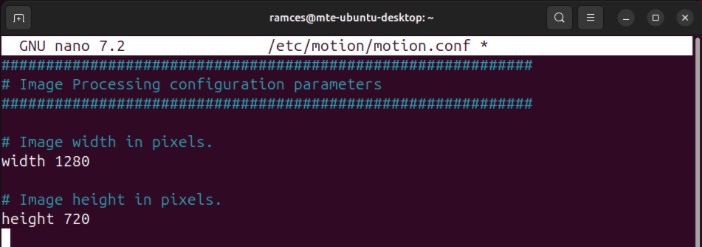
Provide appropriate values for the desired resolution. In the example case, I want to run Motion at 1280×720, so the author entered '1280' as the width and '720' as the height.
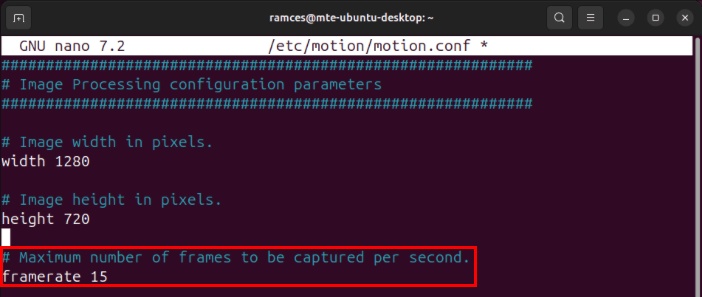
Set the framerate value to the frame rate at which you want to record video. By default, this value is set to '15' but you can lower this value to save disk space.
Scroll down to the 'Picture output' category, then set the value of the picture_output variable to 'on'. This will allow Motion to capture both images and video from the webcam.

Change default save location
Another adjustment you can make to Motion Server is to change where data is saved. This can be useful if you want to export your captured videos and images to a mounted remote folder or a cloud storage service like Dropbox.
To get started, navigate to or create the folder you want to save your data in:
sudo mkdir /motion/dataSet folder ownership to 'motion:adm':
sudo chown -R motion:adm /motion/dataMake sure that the entire path to the folder is readable by all users:
sudo chmod -R 755 /motion/dataBack in the Motion configuration, find the target_dir variable, then set its value to the full path in the directory.

Fine-tune detection settings in Motion
Motion works by looking at the difference between the current video feed and the feed immediately before. If the program finds enough difference between the two, it classifies it as 'motion' and records a video of the event.
Currently, Motion assumes that a difference of 1500 pixels is enough to classify as 'motion'. While this makes it easy for most webcams to detect motion, it can be too sensitive for higher resolution cameras.
To alleviate this, go to the 'Motion Detection' category, then increase the value of the threshold variable. 5500 pixels is enough to prevent Motion from recording unnecessary small movements from the webcam feed.
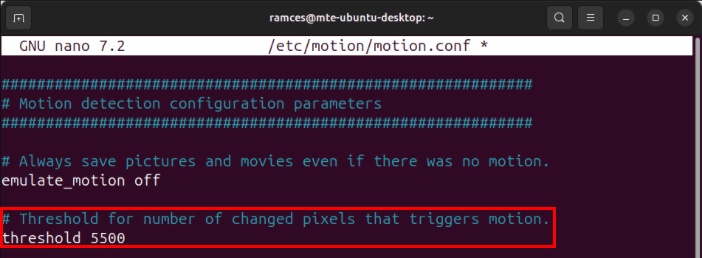
You can also add a threshold_maximum variable to set a limit on the amount of difference that Motion considers 'motion'. This is useful if the webcam is covering a crowded area and you only want it to run when there is less activity.
If you're not sure about the threshold and threshold_maximum values for your webcam, you can let Motion adjust it for you. To do that, add the variable threshold_tune and set it to 'on'.

Finally, you can configure Motion to record the moments before and after motion is detected. To do that, go to the pre_capture and post_capture variables and set their values to the number of additional frames you want to save.

Enable the Motion web interface
Motion server comes with a web interface that allows remote webcam monitoring. To enable this feature, go to the 'Webcontrol' section of the configuration, then set the value of the webcontrol_localhost variable to 'off'.
Scroll down to the 'Live stream' section, then set the value of stream_localhost to 'off'.
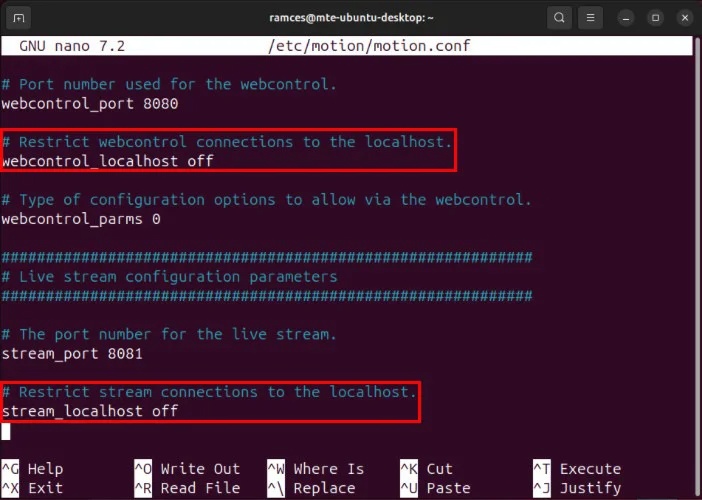
Note : Motion does not have any validation checks for its web interface. Therefore, anyone who knows your Motion Server address can view the webcam and control the service.
Manage saved photos remotely
As mentioned earlier, it is best to save the image to a Dropbox folder so it can be accessed anywhere you want. However, if you want to upload images to your own file server (via FTP), you can use the wput command to upload images:
sudo apt install wputOpen the Motion Server configuration, then insert the following lines of code at the end of the file:
on_picture_save wput ftp://YOUR-USERNAME:YOUR-PASSWORD@YOUR-SERVER-ADDRESS %f on_movie_end wput ftp://YOUR-USERNAME:YOUR-PASSWORD@YOUR-SERVER-ADDRESS %f
Final Thoughts
Use the instructions and checks above in order, verify the result after each major step, and keep a backup whenever the process changes important files or system settings.
FAQ
What should I check before starting?
Confirm that your device or software version matches the instructions, save important data, and note the original settings before making changes.
What should I do if the steps do not work?
Restart the app or device, install available updates, review any error message, and repeat the steps carefully in the same order.
Can I undo the changes?
Many changes can be reversed, but the exact method depends on the feature. A backup or restore point gives you the safest way to recover.

Reader Comments 0
Sign in with email or Google to join the discussion.