Table of Contents
This article examines Microsoft access 2007 and explains the main developments, practical implications, and context readers should understand.
Microsoft Access 2007 Overview
Query Wizard
Query Wizard will introduce each step to build a query. To execute a query using the Query Wizard:
- Click the Create tab
- Click the Query Wizard button 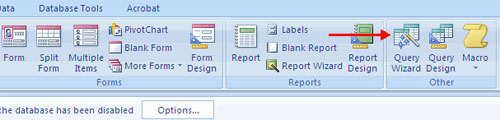 - Select the type of query you want to execute
- Click OK . 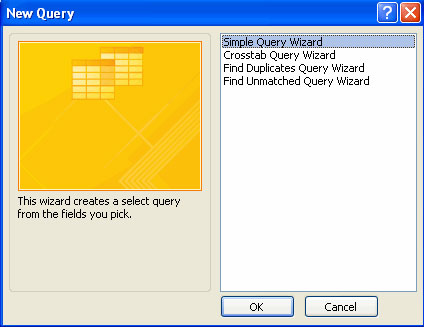 - Select the fields you want to have in each table by selecting the field and clicking the button
- To select fields from different tables, click on the Table / Queries down arrow
- Click Next.  Complete Query wizard
- Enter a name for the query
- Click Finish . 
- The retrieval results will still display as follows:  To switch between tables and queries:
- Open Navigation Pane
- Double click on the table name or query to view. 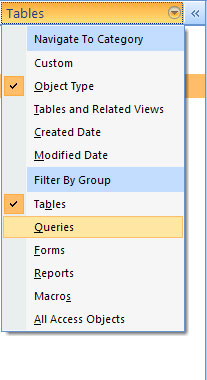 Query design feature
You can design a query with the Query Design button. To design a query using Query Design:
- Click the Query Design button on the Create tab. 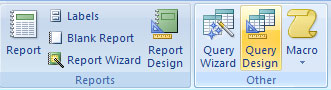 - The Show Table dialog box appears allowing you to select the table
- Click Add to add the table and click the Close button to close the Show Table dialog box  - Double click on the field name you want it to appear in the design grid
- Repeat the above steps for other schools 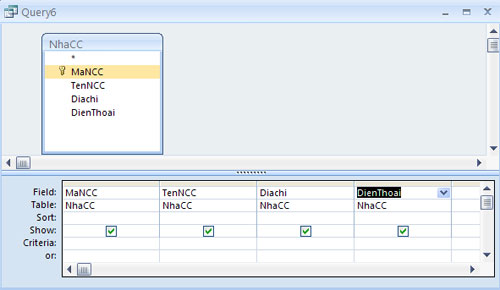 - Click the Run button to execute the query.
 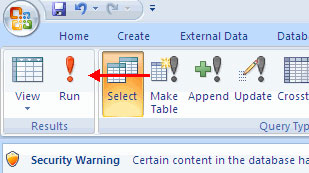 Query design with conditions
The query standard is the search for the conditions used in the query to retrieve data. You can set the standard as a specific number or data string, or data range. 'value' Only displays the record that matches the correct value (replace the Word value with the Word you want to find) = Equal Greater than> = Greater than or equal to <> Different Between X And Y In a range (get the value between X and Y) Is Null Null value And Only true if condition exists Or True if either condition exists Not True if 1 case is incorrect To facilitate query:
- Click on the query you want to add conditions
- Enter the query condition for in the Criteria section 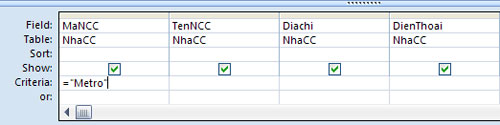 - Then click the Run button to execute the query.
FAQ
What is the main topic of MS Access - Lesson 10: Querying the Database: Microsoft Access 2007?
This article examines Microsoft access 2007 and explains the main developments, practical implications, and context readers should understand.
Why is Microsoft access 2007 important?
Microsoft Access 2007 Overview Query Wizard Query Wizard will introduce each step to build a query.
What should readers remember about Microsoft access 2007?
To execute a query using the Query Wizard: - Click the Create tab - Click the Query Wizard button - Select the type of query you want to execute - Click OK. - Select the fields you want to have in each table by selecting the field and clicking the button - To.
Related Articles
 MS Access 2003 - Lesson 5: Chapter 2: Access Learning in 1 Hour6 minutes read
 MS Access - Lesson 4: Create a New Database: Microsoft Access 20072 minutes read
 Design Your Own Database in Access 20165 minutes read
 MS Access 2007 - Lesson 1: Get Started with Microsoft Access 20073 minutes read
 Introduction to Databases - Database: Access7 minutes read
 Overview of the Access 2010 Tutorial Series: MS Access 20104 minutes read
Reader Comments 0
Sign in with email or Google to join the discussion.