MS Access 2003 - Lesson 23: Own query design
At this point, you can use the Query Wizard to create queries. But Query Wizard only creates a few commonly used queries. If one of those queries doesn't match, you can create your own query..
At this point, you can use the Query Wizard to create queries. But Query Wizard only creates a few commonly used queries. If one of those queries doesn't match, you can create your own query.
Many people think that building your own query is one of the hardest parts when working with Access. That may be true, but with a few tutorials and lots of practice, you can build any query you think of.
When creating queries from scratch, you will know the guidelines to apply when editing an existing query. With such a way - create or edit - you use the query design window.
The following process to create a query is based largely on the type of query you want to create. Regardless of the type of query, you usually start with the same way: select the Queries button in the Database window, double-click the Create Query in Design View option . The screen appears as shown in Figure 1.
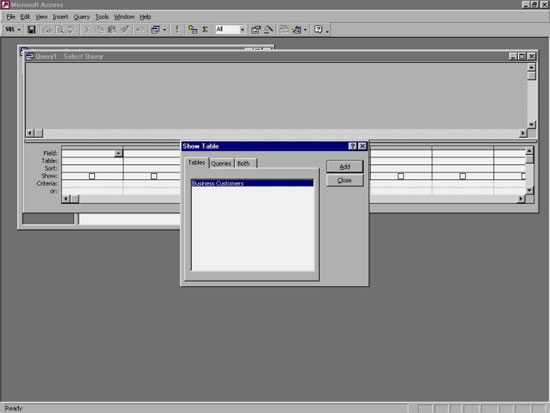
Figure 1: Creating a query
Note that the query design window is the following. In the first part, Access displays the Show Table dialog box that gives you the choice of the data source you want to use. As with other queries, you can select either tables or queries as data sources (available in the Show Table dialog box). In this case, select the Business Customers table and click your mouse on the Add button. Access opens a small window for that table containing the fields. To close the Show Table dialog box, click your mouse on the Close button.
After closing the Show Table dialog box, Access displays the query design window. In the middle of the window is a blank for the data source that was opened. In this case, the space contains the Business Customers table. Below is the OBE design grid (for example, query). The query design window appears as shown in Figure 2.

Figure 2: Query design window
In the QBE design grid, you define the criteria for the query. The options available in the grid depend on the type of query you create.
Query design tool
The query design tool appears only below the menu whenever you use the query design window. Many tools on the toolbar are very familiar as used in other Access windows. However, there are other tools available only on Query Design toolbar. Table 1 shows those tools and the work they do.
 Query Type Allows you to specify the type of query you create
 Run Execute query if necessary.
 Show Table Displays the Show Table dialog box
 Totals Displays the total line in the QBE grid. It is not available when creating a query to update or delete a query
 Top Values Find the highest value in a query based on a percentage or number of lines
 Properties Displays the Properties window, for query fields or for queries themselves
 Build Displays the Builder window when creating a standard for a field.
Table 1: Design tools
You often use Query Wizards to create normal queries, which means using query design windows for more common queries. Therefore, you will often use the Query Type tool when starting the design to indicate the type of query you create. If you click your mouse on the down arrow to the right of the tool, you can see that Access allows you to create the following types of queries:
• Select Query: A type of query that is the default, allowing you to build a query that returns as the number of standard defined fields.
• Crosstab Query (Crosstab Query): Modify the QBE grid so that its options represent the need for the query.
• Make-Table Query: Apply when you need to create a new table. Access uses this table to store the main part of the query. When selecting this tool, Access asks you to name the table and where to store the table. The QBE grid is similar to the selected query.
• Update Query: Used to update multiple records in a table. Access changes the QBE grid to represent the need of the query.
• Append Query: Used to add records to a table. When selecting this tool, Access asks you to name the table and where to store it. Access changes the QBE grid to reflect the criteria for this type of query.
• Delete Query: Used to delete records. Access changes the QBE grid to a simpler form than other queries.
These queries look very familiar, basically, they are like the queries mentioned at the beginning of this chapter.
Using QBE grid
Any type of query you choose, usually uses the QBE grid for query design. You can apply items in the grid just as you would in other design grids. For example, in Chapter 5 ' Sorting and sorting information ', you already know how to use the Filter window grid. The QBE grid also does the same, you can add, delete, and move columns. In addition, you can also select cells in the grid and edit them.
The meaning of the lines in the QBE grid varies depending on the type of query you are designing. However, the first line always contains the field name. Each column in this line represents the field that Access will display in the query result. Therefore, if you want to display 5 fields in the query results, you should use 5 columns in the QBE grid. Access displays the fields in the order you place them in the grid. However, you can set the Show line for each management field whether Access displays the fields or not (Figure 3).

Figure 3: QBE grid
If you select the Show line for a particular column, Access displays that field for the result. If you do not select the Show line, Access does not display the field. Why don't you want to show that school? Simply, if you only use one column to select or sort records, you don't need to display it. For example, if you select records based on the value of a Yes / No field (select only those fields set to Yes), as you know all values that the field result will be (-1). Therefore, it really does not need to display the field. You can use the Show line to hide or show fields as you want.
Note : The Show line does not apply to Crosstab, Update, Add and Delete queries.
The Sort and Criteria lines work similarly to the mentioned filters in Chapter 5 ' Sorting and filtering information '. If you are still unclear about this issue, you can review that chapter.
The best way to discover how to use the QBE grid is practice. Suppose you want to create a query that uses the Business Customers table and displays all active accounts with a limit tag of over $ 1,000 from one of the salespeople. In addition, you want the accounts listed in descending order based on their card deadlines (for accounts with equal card durations, you want them to be ordered in public order names). company). To design such a query, perform the following steps:
1. Start an empty QBE grid.
2. Use the Query Type tool to make sure Select Query is designed.
3. In the list of fields, double-click the Active field name. Access displays this field name in the first column of the QBE grid.
4. In the Criterea line for the first column, enter the calculation = Yes . This means that Access indicates that records with the Active field are set to true.
5. Uncheck the Show line in the first column. Access does not display the value of the field.
6. In the field list, double-click the Salesperson field name. Access displays this field name in the second column of the QBE grid.
7. In the Criteria line for the second column, enter the operation = 'John Davis' . This means you want to show records that have a sales representative named John Davis.
8. Delete the checkmark in the Show line for the second column. Access will not display the value of the field.
9. Double-click the Credit Limit field name. Access displays this field in the third column of the QBE grid.
10. In the Sort line in column 3, select Descending .
11. In the Criteria line of the third column, enter equations > 1000 . This indicates that you only want the records with a limit tag of over $ 1,000.
12. Double-click the Company Name field name . Access displays this field in column 4 in the QBE grid.
13. In the Sort line, select Ascending .
14. Double-click the contact name of the field. Access displays this field in the 5th column in the QBE grid.
15. Double-click your mouse on the name of the field called Contact Phone . Access displays this field in the 6th column in the QBE grid.
16. Double click on the Last Order field. Access displays this field name in the 7th column in the QBE grid.
You have now completed the query. Your query design window is shown as Figure 4.

Figure 4: Query completed
This query displays five fields from the Business Customers table, but only for Criteria-qualified fields. You can save the query right away if you want. However, to see the results of the query, click your mouse on the Run tool in the toolbar. Access runs the query without saving it and displaying the results. This way you can check back to see if the result is as expected. Figure 5 shows the results of the new query.

Figure 5: Query results.
When you finish checking the query results, you can use the View tool (on the left side of the toolbar) to switch back to the query design window. Then, save the query by closing the design window. Click your mouse on the Yes and Access buttons, prompting you to set a name (Figure 6).
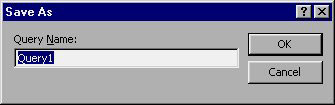
Figure 6: You can save the query using the name you want.
Enter the name you want to use for the query, when you click your mouse on the OK button, Access saves the query and updates the Database window to add a new name.
Set properties
In chapter 3 ' Customizing components ', you learned about the properties of the field and how they affect the Datasheet mode. The properties described in Chapter 3 apply to fields in a table, but you can also set properties for fields in a query. Query properties affect how Access displays information derived from queries as well as how you can edit that information.
To see the properties for a specific field, select the field from the QBE grid. Then, click your mouse on the Properties tool. Access displays the Properties window, and the appearance of the window depends on the data type of the field. A sample properties window is shown in Figure 7 (Properties for Credit Limit field)
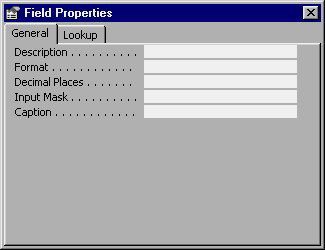
Figure 7: Properties window for Credit field.
Notice that there are several properties that you see in the design window pane. However, the displayed properties function almost the same way they do when working with tables. (You can return to chapter 3 to review).