MS Access 2003 - Lesson 25: Chapter 7: Printing tables
In this chapter, you will learn how to print the information contained in the database. You will learn the concepts applied whether you print a simple or complex report..
Many computer users don't think much about what happens after they get their information from the database. Normally, transferring information into a database is only a part, you need to be mindful of printing information to be able to share data with others.
In this chapter, you will learn how to print the information contained in the database. You will learn the concepts applied whether you print a simple or complex report. However, this chapter is just the beginning. The other two chapters in this Access series refer to the ability to write reports. Along with these 3 chapters, you will have all the tools you need to create any data you want.
After finishing this chapter, you will understand the following concepts:
-
How to print the content of the table.
-
How to choose a printer.
-
How to determine how your information should print
-
How to print the layout of an object
-
How to preview printed pages for saved pages
Lesson 25: Print the table
As mentioned, after entering the data into the table, you want to print a copy of the table content. Access does that in a very simple way to print data in the table. You can print the table using the following steps:
1. Select the Tables button in the Database window.
2. Select the name of the table you want to print
3. Select the Print option from the File menu or click your mouse on the Print button on the toolbar.
Another way to print a table is to follow these steps:
1. Select the Tables button in the Database window
2. Select (mark) the name of the table you want to print.
3. Click your mouse on the Open button. Access displays the table in Datasheet mode; You can make changes to the table.
4. Select the Print option from the File menu or click your mouse on the Print tool in the toolbar
If you click your mouse on the Print tool on the toolbar, Access will print the table now. If you select the Print option from the File menu, Access displays the Print dialog box as shown in Figure 1.

Figure 1: Print dialog box
The separate parts of the Print dialog control what Access prints. If you want to adjust which printer Access uses to print the table, use the Name drop-down list at the top of the dialog box. If you want to change the printer's own properties, click your mouse on the Properties button. In turn, Access displays the printer's Properties dialog box (which will be described immediately after this chapter).
The Print Range area allows you to select parts of a table that Access prints. You can print the entire table, part of the table (the rows or columns you choose) or a range of pages. Right after this chapter, you will learn how to preview data on the screen before printing. Using the Print preview option, you must decide whether to print a specific area of the page. Pages option allows you to define an area of the printed page.
The Copies area allows you to ask Access to create as many copies of the information to print. The Collate check box only means if you print more than one copy of the table. For example, suppose your table needs to print 5 pages. If you need two copies and you select the Collate box, Access will print all 5 pages (1st time) and then reprint 5 pages (2nd time). If you do not select the Collate Copies box, Access prints two copies of each page in turn (In this case, you will need to rearrange the copies later).
Finally, in the middle right of the Print dialog box is the Print to File check box. This check box allows you to transfer data from the printer to a file on the disk. Printing to disk is really necessary. For example, you need to send a report to someone far away. You can print it and fax it to them or send it via email. However, if you print the report into a file, you can instead send them a disk containing the file, or email them to the file. If the report is very large, sending an email or disk can save a lot of transportation costs. As a result, they receive information very quickly and cost very cheaply. When they receive the file, they can transfer it to their printer and have a copy like the copy you printed for them.
When finished, click your mouse on the OK button. Access will send your information to the printer your way. If you select the Print to File box, Access will ask you the file name to use as shown in Figure 2.
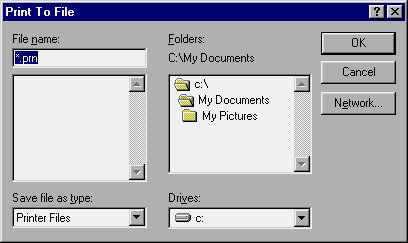
Figure 2: Print to File dialog box.
This is a standard file control dialog box. You can use the adjustment it provides to select the drive and the folder where the file is located. All you need to do is enter the file name you want and click your mouse on the OK button. Access sends the printer's output to the disk of the file you specified.
If your computer has access to multiple printers or if you need to control print data (perhaps by changing the print orientation and margins), you can use the Print Setup dialog box discussed in section next.