Move Desktop, Download and Documents to another drive on Windows 10
By default, folders like Documents, Desktop, Downloads, Picture and Music are located in the drive where you installed Windows 10 (usually the C drive). For example, if Windows 10 is installed in drive C, you can find these directories by navigating to C: UsersYourUserName folder.
From time to time your Download folder is "full" up, the reason is because you download multiple files to your computer, resulting in a C drive capacity increase.
So you can move folders like Documents, Desktop, Downloads, Picture and Music to another drive to free up your C drive space.
Moving these folders does not affect the system but also increases the speed of access in the operating system (because the C drive is only for storing the operating system).

1. Move the Download, desktop, and document folders to another drive
Step 1:
Open File Explorer by clicking on the File Explorer icon in the Taskbar or clicking the File Explorer icon on the Start Menu.

Step 2:
On the File Explorer interface, in the list of left pane items you will see Desktop, Downloads, Picture folders and some other folders under Quick Access.
Right-click on any folder you want to move to another drive and click Properties .
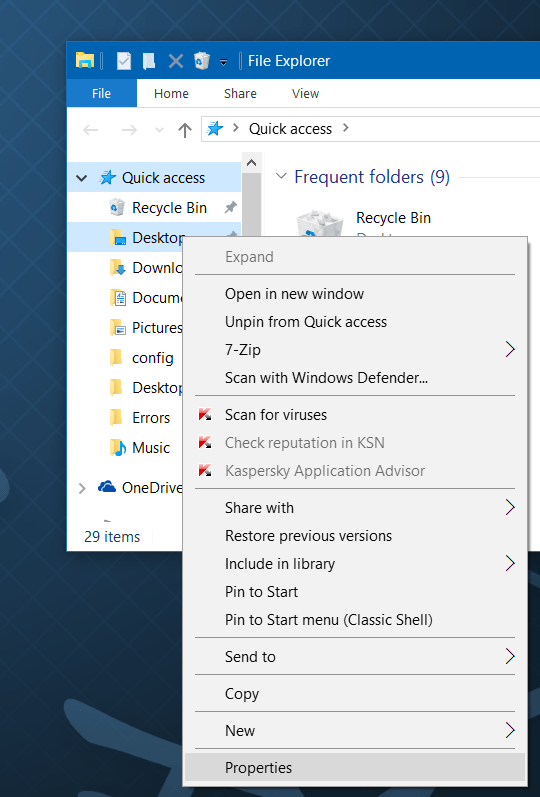
For example, if you want to move the Desktop folder, right-click the Desktop folder and click Properties to open the Desktop Properties window.
Note:
You cannot move folders at the same time.
Step 3:
On the Desktop Properties window, click the Location tab, then click Move and select the location where you want to move the folder.
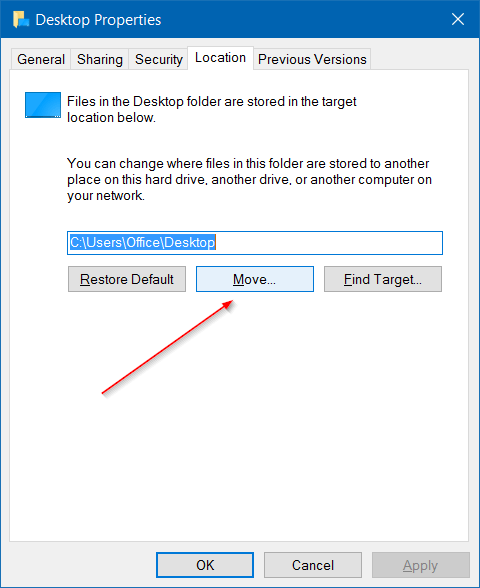
Finally click Select Folder and then click Apply to move the selected folder to the new drive.


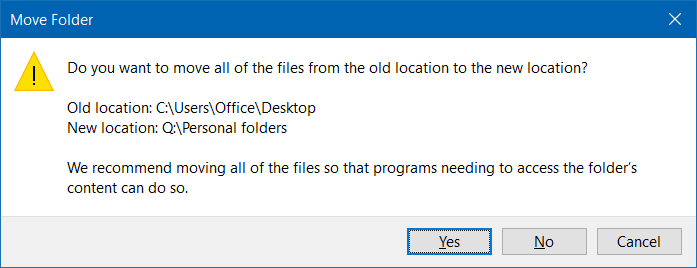
Now the screen will display the dialog box Do you want to move all of the files from the old location to the new location? Your task is to click Yes to move all the files in the folder to the new drive.
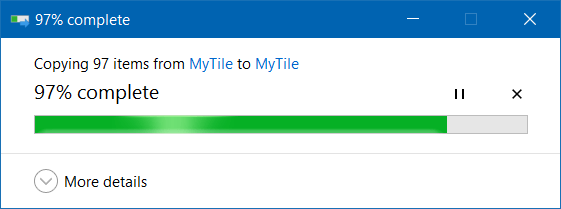
Take the same steps to move the Desktop, Documents, Downloads, Pictures and Music folders to another drive.
2. Restore the folder to the original location
In the guide below, Network Administrator will guide you to restore the Desktop folder to the original location. With the Download, Documents, Music and Picture folders, . you do the same.
Step 1:
Open File Explorer, then navigate to the location where you store the Desktop folder.
Next right-click the Desktop folder and click Properties .
Step 2:
On the Desktop Properties window, click the Location tab, then click the Restore default button to move the folder you selected to the original location.
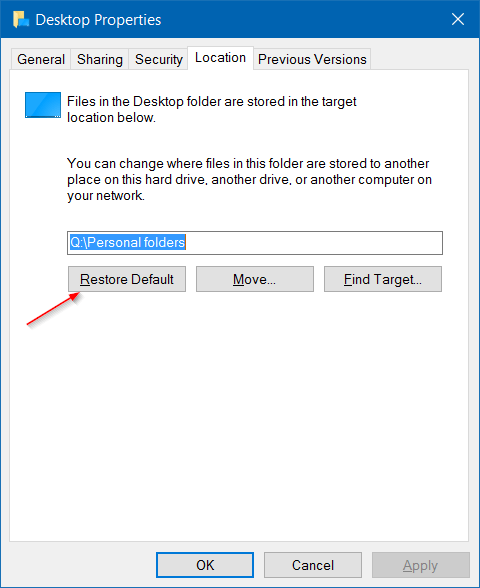
Then click Apply .
If a confirmation dialog box appears, click Yes to confirm.
Refer to some of the following articles:
- Here's how to update your phone to Windows 10 Mobile, whether it's supported or not!
- Instructions for setting up Windows Hello face recognition on Windows 10
- Instructions for setting up and managing Network Bridge on Windows 10
Good luck!