Table of Contents
This guide explains how to move Software to Another Drive Right on Windows 10, with clear steps, practical tips, and important checks before you begin.
Below is a guide to moving the software to another drive using Windows 10 installation, if you want to use third-party software follow this article.
Move apps using Settings on Windows 10
This is the easiest way to move an app from one drive to another on your Windows computer by using Settings. This works for many apps you have installed, but not all.
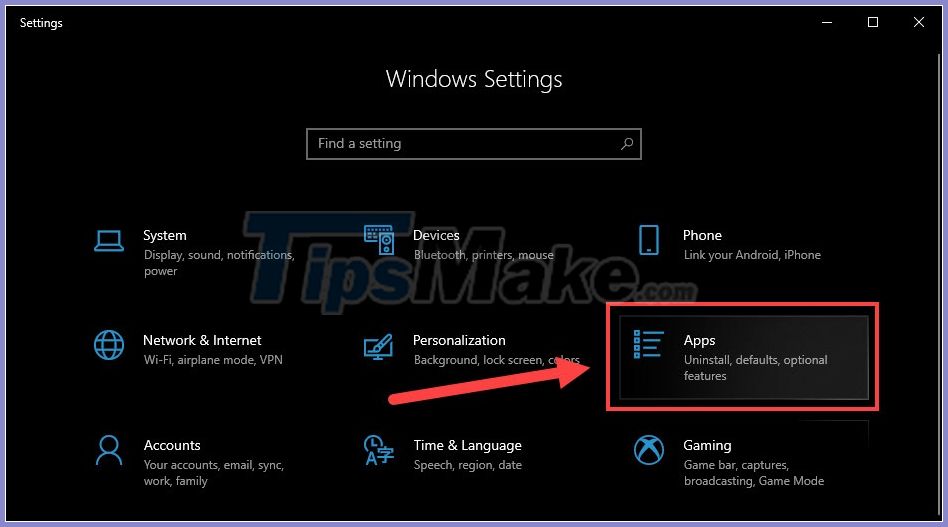
Step 1: Press the Windows + I key combination to open Settings. At the main interface you select Apps .
Step 2: Navigate to the application you want to move, and select Move .
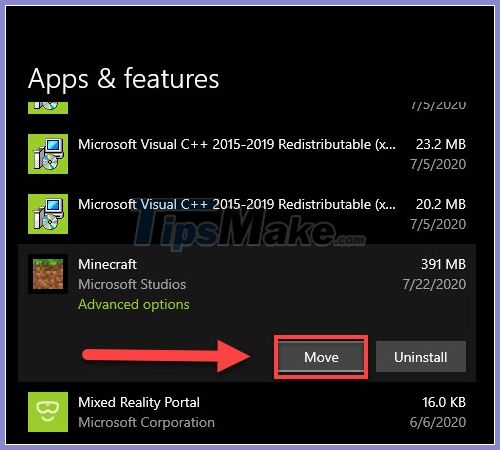
Step 3: Select the drive you want the application to be moved to. Then click Move .

If the Move button is not available for an app, it means the program is a native Windows 10 app and you can't move it.
Change installation directory
Moving the file locations of software you have installed on your computer cannot be done by copying and pasting. Each software usually has too many components and in many different places on the drive. Arbitrary movement may cause the software to stop working. Instead, you have an easy way to uninstall the software and reinstall it on another drive. But first change to the default directory used to install new programs.
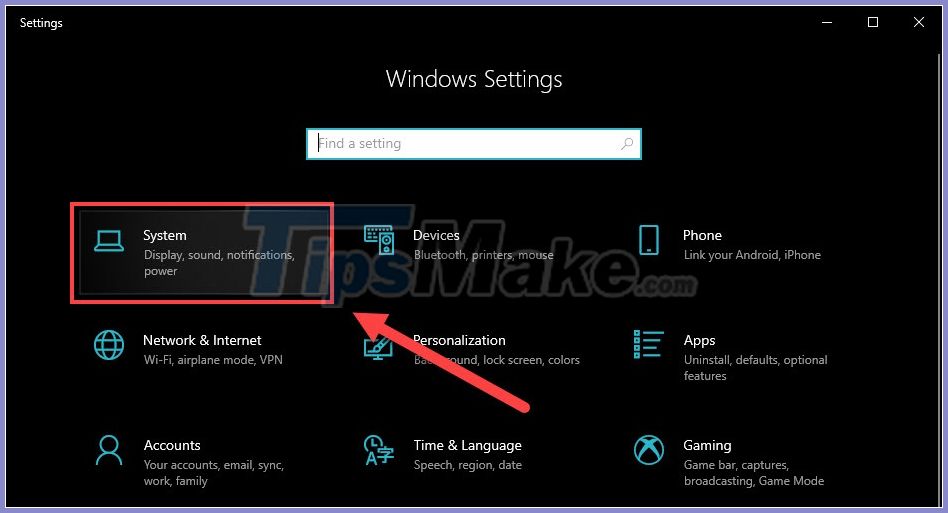
Step 1: Press Windows + I to open settings. This time you choose System .
Step 2: Select Storage in the menu column.

Step 3: Navigate to the Change where new content is saved line .

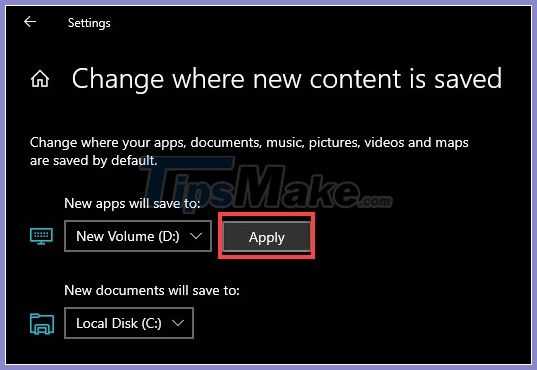
Step 4: In the section New apps will save to , choose the drive you want to install the software on instead of drive C.

Finally Apply is complete.
After you have changed the default installation drive, uninstall the software and reinstall it. The software will be automatically saved in the new drive.
Good luck!
FAQ
What should I know about Move Software to Another Drive Right on Windows 10?
Focus on the key features, requirements, limitations, and practical use cases explained in this guide.
How do I get the best results with Move Software to Another Drive Right on Windows 10?
Follow the recommended steps, use current software or information, confirm compatibility, and review settings before major changes.
Are there any risks or limitations?
Potential limitations depend on compatibility, data quality, cost, privacy, support, and how the product or method is used.
Related Articles
 How to Move Steam Games to Another Drive in 2 Ways8 minutes read
 Click: How to Move Windows to Another Drive6 minutes read
 How to Move an Installed Application from Drive C to Drive D or Another4 minutes read
 How to Move the Downloads Folder to a Different Drive on Windows 10/113 minutes read
 Move Desktop, Download and Documents to Another Drive on Windows5 minutes read
 How to Transfer Windows Supported Operating Systems to a New Hard Drive3 minutes read
Reader Comments 0
Sign in with email or Google to join the discussion.