Table of Contents
This updated guide examines How to Move Apps and Programs Installed in Windows 10 and organizes the essential facts, background, and practical takeaways in clear American English.
Windows has an integrated utility that allows moving modern applications to the location of your choice. Although this method does not work for traditional desktop programs, you can still move these programs to another drive.
Find out how to do it through the following article!
How to move apps and programs to another drive
The migration of most native Windows applications is very quick, but the process of moving anything else will require some additional steps. First, the article outlines the process for Microsoft Store applications, then takes a look at traditional desktop programs.
Modern application
PressWindowskey +Ito display the Settings menu and click Apps , then the Apps & features page in the left navigation panel.
Here, you will find a list of all applications and programs installed on the system. Some of these apps may come with the system, others are self-installed. This method will only work with programs you have installed yourself.
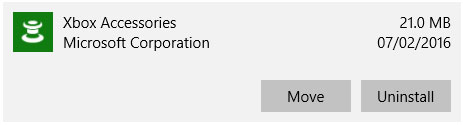
Go to the app you want to move, then select it from the list. Now, click Move. Select the new drive location from the drop-down list, then click Move again.
You can repeat the process if you want to move the application back to or to another drive.
If the Move button is dimmed, that means this is a Windows 10 application that cannot be moved. Instead, if you see the Modify button, it is a traditional desktop program and you will need to follow the method outlined below.
Desktop program
Microsoft discourages users from moving the file location of installed programs because it can cause problems, such as stopping the program from running. The safe (though less efficient) method is to uninstall the program and then simply reinstall it into the drive you want.
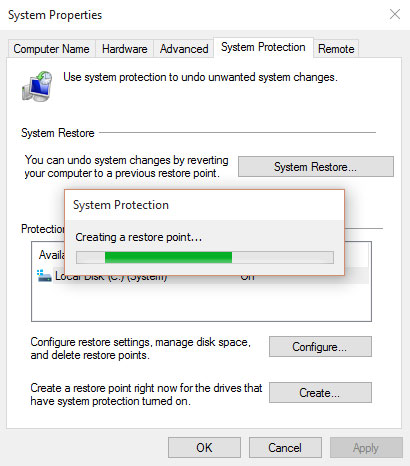
If you want to proceed, create a restore point to reverse the changes, if something goes wrong.
You should use a program called Steam Mover. This tool was originally designed to move Steam games between drives, but will actually work on any program. You can use it to transfer programs from hard drive to SSD for example.
- Download Steam Mover
Note that any drive you want to use with this program, whether it is where the program is being installed or the location you want to move to, needs to be in NTFS format. You can check this by loading File Explorer and then clicking This PC on the left. Now, right-click on a drive and select Properties. See the File system section to see if it uses NTFS.
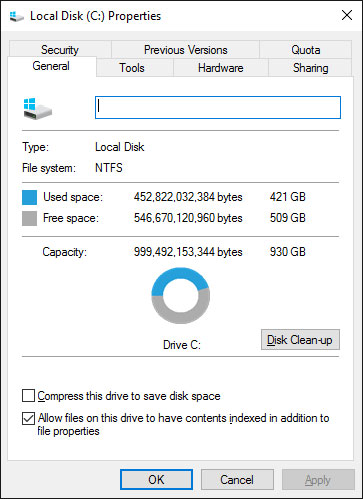
Open Steam Mover. First, select the . button next to Steam Apps Common Folder to select the directory path containing the program you want to move (e.g. Program Files ). Now, select the . button next to Alternative Folder and select the directory path you want to move the program to.
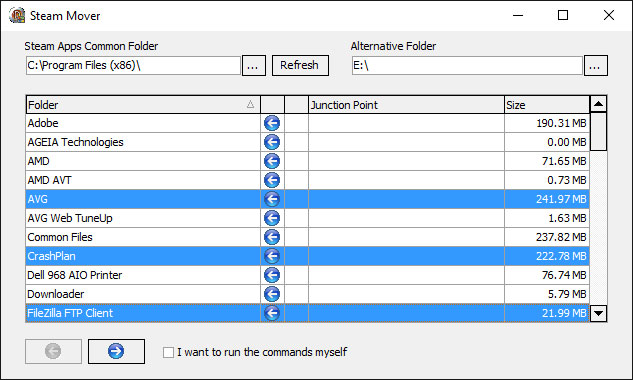
Next, select the program from the list you want to move. You can select multiple programs by holdingCTRLwhen clicking. When ready to move, click the blue right arrow at the bottom to get started. The Command Prompt will open and handle the migration. When you're done, you'll see the new folder path next to the program in the Junction Point column.
How to change the default installation location
If you only want to change the default installation location for applications, please refer to 1 of 2 articles: Change the default data storage folder in Windows 10 and Instructions to change the program installation folder (Windows 7 and 8) to know how.
Desktop programs are a bit more complicated, and you shouldn't do this.
Most programs will allow you to change the path when installing them, which may be a better solution than changing the system.
If you want to continue, you should use a program called Install Dir Changer . Download the Install Dir Changer and then run the program.
When the program opens, click Enable Editing , and then select Yes when the User Account Control window appears. You can now select a default installation path, use the button to browse to the directory path if needed.
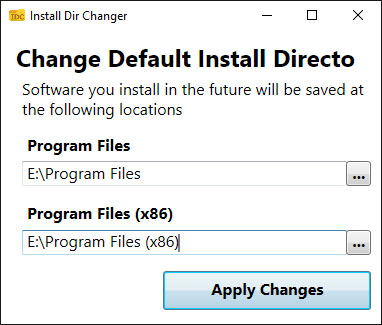
Program Files is where 64-bit applications will be installed and Program Files (x86) for 32-bit applications. If you're not sure what they mean, read TipsMake.com 's guide to the differences between 32 and 64-bit versions of Windows. But you may also want both versions on the same drive.
After selecting the new path, click Apply Changes . Now all new programs you install will default to this new directory path.
FAQ
What is How to Move Apps and Programs Installed in Windows 10 about?
It provides a structured overview of Windows 10, explains the main context, and highlights practical takeaways for readers.
Why does this topic matter?
Understanding the main concepts helps readers evaluate the issue, avoid common mistakes, and make better-informed decisions.
How should readers use this information?
Use the guidance as a practical starting point, confirm details that may have changed, and follow current product, safety, or security recommendations.
Related Articles
 Instructions to Remove the All Apps Option on Windows 10 Start5 minutes read
 How to Create a List of Installed Programs on Windows14 minutes read
 Steps to Remove Installed Apps from Store on Windows 105 minutes read
 How to Delete Apps on Windows3 minutes read
 7 Best AI Software Programs That Can Be Installed on Windows5 minutes read
 Apps: How to Uninstall Programs in Windows 106 minutes read
Reader Comments 0
Sign in with email or Google to join the discussion.