Make the most of the power of Microsoft Word with these 10 hidden features
If you use Microsoft Word regularly, you are probably familiar with mail merge features, drawing tools, or font formatting options. But there are some features in Word that you've forgotten or don't know about its existence. This article brings some forgotten or hidden features, helping you harness the maximum power of Microsoft Word.
- Guide font formatting, change stretch and create artistic text in Word
1. Save time with Reseacher
Are you planning to write an essay, a case study or a study, but in Word there is a great tool called Researcher, which saves you time and effort. To access this tool, click on the References tab and then select Researcher in the Research section. When the sidebar opens, enter the keyword or phrase into the search box. Word will use Bing to scan web pages for search results in the sidebar.
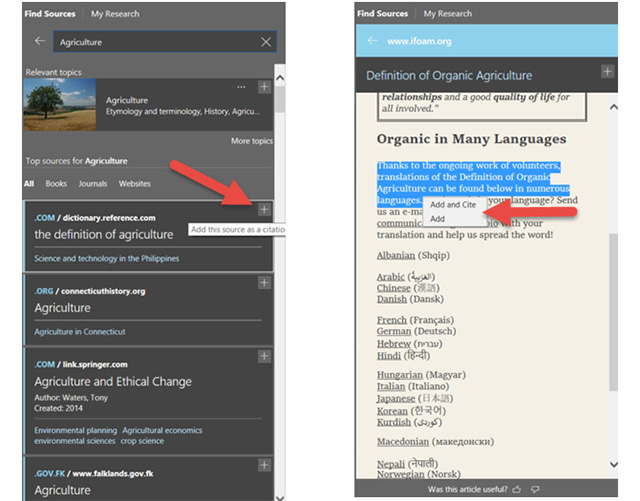
To check an option, just click it and read in the sidebar. You can click on the plus sign in the top corner to start creating the document. Then, select the text from the article and add or quote it to the document.
If there is a reference index in the document, you can update it to add new sources by selecting the source in the document and clicking on the Update Citations and Bibliography drop-down box. You can also create reference indexes in the References tab by clicking Bibliography and then selecting Insert Bibliography .

The Microsoft Word Researcher feature is available in Word 2016 for Office 365 subscribers.
2. Use the Accessibility Checker tool
The Accessibility Checker tool in Word is very handy, it will scan documents and find errors and fix errors. It will check the title, repeated blank characters and subtitles for the video. To perform a document review, go to the Review tab and click Check Accessibility from the ribbon.
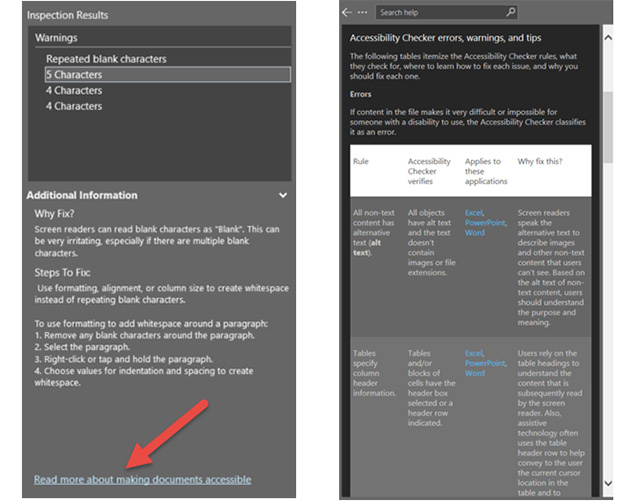
The sidebar will appear when errors, warnings and tips are detected. You can click on an item to see its location in the document and use the information on the sidebar to edit.
Word 2016 full guide (Part 23): How to check spelling and grammar
3. Add online videos to Word
When creating tutorials, training, you can insert an online video so readers can easily visualize on Word. Word has the ability to add online videos directly in the document.
To insert a video, click on the Insert tab and in Media click on Online Video . Then you have three options to insert a video: search on Bing, on YouTube or paste the embed code.
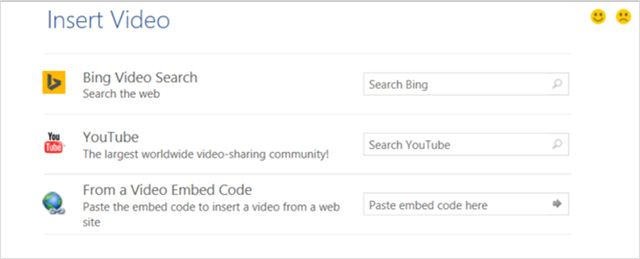
When searching for online video, click on the video you want to insert then select Insert . If you choose the option to paste the embed code in the box, the video clip will appear immediately. You can move, resize or rotate videos.
- How to insert online and offline videos into Word
4. Compare or combine documents
Have you ever had to compare two different versions of documents or need to combine revisions of documents received from others? To do this, Word provides a feature called Compare and Combine. This feature makes it easy for readers to compare or combine two documents.
To access this feature, go to the Review tab and click Compare from the ribbon. Then, select Compare to review the two document versions or Combine to merge the modifications into a document. Both options will give you a pop-up window to browse documents.
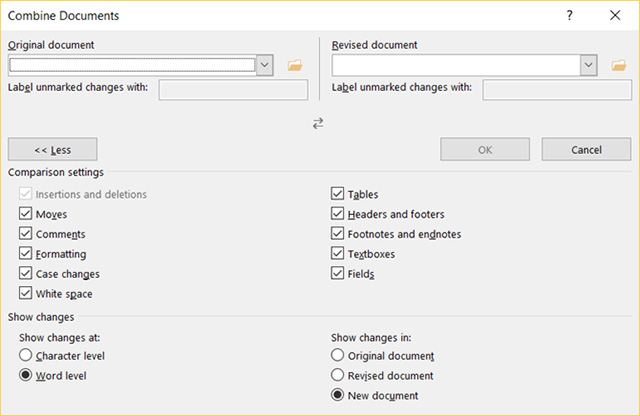
Once you have selected the document, you can use the label for changes. Alternatively, you can click More to adjust the comparison settings and display the change options. This convenient Word feature is ideal for collaborative documents with many authors.
- Use document comparison feature in Word 2010
5. Insert chart using Smart Art tool
Microsoft Excel is a great application if you want to use charts and diagrams, but Word is just as good as Excel when it provides users with Smart Art tools.
- 8 types of Excel charts and when you should use them
Place the cursor in the blank position in the document, go to Insert> Illustrations tab > Smart Art . A window pops up for users to select the chart type. Word provides a variety of charts such as pyramid diagrams, relational charts, hierarchical charts, etc.
You can click through the chart types to see a short description, so you can choose the right chart to use. Then click the OK button and the chart will be inserted into the document.
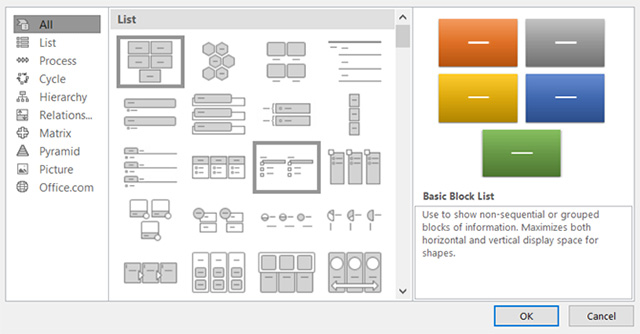
To insert text into a chart just double click on the text area. Also you can format the chart by adjusting the size, rotation and with some charts you can sort the elements.
6. Read feature Aloud - read text in Word
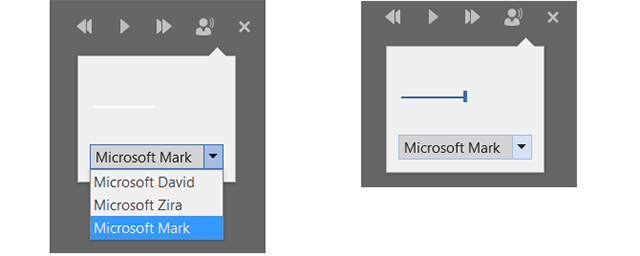
Word's Read Aloud feature is useful in cases of finding errors or listening from another point of view. To enable this feature, place the cursor at the top of the document, access the Review tab and click Read Aloud . Word will then read the document to you (make sure the headset is activated). A small controller will appear to adjust settings such as voice and speed. You can also pause, move forward or back.
7. Check Learning Tools
Microsoft has added Learning Tools with the aim of developing and improving users' reading skills. "Learning Tools is designed to help you improve your reading skills by increasing your ability to pronounce words correctly, quickly and accurately read, and understand what you read."
Click on the View tab and then click Learning Tools from the ribbon. You will see that the Read Aloud feature is also available. There are also some additional tools.
- Column Width changes the width of the line to help users focus.
- Page Color provides normal, inverted or brown colors with a more readable page.
- Text Spacing increases the distance between line and text for simple scanning.
- Syllables mark between each syllable of the pronunciation word.
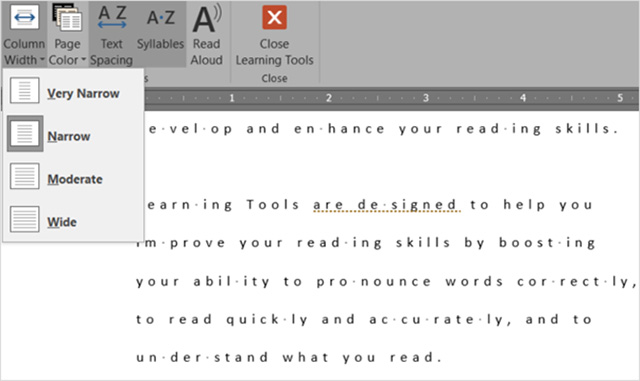
Each of these tools has its own features, so you can try each one and choose the most useful tool and combine it with Read Aloud.
8. Personalize Word with advanced options
Many users use Word with default settings and loyal to it. However with a few simple adjustments, you can save time, create fewer errors and get a personal experience.
To access these settings, click File and Options . In the pop-up window, select Advanced . Note, when changing these settings if not working, you can undo it. Here are some settings you can change in Advanced settings.
- Editing options to track formatting, mark inconsistencies and display AutoComplete suggestions.
- Cut, copy, and paste options to paste in original format, keep bullet and number formats when pasting text, display Paste Options button.
- Show document content options to display image placeholders, bookmarks, borders around text.
- Display options show recent documents, optimize character positions for easy reading and updating content while dragging.
- Print options to print reverse pages, print XML tags and duplex printing.
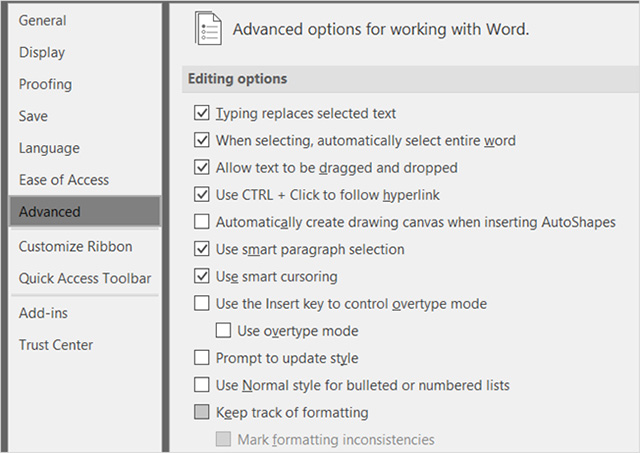
You can also review image size and quality settings, charts, save documents and layout options. Some settings allow you to select a specific document to apply those changes or can do it for all new documents. After making changes, click the OK button at the end.
9. Change options on Ribbon and Toolbar
Ribbon and quick access toolbar are two of the most important parts, users spend the most time on these two parts. With so many features and options in the app, some tools you don't need, so for your convenience you can customize just leave the necessary settings and remove those that aren't used. .
To personalize the ribbon tool and the quick access toolbar, click File then select Options . In the tools, select the tool you want to use to get started.
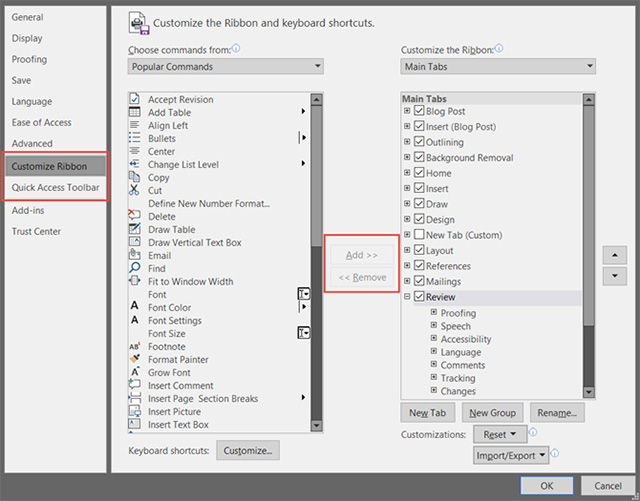
Select items from the left to insert and click Add or select items from the right to remove and click Remove , then click OK to save changes.
10. Customize the status bar
Another point that many people don't realize is that they can customize the status bar. This is the bar at the bottom of the small but very useful Word window.
When opening Word , right-click on the bottom bar. A menu will appear with the title Customize Status Bar . You will see a lot of options in the list, some of them have been counted as page numbers, word count, zoom feature, shortcuts and some are left blank. Uncheck the options you don't want to use or check what you want to display.
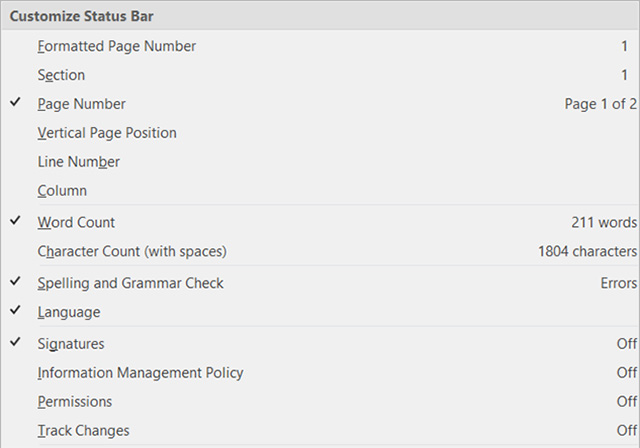
To enable or disable any of these options just select it. You will see the change applied immediately.
See more:
- 10 features in Word 2013 make working faster and easier
- Useful Word tips you should not miss
- Application software can replace Microsoft Office
You should read it
- ★ 15 hidden features of Galaxy S10 users should know for a better experience
- ★ New Accessibility features on iPhone
- ★ Search and activate hidden features in Windows 10 with Mach2 tool
- ★ 17 of Google's extremely useful 'treasures' may not be known to you
- ★ How to improve the Microsoft Word grammar checking tool