Macromedia Flash - Create vertical Flash menu
You have seen many beautiful Flash menus and want to do that? Take a look at this exercise and you'll know how to create a vertical flash menu.
You have seen many beautiful Flash menus and want to do that? Take a look at this exercise and you'll know how to create a vertical flash menu.
Step 1
Create a new flash file, go to Modify > Document ( Ctrl + J ) and set the settings as shown below

Step 2
Double click on layer1 and rename it to background. Add a new layer and name it menu. Then use the Rectangle Tool (R) to draw 5 88.5 x 250px sized rectangles with the following settings:
-
Stroke color : not selected
-
Fill color : # A1958A
See the picture below

Step 3
Select the Text Tool (T) with Fill Color #FFFFFF and enter the first button of the menu with the word 'Home'
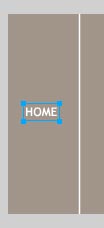
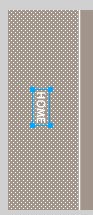
Step 4
Select Modify > Transform > Rotate 90 o CW ( Ctrl + Shift + 9 )

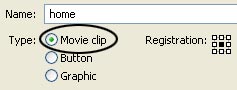
Step 5
Select the first button in the menu (Home), press F8 key ( Convert to Symbol ) and convert it into a Movie Clip .
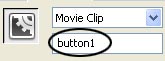
Step 6
Select the converted Movie Clip, open the Properties Panel (Ctrl + F3) and enter button1 in the box
Step 7
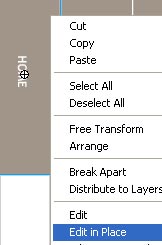
Double-click the newly created Movie Clip (Button) or right-click and choose Edit in Place .
Step 8
Select text Home, press Ctrl + X (Cut), add a new layer (layer 2) and paste the text just cut into the newly created layer (press Ctrl + Shift + V ) to paste.
Step 9
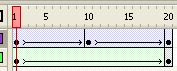
Go back to layer 1, click on frame 20 and press F6 key. Then in the Fill Color box set the color to # E16802. Go back on frame 1, go to the Properties Panel (Ctrl + F3) at Tween choose Shape .

Step 10
Lock layer1, select layer2, go to frame 10 and press F6 key. Select Modify > Transform > Rotate 90 o CCW ( Ctrl + Shift + 7 )
Step 11
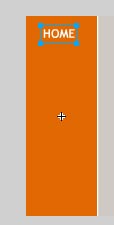
Select frame 20 and press F6 key. Then use the mouse to drag the Home text to the top of the button (rectangle) as shown below
Step 12
Select layer1, go to the Properties Panel , at Tween choose Motion .
Step 13
Select frame 20 of layer1, open the Action Script Panel ( F9 ) and enter the following script:
stop ();
Step 14
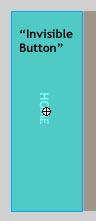
Go back to the main scene (Scene 1), add a new layer and name it Invisible Button 1. Then create the ' Invisible Button ' on the first button (see image below).
Step 15
Select ' Invisible Button ', open the Action Script Panel ( F9 ) and enter the following code (note to change the link to the address you want Home link to).
on ( rollOver ) {
_root .mouse_over_button1 = true ;
}
on ( rollOut ) {
_root .mouse_over_button1 = fstartlse;
}
on ( release ) {
getURL ( "https://quantrimang.com/" , "blank" );
}
Step 16
Add a new layer and name it Action Script. Go to the first frame and enter the following script:
_root .button1.onEnterFrame = function () {
if (mouse_over_button1) {
_root .button1. nextFrame ();
} else {
_root .button1. prevFrame ();
}
};
So we've finished the first button of the menu. Follow the same steps as above to complete the remaining buttons in the menu.
The Script for the ' Invisible Button ' of other buttons
on ( rollOver ) {
_root .mouse_over_button2 = true ;
}
on ( rollOut ) {
_root .mouse_over_button2 = fstartlse;
}on ( release ) {
getURL ( "https://quantrimang.com/" , "blank" );
}
And Action Script for buttons is
_root .button1.onEnterFrame = function () {
if (mouse_over_button1) {
_root .button1. nextFrame ();
} else {
_root .button1. prevFrame ();
}
};
_root .button2. onEnterFrame = function () {
if (mouse_over_button2) {
_root .button2. nextFrame ();
} else {
_root .button2. prevFrame ();
}
};
_root .button3. onEnterFrame = function () {
if (mouse_over_button3) {
_root .button3. nextFrame ();
} else {
_root .button3. prevFrame ();
}
};
_root .button4. onEnterFrame = function () {
if (mouse_over_button4) {
_root .button4. nextFrame ();
} else {
_root .button4. prevFrame ();
}
};
_root .button5. onEnterFrame = function () {
if (mouse_over_button5) {
_root .button5. nextFrame ();
} else {
_root .button5. prevFrame ();
}
};
Download source file (.fla)
Was this article helpful?
Your feedback helps us improve.
Related Articles
 Macromedia Flash - Create flash menu with sound8 minutes read
 Macromedia Flash - Create menu effects6 minutes read
 Macromedia Flash - Create flash menu yourself6 minutes read
 Macromedia Flash - Create a simple menu5 minutes read
 Macromedia Flash - Self-designed animated menu5 minutes read
Reader Comments 0
Sign in with email or Google to join the discussion.