Macromedia Flash - Move objects
With this exercise, you will learn how to move any object with the cursor in Flash 8 using the Action Script.
Step 1
Create a new Flash file, go to Modify > Document ( Ctrl + J ) and set Width to 350px and Height to 250px
Step 2
Double click on layer 1 and rename it to Background. Then insert a new layer named Object.
Step 3
Select the Rectangle Tool (R), and draw a rectangle to represent 'Object'

Step 4
When the Object is selected, press F8 key ( Convert to Symbol ) to convert it into a Movie Clip .

Step 5
Double-click the newly created Movie Clip object or right-click and choose Edit in Place .
Step 6
Then press F8 and convert it to the Button icon

Step 7
Select the Object object, open the Action Script (F9) and enter the following script:
on (press) {
swapDepths (2);
_root.cursor.swapDepths (3);
startDrag ("");
}
on (release) {
stopDrag ();
}
Step 8
Go back to the main scene (Scene 1), click on the first frame of the layer Object and open the Action Script (F9), enter the following line:
help = false;
Step 9
Duplicate the Object layer into several copies as you like.
Step 10
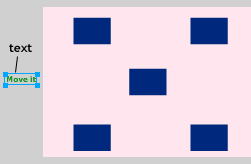
Add a new layer and name it Cursor. Then select the Text Tool (T), and type in the words 'Move it' (or any other content).


Step 11
Select the text (Cursor) layer and press F8 to convert it into a Movie Clip.

Step 12
Then, open Properties and enter the cursor text.

Step 13
Next, select the cursor layer again, open the Action Script (F9) and click on the following script:
onClipEvent (load) {
}
onClipEvent (mouseMove) {
xm = getProperty (_root, _xmouse);
ym = getProperty (_root, _ymouse);
setProperty ("_ root.cursor", _x, xm);
setProperty ("_ root.cursor", _y, ym);
}
onClipEvent (mouseDown) {
with (_root.cursor) {
gotoAndStop ("clench");
}
}
onClipEvent (mouseUp) {
with (_root.cursor) {
gotoAndStop ("open");
}
}
So that's it, would you like to see the product available?