Photoshop CS: Creativity with New Year's cards (Last part)
After 4 pieces of Tet card design. Do you find design and good use of photoshop tools is not difficult, important is patience, and creativity when designing any product right?
After 4 pieces of Tet card design. Do you find design and good use of photoshop tools is not difficult, important is patience, and creativity when designing any product right?
Practicing forever and still not designing a postcard. Too many steps! Don't be impatient, you will be very bored and frustrated. Today's practical lesson, I will guide you to the final steps to perfect the new year card.
Please start the document "Thiep_01" file, we continue to start.
Part V. Design of wine glasses
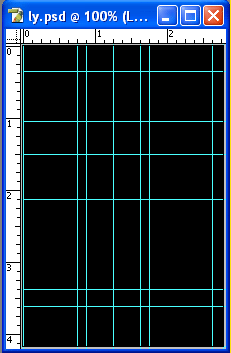
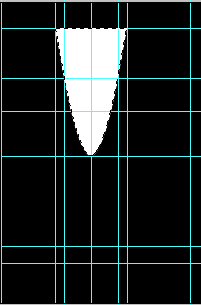
1. Open a new document: size: 200px x 300px, Background: # 000000, Name: cup
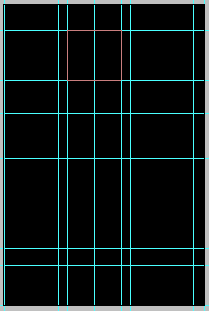
2. Road rulers (Rulers)
3. File management - Name Set: "Tap hop"
4. Add new layer: Ten "Ruou"
5. Follow the steps
-
Rectangle tool drawing picture
-
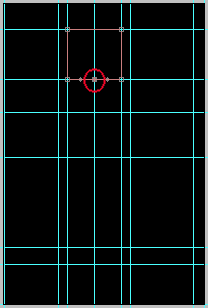
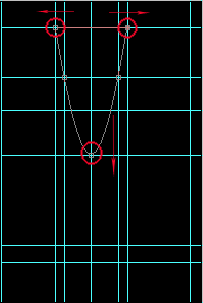
The Add Anchor Point Tool marks a few points, and drags the shape to shape the part on the glass
-
Ctrl + Enter creates a border
-
Fill the "Ruou" layer: White (#FFFFFF)
6. Continue
-
Copy the "Ruou" layer with ( Ctrl + J ), name the new layer "Coal ly"
-
On the Layers layer, turn on - turn off the "eye" icon to hide - show layer => In this example. You turn off the eye icon on the "Than ly" layer, temporarily hide the layer "Coal ly"
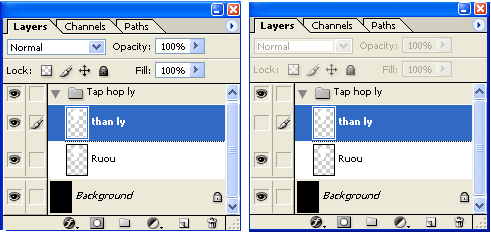
7 Click the "Ruou" layer on the layer palette: Follow the steps below to guide the following images.
- Photo cut:
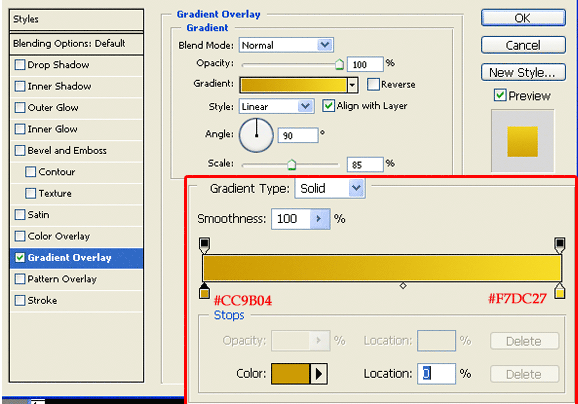
- Set the Gradient Overlay attribute for the "Ruou" layer
- Result

- Add a new layer called "mieng ruou"
- Select the Eliptical Marquee tool and draw an ellipse above the "ruou layer", and fill it with a yellow "# FAE543" color.

8. Turn on the "eyes" icon of the "coal" layer, and select the "coke" layer in the layer palette.
Edit some properties for this layer as follows:
- Reducing Fill: 50%
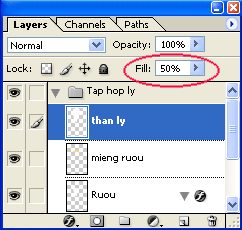
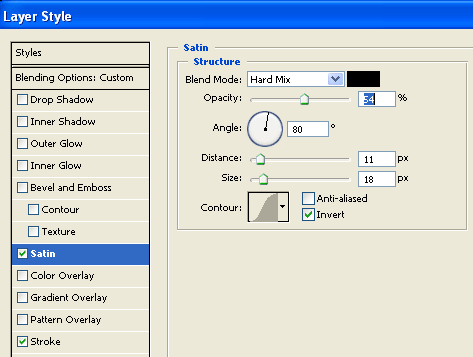
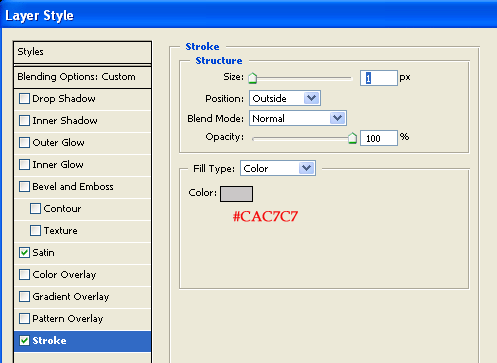
- Set the style for layer "coal ly"
-
Satin
-
Stroke
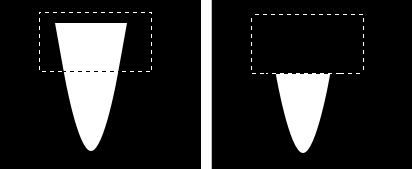
9. Add new layer: Name "Mieng ly"
- Draw an elliptical mouth
- Take advantage of this ellipse and delete the upper part of the layer "Coal ly"
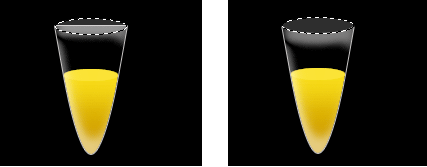
- Fill the white layer with the white color, then reduce the Fill: to 15%, and set the Stroke: 1px, # 878585
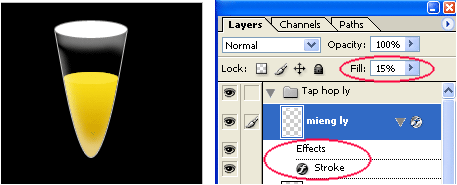
- Result
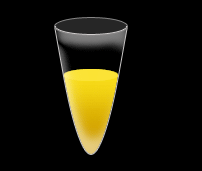
10. The rest of the design, such as "handle body" and "wine cup", you can also use some of the tools you have attached to design these parts. You notice every part of the design, create a layer for them.
Here are the steps I did.
- Body handle
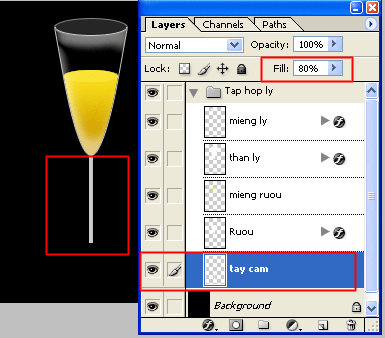
- Glass substrates

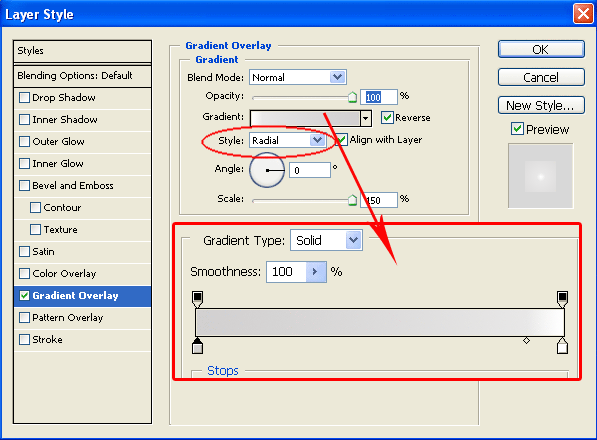
Set Gradient overlay
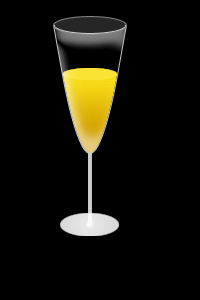
So the design of the glass is finished.
Result.
Part VI, Complete postcards
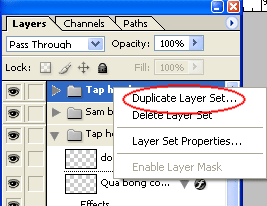
So you designed to complete all the small parts on card_01. Again, "drag" set "tap hop cups" on this "Ly" document to "Thiep_01"
- Right click set "Tap hop cup"> Duplicate layer set => Duplicate set to create a new glass.
- Minimize the size of cups, and place them in an appropriate position on the postcard.
Here is an example

- Look at the champagne boys not "natural", try putting a bow on a champagne boy. Use the "Custom shape tool" tool and select "chiec no" icon on the option bar.
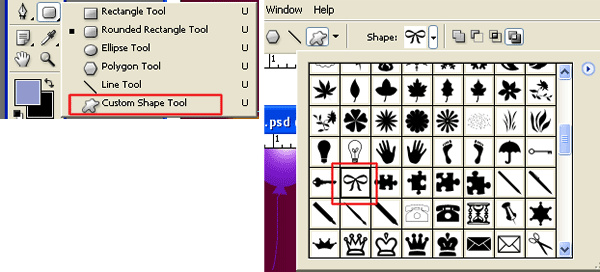
Add 2 new layers, draw 2 bows with 2 different colors. Not very good! But surely you will be more creative when drawing the bows on your postcard.

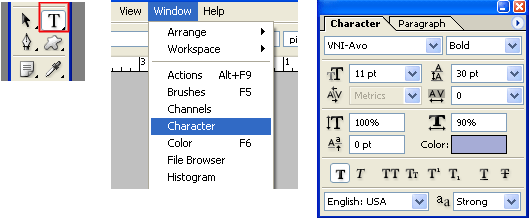
- Finally, send a message to send your love and sincere words to your loved one through cards. The Text tool will help you do that. Remember, it is not too strange to write text, because if you are more sophisticated with the effects of font text, it will make the card more "confused" by too many details.
-
Activate Hirizontal type tool (press T)
-
Open the Palette character table (edit text properties): Windows > character .
-
Type the text of the message, and adjust the color, font, size for text on the palett character.
- You can try the Style effects of text in Blending option just as you do with Layer
New year cards are finally completed. You can stop at this step, If you have practiced the song "Birthday card for your loved one" please spend another 2 minutes to create a few more snowflakes on the photo background.
This is my card.

So you can completely design yourself a new year postcard. It is not easy, but not too difficult, is it? I believe and wish you good practice.
Was this article helpful?
Your feedback helps us improve.
Related Articles
 Instructions for using Photoshop CS6 (Part 5): Create christmas cards with snowflakes on a red background6 minutes read
 Instructions for using Photoshop CS6 (Part 7): Creating Christmas cards with Christmas balls on a Stylish background15 minutes read
 Photoshop CS: Creativity with new year cards10 minutes read
 Making Spring cards with Photoshop (Part 2)2 minutes read
 How to use Photoshop CS5 - Part 2: Panels8 minutes read
 Create Christmas cards in Photoshop6 minutes read
Reader Comments 0
Sign in with email or Google to join the discussion.