Load balancing in Exchange 2007 - Part 2: Configure Windows NLB Clusters
 Load balancing in Exchange 2007 - Part 1
Henrik Walther
In this section, I will continue the discussion by showing you how to balance the Exchange 2007 Client Access servers with NLB load balancing technology.
Now you need a lab environment with the servers mentioned in the previous section.
Create FQDN for NLB Cluster in DNS
With the newly set environment, the first thing you do is create a log for the NLB group in DNS. To do this, log on to the domain controller in the Active Directory forest, then open the DNS manager by clicking Start > Run and typing dnsmgmt.msc .
Open the Forward Lookup Zones section and right-click the search area for your Active Directory. In the context menu, select New Host (A) , then type the name you want to use. As you can see in Figure 2.1, we have used MAIL for the purpose of this installation. Then type the IP address you want to use as the IP address of the Windows NLB group (this IP address will be the IP address on the same subnets as the NLB member servers).

Figure 2.1: Create a DNS Record for the Windows NLB Cluster in DNS Manager
Click Add Host (Figure 2.2) then click OK and Done . Close DNS Manager.

Figure 2.2: Enter DNS name and IP address
Important :
In order for the Internet clients to connect to the specified Internet name, you must create a record on the DNS servers that configure your domain. This task is performed on DNS servers located in your ISP.
Configure network settings
Although not necessary (as explained previously), we will use unicast mode with the two network adapters installed in this installation (that will give us the best performance possible). ). To configure the second network adapter in each Client Access server of Exchange 2007, open Network Connections and give a name to each LAN connection, as shown in Figure 2.3.
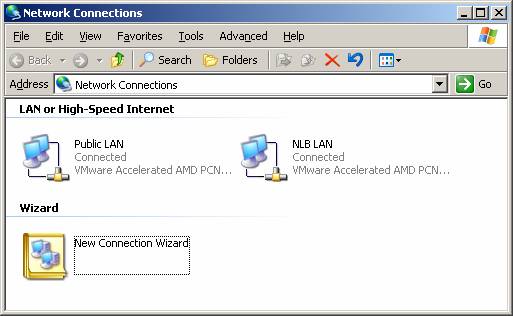
Figure 2.3: Name the network connections
Open the properties page of the LAN adapter, and then configure the TCP / IP settings but shown in Figure 2.4. As you can see in the figure, you only have to specify the IP address and Subnet mask. Then click OK.
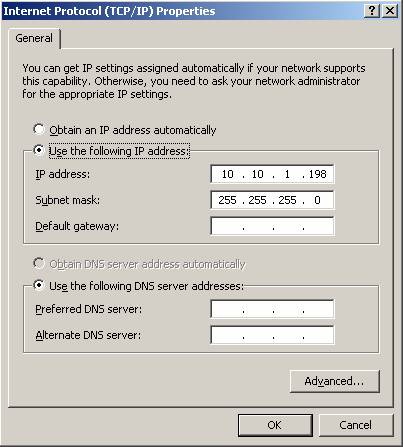
Figure 2.4: Configuring TCP / IP settings for LAN
We have to change the link order for network connections. The change is done by clicking Advanced > Advanced Settings in the Network Connections window in Figure 2.3. Under the Adapters and Bindings tab, make sure the Public LAN connection is listed first as shown in Figure 2.5, and then click OK.
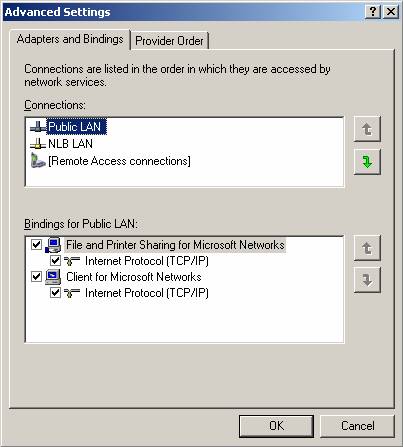
Figure 2.5: Change the link order for network connections
Enable NLB on the first Client Access server
Now it's time to activate NLB on the first Client Access server in our installation. Activation can be done via the properties page of the network adapter, or by using Network Load Balancing Manager. We will activate through the properties page of the network adapter, then add the second Client Access server to the NLB cluster in the next section. Open the NLB LAN adapter properties sheet, then check the Network Load Balancing checkbox as shown in Figure 2.6. When Network Load Balancing is selected, click the Properties button .
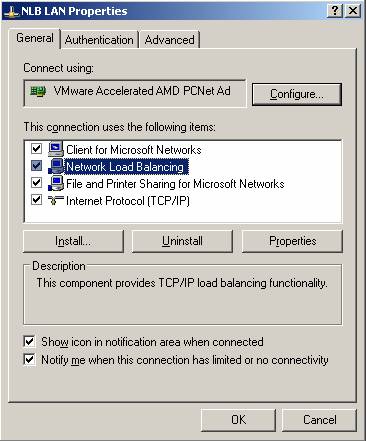
Figure 2.6: Enable Network Load Balancing
In the Cluster Parameters tab (Figure 2.7), enter the IP address , subnet mask and full Internet name for the NLB cluster. Next, make sure the Unicast option in the Cluster operation mode is selected.
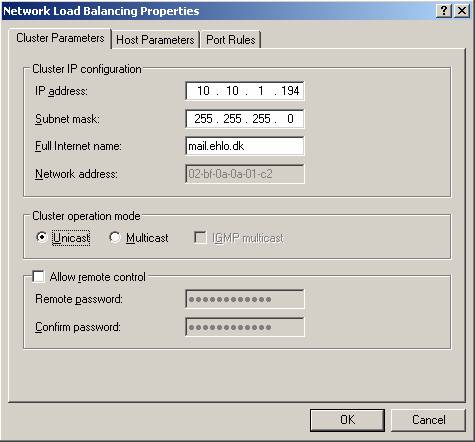
Figure 2.7: Configuring Cluster parameters
Now, click the Host Parameters tab and enter the IP address and subnet mask configured for the network adapter (Figure 2.8). Leave the other settings as default.
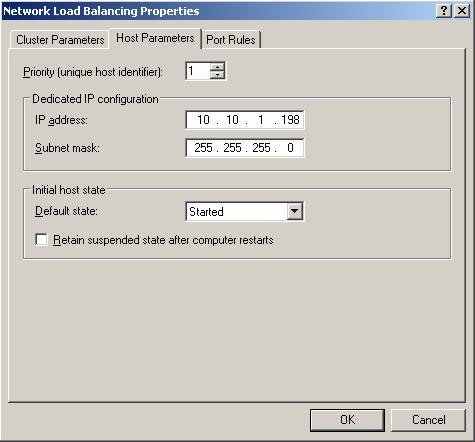
Figure 2.8: Configuration for Host Parameters
Click the Port Rules tab and then select the default port and click Remove .
We need to add port rules for each port where the NLB cluster must accept client requests. To do so, click the button, then enter the corresponding port in Port range (Figure 2.9). Make sure the Affinity option is set to Single . Finally, click OK to add the port rule.
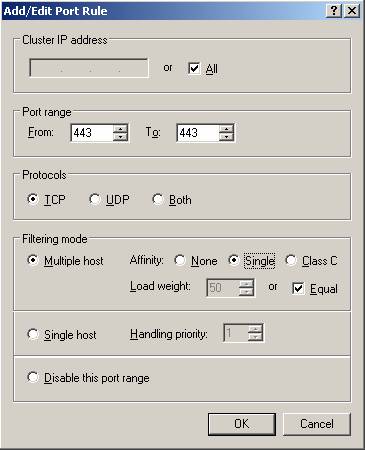
Figure 2.9: Configuring Port Rules
Perform this configuration for each required port, so you will have a list of rules as shown in Figure 2.10 depending on which client access services you want to allow in your organization.
Note:
If you support other Internet client types such as POP3 and IMAP4, add ports 110 and 143, respectively.
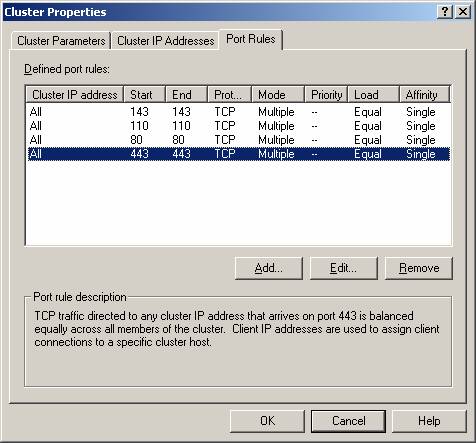
Figure 2.10: List the configured Port Rules
Click OK and OK for the message you received (Figure 2.11).
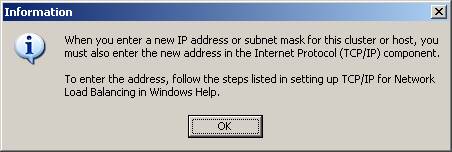
Figure 2.11: Information dialog box
Now add an IP address of the new virtual cluster in the properties page of the network adapter, as shown in Figure 2.12.
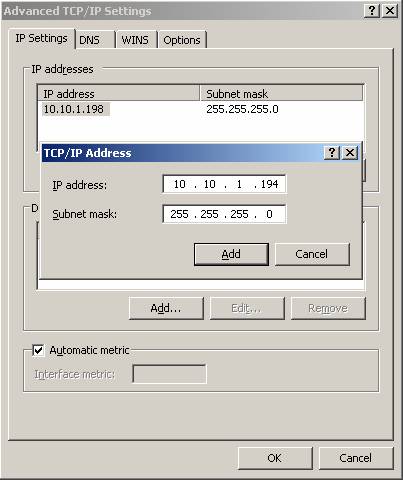
Figure 2.12: Add the IP address of NLB Cluster in the TCP / IP Settings page
Finally, click Add and OK
We have now set up a Windows NLB cluster with a member server.
Add a secondary Client Access server to the NLB Cluster
Is it good if a NLB cluster has only one member server? Maybe, but not always good. So let's add a second server to the cluster. To do this, open Network Load Balancing Manager by clicking Start > Run and NLBMGR.EXE (or click Administrative Tools > Network Load Balancing Manager ). This will open the Network Load Balancing Manager as shown in Figure 2.13.
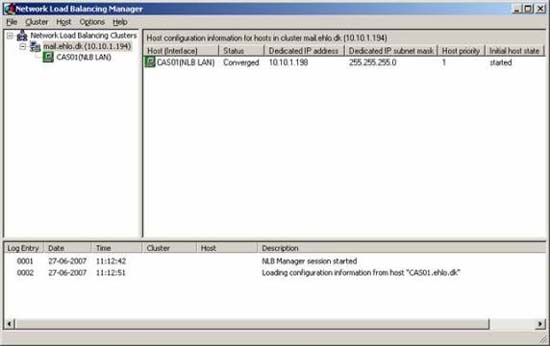
Figure 2.13: Network Load Balancing Manager
To add a secondary server to the NLB cluster, click Cluster in the menu, then Add Host . In the window that appears, type the name of the secondary Client Access server and then click Connect (Figure 2.14). Select the corresponding cluster and click Finish .
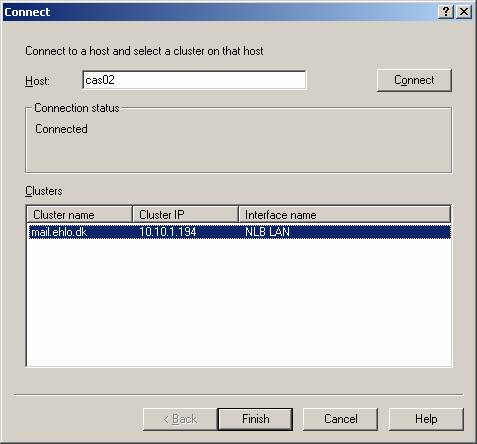
Figure 2.14: Add a secondary Client Access server to the NLB Cluster
Next, type the IP address and subnet mask of the network adapter that will be linked to the NLB cluster after clicking Finish (Figure 2.15).
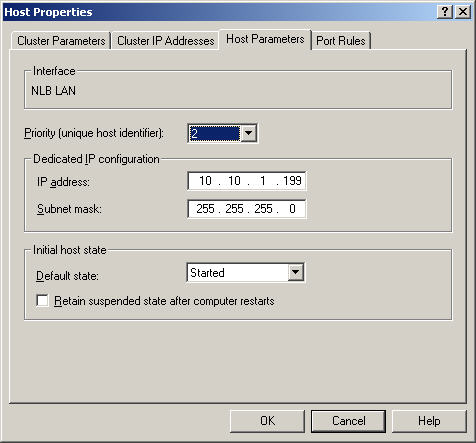
Figure 2.15: Configure Host parameter settings for secondary Client Access server
Please wait a bit for the server to be added and configured properly (Figure 2.16).
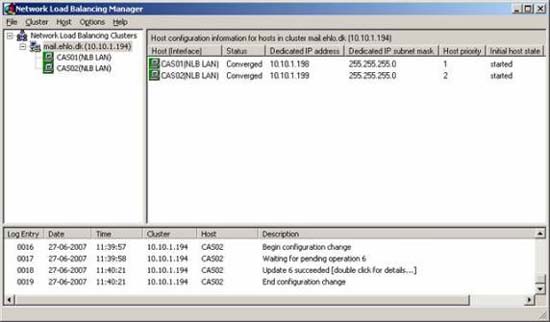
Figure 2.16: The secondary Client Access server has been added to the NLB Cluster
Close Network Load Balancing Manager .
Now we have balanced the load for two Client Access servers in the lab field. However, there are some configuration steps that still need to be done here and we will introduce those remaining configurations in the third part of this article.
You should read it
- ★ Exchange Server 2007's spam filtering feature does not need the Exchange Server 2007 Edge Server
- ★ Transfer MDaemon to Exchange 2007/2003 (P.3)
- ★ Check mail in Exchange 2007 (Part 2)
- ★ Transfer from Linux Mail Server to Exchange Server 2007 (Part 1)
- ★ Managing log files of Exchange Server 2007 - Part 1